41
SHIFT LEVER
10
If the shift lever switch input does not function correctly on the INPUT TEST screen, the switch may need to be replaced. Also, grease should be ap-
plied to the sliding parts of the mechanism once every three months. To carry out this maintenance, you must fi rst remove the shift lever unit.
For this task, you will need a tamperproof wrench (for M5 screws), a socket driver (for M4, M5 screws), and a Phillips-head screwdriver (for M4
screws).
1
Switch off the unit.
2
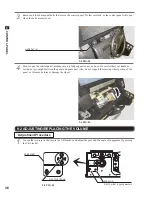
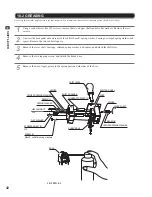
Use the tamperproof wrench to remove the four screws, and then lift up the shift lever.
10-1 FIG. 01
SHIFT LEVER
10
●
When working with the product, be sure to turn the power off. Working with the power on may cause an electric
shock or short circuit.
●
Be careful not to damage the wires. Damaged wires may cause an electric shock, short circuit or present a risk of
fi
re.
10-1 REMOVING THE SHIFT LEVER
3
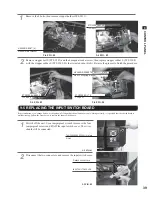
Detach the connector and remove the shift lever.
10-1 FIG. 02
4
To reattach the unit, reverse the steps described above. The unit must be installed in the correct direction. Be
sure to check the UP/DOWN indicator and align the unit correctly (see 10-1 FIG. 01).
After reattaching the unit, use the INPUT TEST screen in Game Test Mode to check that it is operating normally
(see Service Manual).
Detach the connector.
TAMPERPROOF SCREW (4)
Torx (TT-15) 10-32 x 3/4"
Содержание Initial D4
Страница 1: ......


