TB MRD1-G 11.01 E
5
3
Design
This chapter informs briefly about operation elements
and indication elements of the
MRD1.
Name and po-
sition of the individual modules are also described. In
chapter 5 operating of the relay and type specific
functions are explained in more detail.
!
Note
Note
Note
Note
Front view and rear view illustrations of the
MRD1
as
well as connection diagrams can be found at the end
of the manual.
3.1.1
Relay front
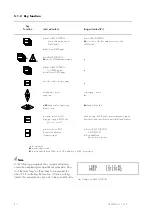
Display in Home Position
3.1.2
Display
The
MRD1
is provided with a 16-digit, double-line
liquid crystal display (LCD), which is of alphanumerical
design for an easy dialog. The figure above shows the
basic status of the display. Dependent on the mode se-
lected, the following data can be shown on the dis-
play:
•
Date / Time / Relay type (Home Position)
•
Measured operational data
•
Measured fault data
•
System parameters and protection parameters
•
System signals and fault signals
3.1.3
LEDs
Additionally to the display there are max. 30 LEDs at
the front, indicating each of the operational status in
the
MRD1
. All LEDs are two-coloured (red/green) and
arranged in two groups:
a) System and relay status indications
The 15 system indications are arranged underneath
the alphanumerical display. They are allocated to a
certain function and show:
•
Operational voltage available
•
Trip
•
OFFLINE TEST mode active
•
Edit mode active
•
Displayed parameter is modified but has not been
stored yet
•
Switch status of the 5 (optionally 10) output relays
•
Display of the relay function (self-test)
b) Status display of the 15 digital inputs (if provided)
These 15 indications are shown at the left of the dis-
play informing about the status of the digital inputs.
3.1.4
Push-buttons
All necessary
MRD1
adjustments and inquiries can be
carried out from the front of the relay by pressing the
respective push-button (9 in total). Individual function of
these push-buttons is explained in chapter
Operating
.
3.1.5
Parameter interface RS232
At the left of the relay front there is a 9-pole, D-SUB
plug-and-socket connector for temporary lap-top con-
nection. At this connection a serial interface RS-232 is
provided. A standard IBM
TM
compatible PC or port-
able notebook can be connected to this PC interface.
To connected
MRD1
and PC a 1:1 modem-cable with
9-pole plug-and-socket is used. By using SEG software
HTLSOFT 3, which is Windows
TM
compatible,
MRD1
parameters can comfortably be set. Additionally all
measured operational and fault data can be read out
of the relay integrated non-volatile memories and the
optional fault recorder.
3.1.6
Disturbance recorder (optionally)
The right rack place at the relay front is reserved for
the disturbance recorder and consists of a duct for the
storage medium which is a PC memory card accord-
ing to the PC card standard (PCMCIA) in this case.


