6
The first set of options displayed will be the Video options. Time & Date settings are located on
the System Settings screen (wrench icon) so you will need to press the menu button one more
time to tab over to the next screen.
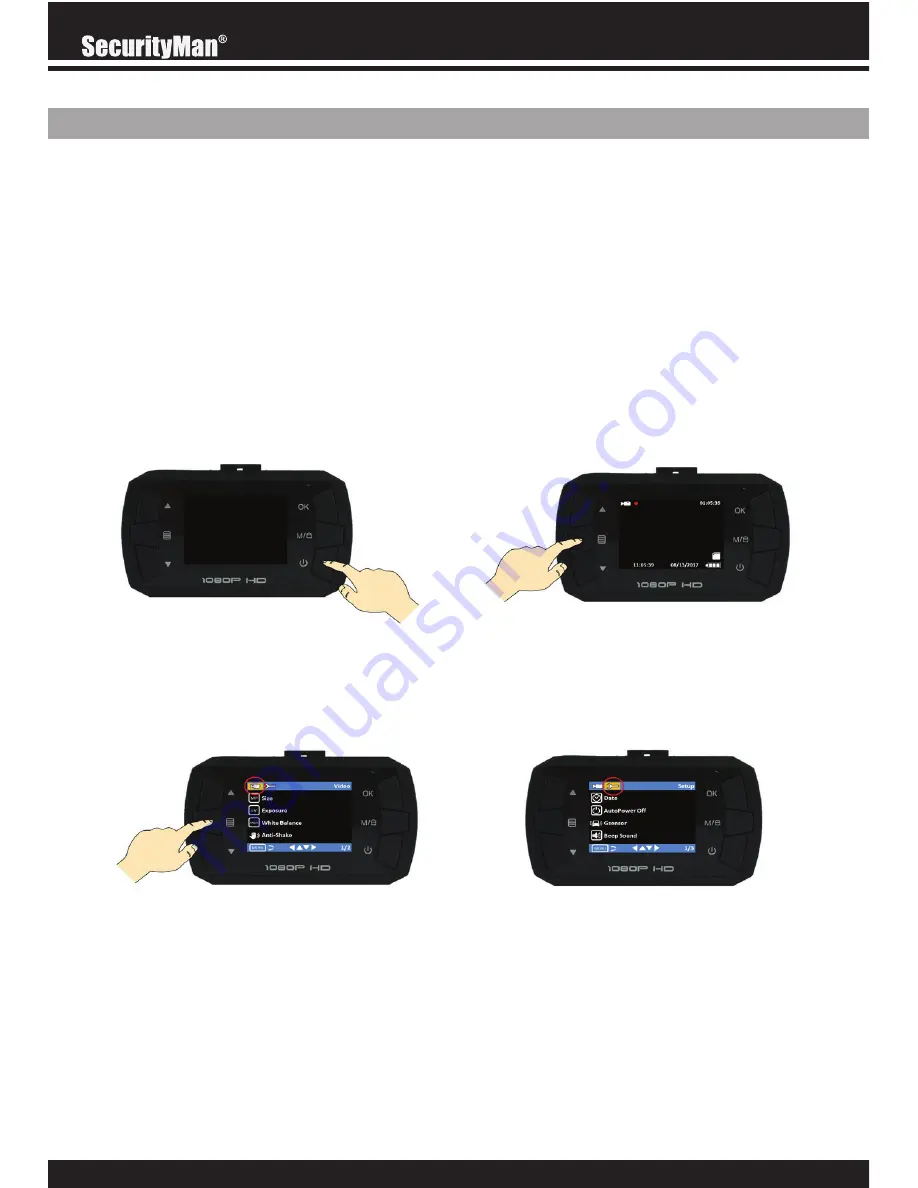
On the Setup menu page, navigate to the Date option using the up/down arrows and press ok.
By default the Time/Date option is set to “on” so there is no need to select the on option. Using
the up/down arrows navigate to the “SetDate” option and press ok.
Quick Start
NOTE:
Menu options, settings and switching between modes (video, photo and playback) will
not be accessible while the camera is recording (flashing blue LED) or if the camera is connect-
ed to a low voltage USB port such as a computer using the supplied USB data transfer cable.
To stop recording, press the REC button once or simply eject the memory card and re-insert it
when done.
SETTING THE TIME AND DATE
Turn your camera on by pressing the power button, then press the menu button to bring up the
Video Settings screen. If you’ve already inserted your memory card the camera may start to
record as soon as it’s on. Simply press the ok button to stop recording.
Содержание CARCAMMICRO
Страница 1: ...User s Guide Micro HD Car Camera Recorder with Smart Impact Sensor Model CARCAMMICRO...
Страница 39: ...35 Live View Icons...
Страница 42: ...www securitymaninc com...


