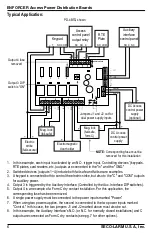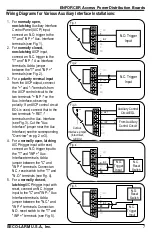
ENFORCER Access Power Distribution Boards
8
SECO-LARM U.S.A., Inc.
No DC output
•
Check whether the AC input voltage or backup battery voltage is
normal
Low DC voltage output
•
Check whether the output voltage setting is correct
•
Check whether the AC input wattage is correct (see chart, pg. 3)
•
If the battery is supplying power, check whether the battery voltage
is normal
•
Check whether the power supply board is overloaded
No backup battery power
•
Check whether the battery voltage is normal or already discharged
•
Check whether the master fuse has burned out
Installing in ENFORCER Access Control Power Supply:
Troubleshooting:
SECO-LARM
®
U.S.A., Inc.
16842 Millikan Avenue, Irvine, CA 92606
Website: www.seco-larm.com
Phone: (949) 261-2999 | (800) 662-0800 Email: [email protected]
™
PITSW1
Order Part# 764-042%
MI_PD-xxTQ_190711.docx
NOTICE:
The SECO-LARM policy is one of continual development and improvement. For that reason, SECO-LARM
reserves the right to change specifications without notice. SECO-LARM is also not responsible for misprints. All trademarks
are the property of SECO-LARM U.S.A., Inc. or their respective owners. Copyright © 2019 SECO-LARM U.S.A., Inc. All
rights reserved.
WARRANTY:
This SECO-LARM product is warranted against defects in material and workmanship while used in normal
service for one (1) year from the date of sale to the original customer. SECO-LARM’s obligation is limited to the repair or
replacement of any defective part if the unit is returned, transportation prepaid, to SECO-LARM. This Warranty is void if
damage is caused by or attributed to acts of God, physical or electrical misuse or abuse, neglect, repair or alteration,
improper or abnormal usage, or faulty installation, or if for any other reason SECO-LARM determines that such equipment
is not operating properly as a result of causes other than defects in material and workmanship. The sole obligation of
SECO-LARM and the purchaser’s exclusive remedy, shall be limited to the replacement or repair only, at SECO-LARM’s
option. In no event shall SECO-LARM be liable for any special, collateral, incidental, or consequential personal or property
damage of any kind to the purchaser or anyone else.
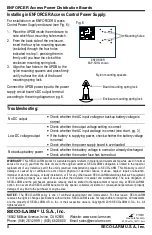
For installation in an ENFORCER Access
Control Power Supply enclosure (see Fig. 6):
1.
Place the APDB inside the enclosure to
note which four mounting holes match.
2.
From the back side of the enclosure,
insert the four nylon mounting spacers
(included) through the four holes
indicated in step 1, pressing them in
firmly until you hear the click of the
enclosure mounting spring lock.
3.
Align the four holes in the APDB to the
nylon mounting spacers and press firmly
until you hear the click of the board
mounting spring lock.
Connect the APDB power input to the power
supply circuit board's DC output terminal
according to the wiring diagram on pg. 6.
Fig. 6
Nylon mounting spacers
Mounting holes
Board mounting spring lock
Enclosure mounting spring lock
ENFORCER
EAP-5D1Q shown


