


8
•
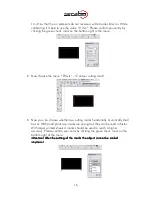
After installing, connect the vinyl cutter to the USB interface on your PC using
the USB cable provided. Windows then indicates that new hardware
components have been recognized and shows when the installation is
completed.
•
To determine the number assigned to the new interface, it is necessary to call
the
Windows Device Manager
. For this purpose, click on
Workplace
with the
right mouse key and select
Properties.
Then select the
Hardware
tab in the
window which opens and click
Device Manger.
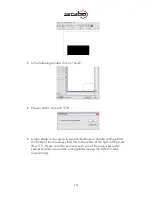
The serial and parallel
interfaces on the computer are listed under the point
Connections,
including
the
USB To Serial
connection. The interface number (e.g. COM1) indicated
following the connection is the connection number to be used (e.g. in Artcut).
•
If it is necessary to change the connection number, proceed as follows: Click
the connection with the right mouse key and select
Properties.
•
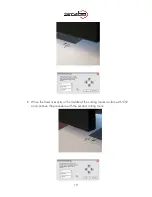
Then click
Advanced
on the
Connection Settings
tab and enter the new
number in the COM connection number field. This is required, for example,
when using cutting programs such as Artcut, because Artcut can control vinyl
cutters only over the COM1 or COM2 interface.
5.3
Connection via Serial Interface
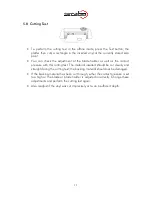
No special installation is required when you connect your Secabo vinyl cutter to the
hardware-side serial interface on your PC; it is only necessary to connect the plotter
to the interface using the cable provided.
5.3.1
Be sure to check
Be sure to check the following settings before starting the first time:
•
Open the FlexiStarter cutting software.
•
Create your inscription or graphic and click
Cut/plot file.
In order to use Date
from
CorelDraw
, the graphic must be exported from
CorelDraw
as EPS and
can be opened in FlexiStarter via
File / Open.
•
Select your Secabo vinyl cutter (C30III, C60III or C120III).
•
In the Production Manager go to
Settings / Job standard settings / cutting
options
, knife offset and enter a value between 0,020cm and 0,033cm.
•
Activate the overcut option with a value of 0,0254cm in the
File - Cut/Plot -
Advanced
menu. If your vinyl cutter is controlled directly, please select local
PC.
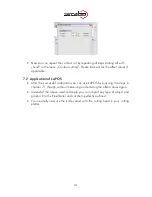
•
Set the
flow control
to Xon/Xoff in the
properties
and set the
baud rate
to
38400. Set the baud rate both in the software and in the machine‘s menu. In
version 8.5, you can select the baud rate and flow control in the production
manager by clicking the knife symbol in the left area of the window.