40
3.4 Connecting the Lantern
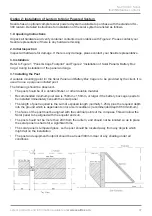
To connect the SL-300 to the solar powered system:
• Connect the blue negative wire of the lantern to the battery negative terminal
• Connect the brown positive wire of the lantern to the battery positive terminal
The lantern must to be connected to a 24VDC power supply.
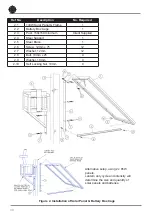
Please ensure the solar panel array has been installed appropriately. To maximise solar collection,
the solar panel array should be installed facing the equator and in a location that ensures it will not be
shaded by buildings, trees or other structures.
Solar panels will significantly reduce in efficiency if
a small shadow is positioned over the solar panel.
IMPORTANT:
it is important to work with the team at Sealite when determining the quantity and size
of both batteries and solar panels for this lantern. Duty cycle, intensity and local solar conditions are
important factors to take into consideration when building a solar powered battery supply.
Sealite solar marine lanterns will give years of trouble free service if installed correctly initially.
• Please ensure all connections are tight
• Please ensure that solar panels are always clean and free from bird droppings and shade and that
the solar array it pointed toward the sun to maximise solar collection
• Please ensure that battery box covers are latched properly and that cages are secured
appropriately, to prevent theft and vandalism
Please contact your Sealite representative if you have any questions regarding the installation
and service of the lantern.
Содержание SL-300-1D5 Series
Страница 1: ...SL 300 1D5 Series 13 21 NM Marine Lanterns V1 3 INSTALLATION SERVICE MANUAL ...
Страница 12: ...12 Image 1 Sealite PC Configuration Tool ...
Страница 50: ...50 ...
Страница 51: ...SL 300 1D5 Series 13 21NM Marine Lanterns Latest products and information available at www sealite com 51 ...


