background image

17

5.2

Printer settings

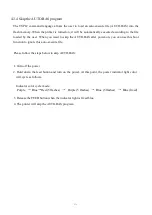
1. Select the connection interface between your computer and the printer.

The default communication interface of

this printer diagnostic tool program is

USB, so if the computer is connected

through USB cable for transmission, no

changes need to be made to the settings

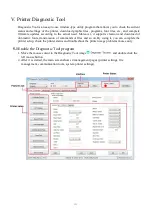
2. Click on a function you intend to set in the "Printer Settings".
3. The printer functions in the Printer Settings management page are described as below.

Description

Sensor Calibration
Set Ethernet network
Set Printer RTC Time Parameters

Restore Factory Defaults and Reboot
Restart the Printer
Print Test Page
Print Self-test Page
Enter Printer Debugging Mode
Ignore the AUTO.BAS File

Set the Diagnostic Tool Password

Содержание 2C-LP427B

Страница 1: ...1 XP DT325B 4B 2053A Thermal Barcode Printer User s Manual Direct Thermal Printer Please keep the user s manual properly for reference 2C LP427B ...

Страница 2: ...ral button functions 9 4 3 Boot function 9 4 3 1 Gap black mark sensor detection 10 4 3 2 Gap black mark sensor detection printing self test value and entering the debugging mode11 4 3 3 Printer initialization 14 4 3 4 Skip the AUTO BAS program 15 V Printer Diagnostic Tool 16 5 1 Enable the Diagnostic Tool program 16 5 2 Printer settings 17 5 3 Calibrate the paper sensor with the printer diagnosti...

Страница 3: ... to change without notice and does not represent a commitment on the part No part of this manual may be reproduced or transmitted in any form by any means for any purpose other than the purchaser s personal use without the expressed written permission ...

Страница 4: ...f the same level The 4B 2053A series printer provides thermal printing The printing speed is adjustable from 2 0 3 0 4 0 to 5 0 inches per second It applies to a variety of printing materials including paper rolls paper slices and fan fold labels In addition the printer has the built in 1D and 2D barcodes that are commonly used a TTF font and eight sets of English numeric fonts in different sizes ...

Страница 5: ...everity of the damage If necessary you should keep the packaging materials for returning the printer Once you have received your barcode printer place it on a clean steady table and carefully remove the packaging material Check if the following items are included One printer x1 One disk x1 One paper roll shaft 1 core x1 Two baffles for paper roll shaft x2 One USB cable x1 One power cord x1 One cop...

Страница 6: ...Power interface Note The transmission interfaces of the printer in the picture will vary depending on the model of machine you purchase For the actual transmission interface please refer to the catalog specifications Paper exit Printer cover Hook for cover LED Feed Pause Transparent lid 1 2 3 ...

Страница 7: ...ble or USB cable into the slot on the back of the printer and connect the other end of the cable to the appropriate slot of your computer 3 Plug the power cord into the power slot on the back of the printer and plug the other end into an AC socket Note Make sure the printer power is switched off when you plug the power cord into the power slot on the back of the printer ...

Страница 8: ... paper roll shaft only 1 5 纸卷轴榇套 纸卷 打印面朝上 纸卷轴 固定片 2 Push the printer cover release button forward with both hands to open the printer cover 3 Place the label roll on the label roll holder Print side up 4 Pass the label through the paper guide and pull the label over the rubber roller Print head Paper guide Rubber roller 1 5 Paper roll shaft bushing Print side up 1 Paper roll shaft Paper roll Fixin...

Страница 9: ...r printing quality make sure the printer cover is closed tightly 3 3 Install the external label holder optional 1 Fix the external label holder on the bottom of the printer 2 Place the label roll on the external label holder External label holder ...

Страница 10: ...ternal paper feed through the external paper guide and into the printer 5 Pass the label through the paper guide and pull the label over the rubber roller 6 Turn the knob so that the paper guide has the same width as the label and contacts slightly the label 7 Close the printer cover External paper feed ...

Страница 11: ...e to the front of the next label paper 2 Pausing of printing operation While the printer is printing clicking the button will pause the operation At this point the power indicator light flashes blue Click the button again to resume the printing 4 3 Boot function This printer has four boot functions that can be used to set or test the printer s hardware These functions can be activated by holding d...

Страница 12: ...ter sensor is set to gap calibration Please follow the steps below 1 Turn off the printer 2 Turn on the printer while holding down the feed button 3 When the indicator light flashes red after the first purple release the feed button Indicator color cycle mode Purple Blue Red flash 5 times Purple flash 5 times Blue flash 5 times Blue fixed Note Whether the printer roll label sensor detects the gap ...

Страница 13: ...r by the sensor 1 Make sure that the label paper is properly installed 2 Turn off the printer 3 Turn on the printer while holding down the feed button 4 When the indicator light flashes purple after the first purple release the feed button Indicator color cycle mode Purple Blue Red flash 5 times Purple flash 5 times Blue flash 5 times Blue fixed 5 The sensor will calibrate the label paper and the ...

Страница 14: ... the printing quality of the print head and to know the internal settings of the printer Printer internal settings printed in the self test mode Model firmware version Machine serial number Print head mileage Check code Serial port setting Character set Country code Printing speed Printing density Paper size width height Black mark or gap size vertical gap offset Sensor strength Ethernet setting i...

Страница 15: ...t are the data received by the system The data on the right are printed from the strings on the left in hexadecimal values This function is provided for users or engineers to debug programs You only need to turn off and on the power again to leave the debugging mode and return to the normal printing mode ASCII string Hexadecimal value data corresponding to the ASCII string listed on the left ...

Страница 16: ...nt the power indicator light color will cycle as follows Indicator color cycle mode Purple Blue Red 5 flashes Purple 5 flashes Blue 5 flashes Blue fixed 3 Release the feed button when the power indicator is flashing blue At this point the printer will be reset and then the power indicator will flash purple once and finally the indicator will be blue ready After initialization the printer configura...

Страница 17: ... BAS after power on you can use this boot function to ignore this auto execute file Please follow the steps below to skip AUTO BAS 1 Turn off the power 2 Hold down the feed button and turn on the power At this point the power indicator light color will cycle as follows Indicator color cycle mode Purple Blue Red 5 flashes Purple 5 flashes Blue 5 flashes Blue fixed 3 Release the FEED button when the...

Страница 18: ...rts creation and download of dot matrix fonts transmission of commands or files and so on By using it you can complete the printer setup check the printer status and troubleshoot the printer usage problems more easily 5 1 Enable the Diagnostic Tool program 1 Move the mouse cursor to the Diagnostic Tool image and double click the left mouse button 2 After it is started the main screen shows 4 manag...

Страница 19: ...anges need to be made to the settings 2 Click on a function you intend to set in the Printer Settings 3 The printer functions in the Printer Settings management page are described as below Description Sensor Calibration Set Ethernet network Set Printer RTC Time Parameters Restore Factory Defaults and Reboot Restart the Printer Print Test Page Print Self test Page Enter Printer Debugging Mode Ignor...

Страница 20: ... or the black mark sensor Gap sensor Black mark sensor 2 Turn on the printer 3 Start the Diagnostic Tool and set the transmission interface the default is USB The default communication interface of this printer diagnostic tool program is USB so if the computer is connected through USB cable for transmission no changes need to be made to the settings 4 Click on Sensor Calibration 5 Select the paper...

Страница 21: ...the power supply plug are properly connected to the printer Turn on the power switch The printer Diagnostic Tool displays Printer On The print head holder is not closed Close the print head holder The printer Diagnostic Tool displays Out of Paper The label paper is used up The roll label installation path is incorrect The gap black mark sensor detection is incorrect Install new label paper Refer t...

Страница 22: ...P address setting is correct when it uses a fixed IP address Wait a few seconds for the printer to contact the server and then check the IP address again Replace it with a new transmission line Clean the print head The printing density setting for the printer is incorrect The connection line of the print head is not well connected Please turn off the printer and reconnect the print head cable Make...

Страница 23: ...lready 5 but it is still too light adjust the value of the pressure adjusting knob back to 1 and then adjust the Z axis adjuster to find the best pressure setting If it is too light on the right of the printed label adjust and increase the value of the pressure adjusting button on the right side to improve the printing quality If the thickness of the label exceeds 0 22 mm the printing quality may ...

Страница 24: ...not correct after restarting the printer The battery is dead Check the battery on the mainboard Wrinkle problem The print head pressure is uneven The label paper is installed incorrectly The printing density is incorrect The label paper feeding is incorrect For uneven print head pressure refer to the next section for adjustment Set the appropriate label printing density Adjust the label width adju...

Страница 25: ...ical alcohol When installing a new roll of label paper Paper tearing off piece Paper peeling off piece Wipe it with a cotton cloth dipped in medical alcohol When needed Sensor Remove dust from the sensor with an air brush or vacuum cleaner Monthly Outside of the machine Wipe it with a wet cotton cloth When needed Inside of the machine Remove dust from inside of the machine with an air brush or vac...

Страница 26: ...24 Update history Date Content Editor 15 04 2019 Official release Hu Xiang ...

Отзывы: