


Operation and maintenance
33
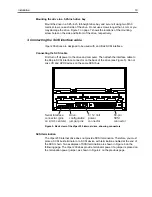
2.
Replace the drive cover to protect the gear and spooling assemblies. You do not
need to replace all the screws.
3.
Turn the drive over.
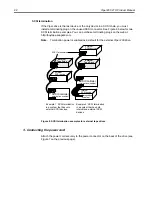
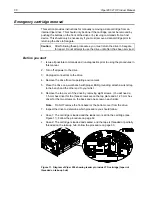
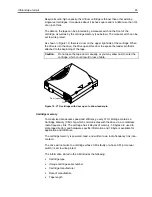
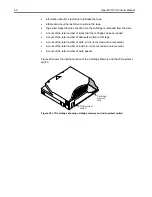
4.
Insert the M2 hex headed screw driver through the hole in the bottom plate
shown in Figure 15.
Slowly
turn the driver clockwise to rewind the tape into the
cartridge. This may take some time.
Caution:
If you turn the driver quickly you may create a tape loop or tape
contamination.
Figure 15. Diagram of underside of Viper 200 showing supply motor access hole
5.
When all of the tape has been spooled off of the take-up reel, turn the drive right-
side up.
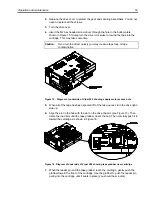
6.
Align the slot in the hub with the slot on the drive chassis (see Figure 13). Then
rotate the load arm until the tape grabber clears the hub. Then carefully push it in
toward the cartridge, as shown in Figure 16.
Figure 16. Diagram of underside of Viper 200 showing tape grabber near cartrdige
7.
When the leader pin and the tape grabber reach the cartridge, gently push the
grabber toward the front of the cartridge. Use the grabber to push the leader pin
gently into the cartridge until it seats in place (you should hear a click).


