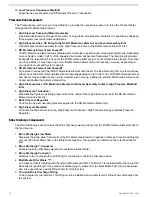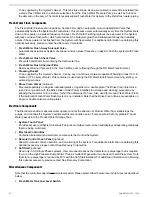
Connect Plumbing
Important:
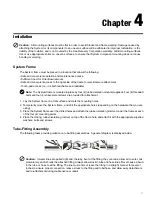
Tube or hose ends must be cut squarely and cleanly, without rough edges. The quick-fit elbow
fitting has a C-clamp that will lock the tube in place, once inserted.
1. Insert the supply pipe into one (1) cylinder port and label the port “Inlet.”
2. Insert the temporary pipe into the other cylinder port to direct water into a container.
3. Slowly fill the cylinder with water and flush cylinder for one (1) minute.
4. Remove temporary pipe and insert the return pipe into the cylinder port, then label the port “Outlet.”
5. Slowly pressurize the UV unit by filling the cylinder with water while checking for leaks.
6. If leaks are found on the compression nuts, depressurize the unit and slightly tighten the leaking compression
nut.
7. Retest until a leak-free installation has been verified.
Once the UV unit is leak-free, the quartz sleeve installation is complete. The UV lamp can now be installed.
Note:
To remove the tube from the fitting, first remove the C-clamp, then push the fitting sleeve downward.
Once the fitting sleeve is down, pull the tube out of the fitting.
Install Ultraviolet Lamp
Important:
Perform this procedure only after the quartz sleeve installation and leak-tests are completed
successfully.
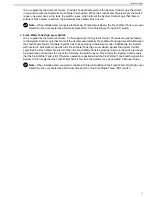
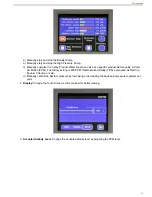
1. Connect the UV lamp to the 4-point receptacle.
If the lamp is not installed properly, lamp breakage will
occur.
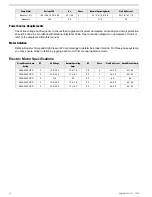
Aqua Matic XL 2200 - 3600
36
Содержание Aqua Matic XL Series
Страница 2: ......
Страница 10: ......
Страница 28: ......
Страница 38: ......
Страница 45: ...45 Commissioning...
Страница 46: ......
Страница 58: ......
Страница 76: ......
Страница 89: ...Chapter 10 Appendix 89...
Страница 90: ...ABS Certificate of Design Assessment Aqua Matic XL 2200 3600 90...
Страница 91: ...FCC Compliance 91 Appendix...
Страница 92: ...DNV ISO 9001 Certificate Aqua Matic XL 2200 3600 92...
Страница 93: ...Single Phase Electrical Motor Wiring 93 Appendix...
Страница 94: ...Three Phase Electrical Motor Wiring Aqua Matic XL 2200 3600 94...
Страница 95: ...Three Phase Transformer Wiring 95 Appendix...
Страница 96: ...New System Initial Readings Form Aqua Matic XL 2200 3600 96...
Страница 97: ...Daily System Readings 97 Appendix...
Страница 98: ......
Страница 99: ...Chapter 11 Exploded Parts Views 99...
Страница 100: ...Exploded Parts View...
Страница 103: ...7 8 9 10 11 12 13 14 15 16 17 20 19 18 21 22 23 24 25 26 1 2 3 4 5 6 Exploded Parts View 4...
Страница 107: ...6 10 14 10 6 10 4 10 13 8 14 10 6 5 7 7 5 11 12 3 2 3 3 2 3 10 4 7 9 7 1 4 Exploded Parts View 8...
Страница 111: ...14 13 2 16 13 12 3 8 10 9 7 1 5 4 6 14 13 15 15 17 13 12 11 18 15 Exploded Parts View 12...
Страница 113: ...19 16 2 21 16 14 3 9 11 10 8 1 5 4 6 12 22 20 18 16 17 15 15 13 7 Exploded Parts View 14...
Страница 115: ...2 3 10 12 11 9 1 5 4 21 13 20 18 15 19 18 19 15 17 14 16 8 18 15 7 Exploded Parts View 16...
Страница 117: ...10 26 11 9 5 5 4 20 1 7 18 3 2 16 13 15 12 14 13 23 24 21 24 25 Exploded Parts View 18...
Страница 119: ...12 10 13 11 5 5 4 6 1 9 20 3 2 17 16 14 18 15 19 17 16 14 18 15 8 7 Exploded Parts View 20...
Страница 128: ...6 7 2 3 2 5 10 10 12 1 11 8 9 8 11 6 7 4 2 13 14 29...
Страница 131: ...6 15 7 13 18 11 16 27 25 26 21 1 4 3 2 3 12 19 9 17 14 23 8 20 9 19 5 27 16 24 22 10 Exploded Parts View 32...
Страница 138: ...Chapter 12 Electric Diagrams Foldouts 101...
Страница 139: ...Aqua Matic XL Series Three Phase Wiring Diagram...
Страница 140: ......
Страница 141: ......
Страница 142: ...Sea Recovery 2630 E El Presidio Street Carson CA 90810 sales searecovery com www searecovery com PN B6513100001...


