Rev.2
61
3.
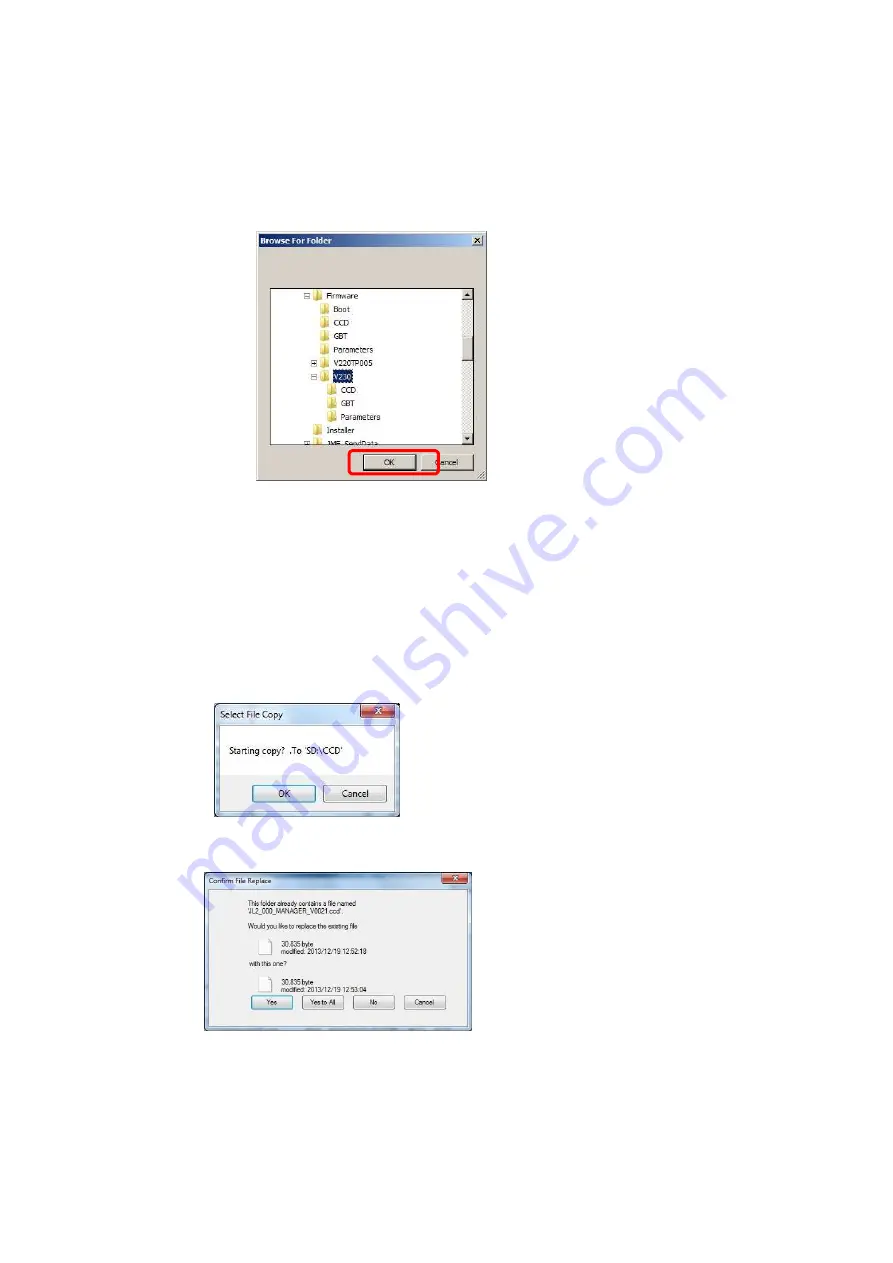
Select the folder to which the CCD file and the GBT file is saved.
→D:\TP-JL350\Client\Firmware\V240TP005
4.
Select the folder, and then click “OK”.
5.
Click “select all”.
6.
Click “Copy”.
7.
The confirmation dialog box for copying is displayed. Click "OK".
8.
If the Confirmation File Replace dialog box is displayed, click “Yes to All”.
④
Содержание TP-JL350UV+
Страница 17: ...Rev 2 17 9 Confirm the version name displayed in startup screen matches JD2 4 00 030 3 1...
Страница 21: ...Rev 2 21 18 Confirm the version name displayed in startup screen matches JD2 4 00 050 7 2...
Страница 26: ...Rev 2 26 Appendix1 folders to be backed up WindowsServer2012...
Страница 29: ...Rev 2 29 9 Click the OK button to close all dialogs 10 Repeat steps 3 to 9 for all other folders...
Страница 35: ...Rev 2 35 7 Close the PrinterAdminTool 8 Click the Run button in Service Manager...
Страница 41: ...Rev 2 41 24 Click the Run button in Service Manager...


