Rev.2
48
5.
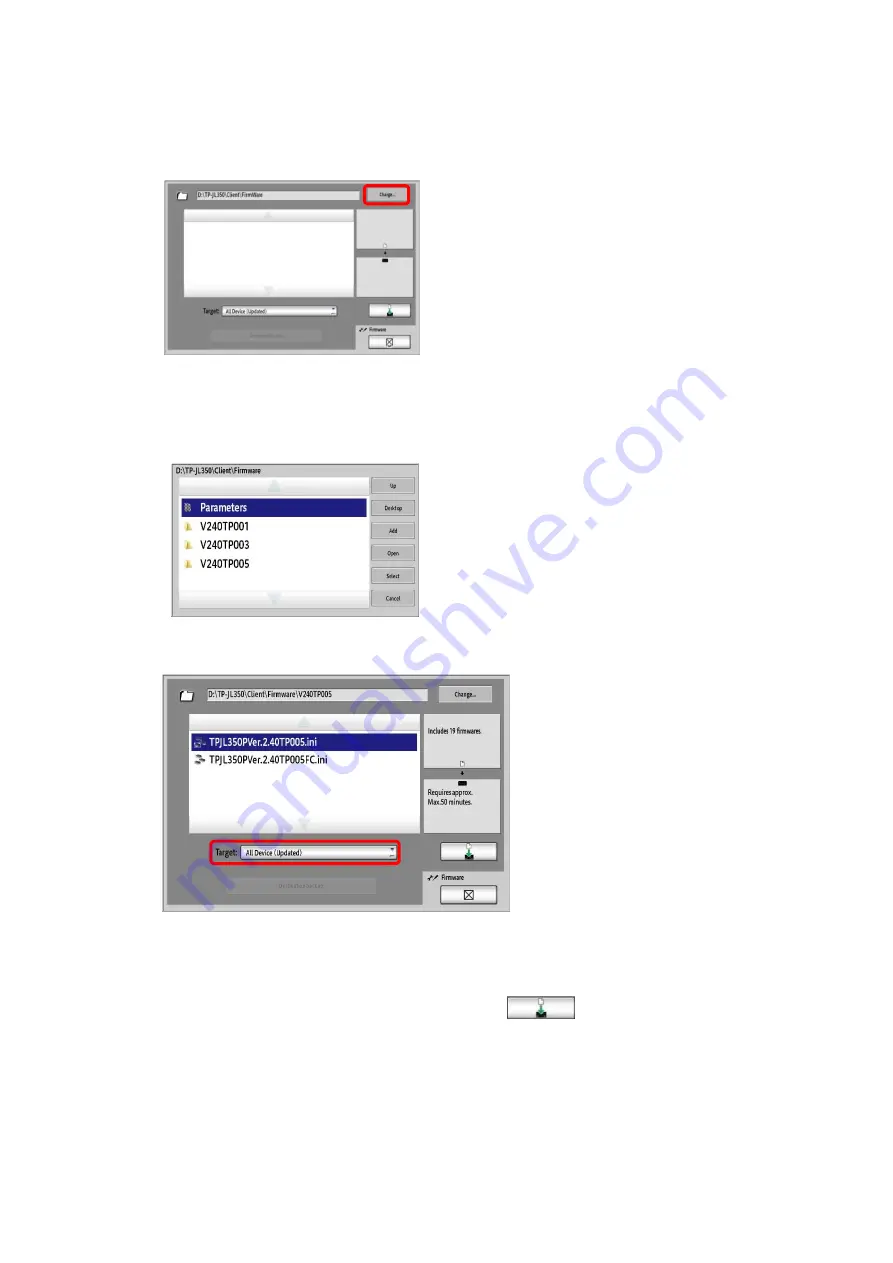
Click the “Change” button on the right side of the path field.
6.
Access the layer of the target folder using “Up” and “Open”.
→ D:\TP-JL350\Client\Firmware\V240TP005
Click “Select”.
7.
Select “All Device(Updated)” from the “Target” list.
8.
The
Batch download
file is displayed.
9.
Select “TPJL350PVer.2.40TP005.ini”, and then
click
*When upgrading a machine with full color variable option, select
“TPJL350PVer.2.40TP005FC.ini”.
Содержание TP-JL350UV+
Страница 17: ...Rev 2 17 9 Confirm the version name displayed in startup screen matches JD2 4 00 030 3 1...
Страница 21: ...Rev 2 21 18 Confirm the version name displayed in startup screen matches JD2 4 00 050 7 2...
Страница 26: ...Rev 2 26 Appendix1 folders to be backed up WindowsServer2012...
Страница 29: ...Rev 2 29 9 Click the OK button to close all dialogs 10 Repeat steps 3 to 9 for all other folders...
Страница 35: ...Rev 2 35 7 Close the PrinterAdminTool 8 Click the Run button in Service Manager...
Страница 41: ...Rev 2 41 24 Click the Run button in Service Manager...


