8
IN
AU
STRAL
IA
PR
OU
DLY BUILT
18. AMX Device Discovery
•
This feature allows the IP CONNECT module to be identified by AMX AV Control Systems
- When polled the IP CONNECT module responds with a Beacon message which contains
device specific information. (Eg Make, Model, Version)
- With this information the AMX system is able to then configure itself with the correct
protocol to be able to control the IP Connect Module.
•
The protocol works for any of the Serial ports, and over TCP/IP.
•
The AMX “Device Discovery White Paper.Doc” defines, The Dynamic Device Discovery
Protocol - the connection methods and data interactions required to dynamically connect
a third party device to a NetLinx Master via either serial or IP connectivity.
•
AMX Discovery is enabled using Register 80 or via internal web browser
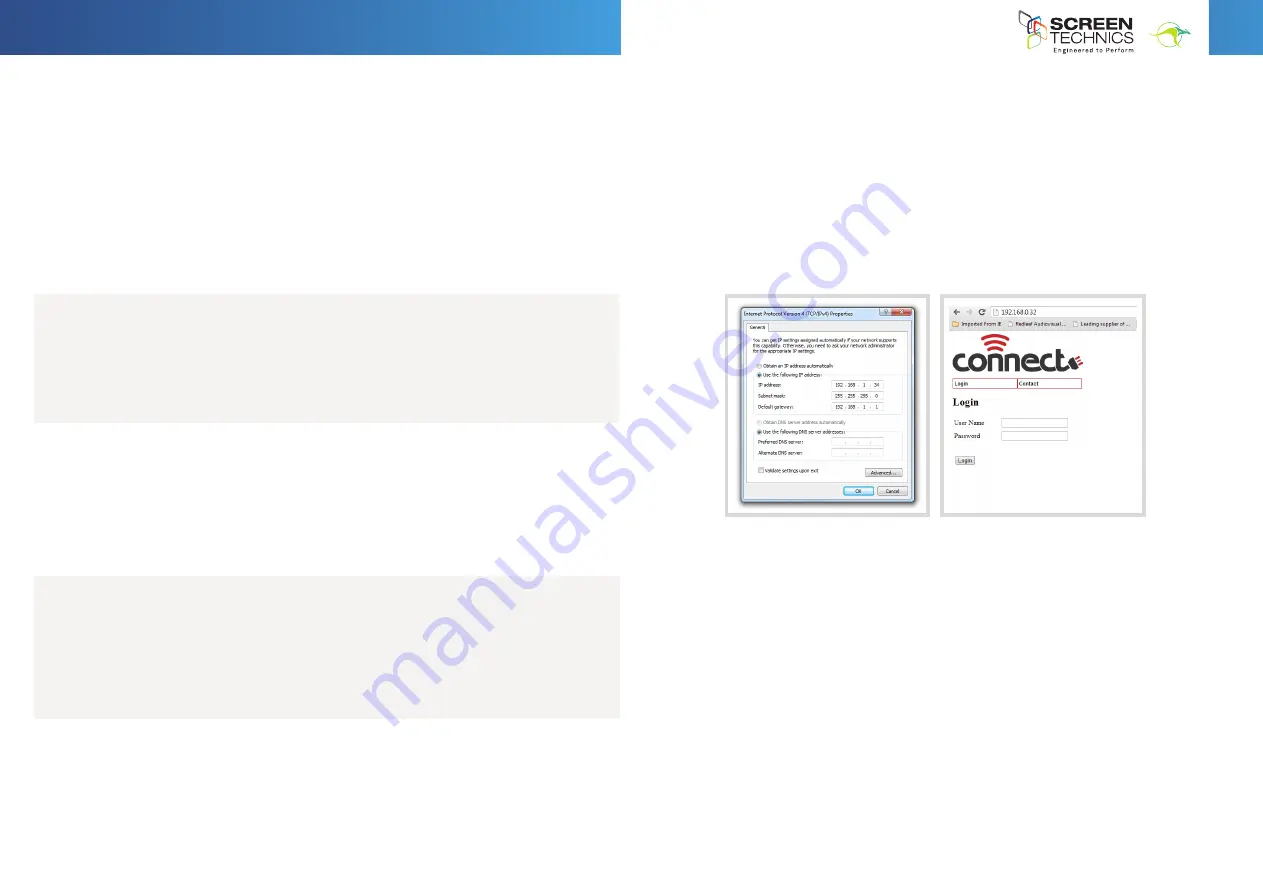
20. Default IP Address when in Factory Default Mode
•
Hold reset button on module until LED flashes twice to put the IP module into static IP
mode
•
You will need to set your network adaptor to look for IP range – example shown:
http://192.168.1.253
Into browser address bar
Input User
Name : Admin - Password : Connect
You should now see the direct control screen
You can now access the settings for the Connect IP module
19. FACTORY RESET SWITCH
•
Single long press for 5 seconds approximately
- Factory Default Mode selected.
- LED double flashes.
- Pressing button again exits mode.
- Receiving an IR command exits this mode.
•
Single short press for 3 seconds approximately
- Screen Rattle command.
- 3 seconds down 1 second up.
- LED single flashes while in this function.
- Pressing button again stops screen.
- Function is exited when screen operation finished or another screen operate
command is acted on.
•
Double short press for 2 seconds approximately per button press
- Screen Up command. Screen travels to up limit.
- LED single flashes while in this function. Pressing button again stops screen.
- Function is exited when screen travels to up position or another screen operate
command is sent.
•
Triple short press for 2 seconds approximately per button press
- Screen Down command. Screen travels to down limit.
- LED single flashes while in this function.
- Pressing button again stops screen.
- Function also exited when screen operation finished or another screen operate
command is acted on.
20.
Default IP Address when in Factory Default Mode
a.
Hold reset button on module until LED flashes
twice to put the IP module into static IP mode
b.
You will need to set your network adaptor to
look for IP range – example shown
c.
Default IP address is 192.168.1.254
http://192.168.1.253
Into browser address bar
Input User
Name
: Admin -
Password
: Connect
You should now see the direct control screen
You can now access the settings for the Connect IP module
INSTRUCTIONS -
MASTERFIT IP
A, A+, B, B+, C, C+ Projection Screen
Should you have any questions regarding the installation of our projection screens please call our
technical sales desk on +61 2 4869 2100 for assistance


