_________________________________________________________________________________________
schunk.com
XND.00005.022_A – 10/2018
35
The closing range of the mechanical force cassette changes of its own accord
If this occurs when setting the clamping range, there is likely to be increased friction in the
seal area of the knurled knob between pull rod and spindle (the seal under the setting ring
has swollen due to cooling liquid, soiling or sim. ).
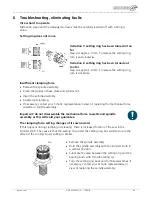
Remove the spindle assembly.
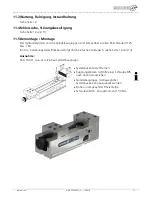
Hold the spindle assembly with the knurled knob in
a vertical position.
Lubricate the area between the setting ring and the
bearing bush with thin lubricating oil.
Turn the spindle assembly and lubricate the gap
between the pull rod and the end of the spindle
with thin lubricating oil.
Hold the spindle assembly in place with the spindle,
turn the pull rod back and forth several times; if
necessary, contact your Schunk representative in
view of replacing the spindle assembly.
Replacing the mechanical force cassette
Removing the cassette
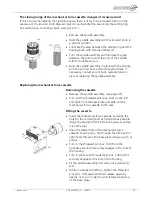
Remove the spindle assembly. (see page 35)
Turn out the threaded pins (pos. 140) on the left
and right from the base plate and slide out the
mechanical force cassette to the rear.
Fitting the cassette
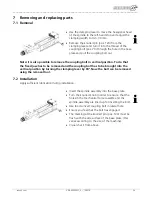
Insert the mechanical force cassette and align the
hole for the coupling bolt as horizontal as possible.
(Align the position of the bolt locking screw so that
it is at the top)
Align the lateral hole in the mechanical force
cassette housing (pos. 50) through the left-hand or
right-hand thread in the base plate using a punch or
similar.
Turn in the threaded pin (pos. 140) from the
opposite side until it securely engages in the hole of
the housing.
Turn in the second threaded pin (pos. 140) until it
securely engages in the hole of the housing.
Fit the spindle assembly and carry out a clamping
test.
While in clamped condition, tighten the threaded
pins (pos. 140) again and then release again by
approx. ¼ turn in order to avoid lateral tensioning
of the base plate.

