Attachment and disassembly of the chuck
32
02.00|ROTA NC plus 2 / ROTA NCF plus 2 |en
•
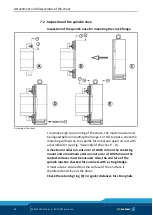
Unscrew screw (Item 30) completely from the chuck body (Item
1).
NOTE:
the same screws (Item 28) can be used to press off the
center sleeve (Item 4) from the chuck body through the
additional thread.
•
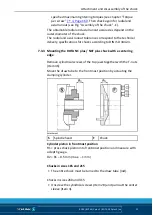
Using lifting gear on the eye bolt, lift the chuck so that it is
aligned with the center of the spindle in front of the spindle
head.
•
Use the included assembly key to screw on the turning draw
nut (item 5) in the chuck to the stop.
•
Push in the center sleeve (Item 4) and tighten with the
cylindrical screws (Item 28).
Tighten the chuck mounting screws (item 30) alternately.
Check radial and axial runout on the control edge
Check the function and level of the actuating force.
Check the ease of movement and jaw stroke of the base jaws.
Mount the top jaws corresponding to the markings 1, 2 and 3 on
the base jaws with T-nuts (Item 46) and screws.
Disassemble the spindle in reverse order.
NOTICE
During the change of the protection sleeve the chuck
mechanism gets opened. Danger of damage of the chuck
because of swarf and dirt.
Do not allow swarf and dirt to enter the chuck mechanism.
If no center sleeve is mounted in the chuck, do not actuate the
chuck or move the chuck piston!
Check the mounting ring (item 5) at regular intervals to ensure it is
seated firmly.
CAUTION
When the chuck mechanism is open there is a danger of limbs
being crushed.
Do not reach into the open chuck mechanism!


