Attachment and disassembly of the chuck
28
02.00|ROTA NC plus 2 / ROTA NCF plus 2 |en
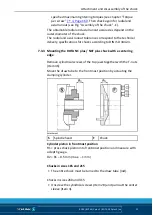
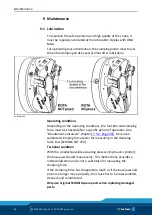
Inspection of the spindle nose
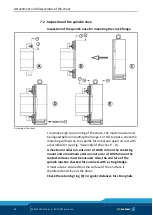
Inspection of the spindle nose for mounting the chuck flange
Assembly of the chuck
To achieve high true running of the chuck, the machine side must
be aligned before mounting the flange. For this purpose, check the
mounting surfaces on the spindle for radial and axial run-out with
a dial indicator (see Fig. "Assembly of the chuck" - A).
A maximum radial run-out error of 0.005 mm on the centering
mount and a maximum axial run-out error of 0.005 mm on the
contact surfaces must be ensured. Also, the end face of the
spindle must be checked for evenness with a straightedge.
It must also be ensured that the surface of the end face is
chamfered and clean at the bores.
Check the retaining ring (6) in regular distances for strong hub.
7.2

