Содержание SL1452

Страница 1: ...nd follow these instructions and precautions carefully POR FAVOR GUARDE ESTE MANUAL DEL PROPIETARIO Y LEER ANTES DE CADA USO En este manual se explica cómo utilizar la unidad segura y efectiva Por favor lea y siga las siguientes instrucciones y precauciones ESSAYER DE GARDER LE MANUEL D INSTRUCTIONS ET LE LIREAVANT CHAQUE UTILISATION Ce manuel explique comment utiliser l unité d une façon sûre et ...

Страница 2: ...E UNIT 7 FOLLOW THESE STEPS WHEN CONNECTING TO A BATTERY 7 FEATURES 8 CHARGING THE JUMP STARTER 8 OPERATING INSTRUCTIONS 9 MAINTENANCE INSTRUCTIONS 11 STORAGE INSTRUCTIONS 11 TROUBLESHOOTING 11 SPECIFICATIONS 12 REPLACEMENT PARTS 13 BEFORE RETURNING FOR REPAIRS 13 LIMITED WARRANTY 13 ...

Страница 3: ...SO 16 SIGA ESTOS PASOS CUANDO SE CONECTE A LA BATERÍA 16 CARACTERÍSTICAS 17 CARGAR ELARRANCADOR 18 INSTRUCCIONES DE OPERACIÓN 18 INSTRUCCIONES DE MANTENIMIENTO 20 INSTRUCCIONES DE ALMACENAMIENTO 21 RESOLUCIÓN DE PROBLEMAS 21 ESPECIFICACIONES 22 REPUESTOS 22 ANTES DE DEVOLVER A REPARACIONES 23 GARANTÍA LIMITADA 23 ...

Страница 4: ...APPAREIL 26 SUIVEZ CES ÉTAPES LORSQUE CONNEXION À UNE BATTERIE 26 CARACTÉRISTIQUES 27 CHARGE LE DÉMARREUR 28 CONSIGNES D UTILISATION 28 CONSIGNES D ENTRETIEN 31 INSTRUCTIONS DE STOCKAGE 31 TABLEAU DE DÉPANNAGE 31 SPÉCIFICATIONS 32 PIÈCES DE RECHANGE 33 AVANT DE RETOURNER POUR LES RÉPARATIONS 33 GARANTIE LIMITÉE 33 ...

Страница 5: ... persons or damage to property 1 6 To reduce the risk of damage to the electric plug or cord pull by the adaptor rather than the cord when disconnecting the unit 1 7 Do not operate the unit with damaged cables or clamps 1 8 Do not operate the unit if it has received a sharp blow been dropped or otherwise damaged in any way take it to a qualified service person 1 9 Do not disassemble the unit take ...

Страница 6: ...ing someone nearby to come to your aid when you work near a lead acid battery 2 7 Have plenty of fresh water soap and baking soda nearby for use in case battery acid contacts your eyes skin or clothing 2 8 Wear complete eye and body protection including safety goggles and protective clothing Avoid touching your eyes while working near the battery 2 9 If battery acid contacts your skin or clothing ...

Страница 7: ...tal part of the battery clips or cut the insulation of the cables 4 3 Stay clear of fan blades belts pulleys and other parts that can cause injury 4 4 Check the polarity of the battery posts The POSITIVE POS P battery post usually has a larger diameter than the NEGATIVE NEG N post 4 5 Determine which post of the battery is grounded connected to the chassis If the negative post is grounded to the c...

Страница 8: ... TO KEEP THE INTERNAL BATTERY FULLY CHARGED AND PROLONG BATTERY LIFE 6 1 CHECKING THE LEVEL OF THE INTERNAL BATTERY 1 Press the display button The LCD display will show the battery s percentage of charge Afully charged internal battery will read 100 Charge the internal battery if the display shows it is under 85 2 To reduce the risk of electric shock unplug the unit s charging cable from a USB or ...

Страница 9: ...ounded vehicle connect the POSITIVE RED clamp from the jump starter to the POSITIVE POS P ungrounded post of the battery Connect the NEGATIVE BLACK clamp to the vehicle chassis or engine block away from the battery Do not connect the clamp to the carburetor fuel lines or sheet metal body parts Connect to a heavy gauge metal part of the frame or engine block 4 For a positive grounded vehicle connec...

Страница 10: ...ncludes two USB output ports The standard one provides up to 2 4A at 5V DC The second is a USB Fast Charging port which provides up to 5V at 3A 9V at 2A or 12V at 1 5A 1 Consult your mobile device manufacturer for proper charging power specifications Connect a mobile device cable to the appropriate USB port 2 Charging should begin automatically The display will show which port is in use 3 Charging...

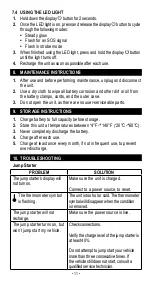
Страница 11: ...ge battery to full capacity before storage 2 Store this unit at temperatures between 4 F 140 F 20 C 60 C 3 Never completely discharge the battery 4 Charge after each use 5 Charge at least once every month if not in frequent use to prevent over discharge 10 TROUBLESHOOTING Jump Starter PROBLEM SOLUTION The jump starter s display will not turn on Make sure the unit is charged Connect to a power sour...

Страница 12: ... is connected correctly to both battery and jump starter Solid Red LED Green LED off beeps once per second Low voltage protection Solid Red LED Green LED off beeps twice per second Reverse polarity protection Alternating Red and Green flashing LEDs no beep Reverse charging protection Solid Red LED Green LED off rapid beeping Short circuit protection Solid Red and Green LEDs no beep Auto shut off d...

Страница 13: ...TURNS visit 365rma com Visit batterychargers com for Replacement Parts 14 LIMITED WARRANTY For information on our one year limited warranty please visit batterychargers com or call 1 800 621 5485 to request a copy Go to batterychargers com to register your product online Schumacher is a registered trademark of Schumacher Electric Corporation ...

Страница 14: ...dado o suministrado por el fabricante del arrancador para la unidad puede provocar riesgo de incendio descarga eléctrica o lesiones a personas o daño a la propiedad 1 6 Para reducir el riesgo de daños al enchufe o cable eléctrico jale del adaptador en lugar de jalar del cable al desconectar la unidad 1 7 No utilice la unidad si el mismo posee los cables o las pinzas dañado 1 8 No utilice la unidad...

Страница 15: ...el metal causando una quemadura de gravedad 2 3 Tenga especial cuidado para reducir el riesgo de dejar caer una herramienta de metal sobre la batería Esto podría provocar chispas o un cortocircuito en la batería o en cualquier otra pieza eléctrica que podría provocar una explosión 2 4 No deje que la batería interna se congele Nunca cargue una batería congelada 2 5 Para prevenir cortos NUNCA permit...

Страница 16: ...nariz o boca 3 3 Determine el voltaje de la batería consultando el manual del usuario del vehículo y asegúrese de que la tensión de salida es de 12V 3 4 Asegúrese de que las pinzas de la unidad se encuentren firmemente conectadas 4 SIGA ESTOS PASOS CUANDO SE CONECTE A LA BATERÍA ADVERTENCIA UNACHISPAPROVOCADACERCADE LABATERÍA PUEDE CAUSAR LAEXPLOSIÓN DE LABATERÍA PARAREDUCIR EL RIESGO DE PROVOCAR ...

Страница 17: ...ra de la batería Conecte el gancho POSITIVO ROJO al chasis del vehículo o al bloque motor alejado de la batería No conecte al carburador líneas de combustible o cuerpos metálicos Conecte a una pieza metálica de calibre grueso del marco o del bloque motor 4 8 Cuando termine de usar el arrancador retire la pinza del chasis del vehículo y quite la abrazadera de la terminal de la batería Desconecte la...

Страница 18: ...uación conecte el extremo USB del cable de carga en el puerto USB de un cargador 2 Conectar el cargador a una toma de alimentación de CA o CC en vivo 3 La pantalla LCD se iluminará el dígito comenzará a parpadear y mostrará IN indicando que la carga ha comenzado 4 El arrancador cargará completamente en 7 8 horas Cuando la batería interna está completamente cargada la pantalla mostrará 100 5 Cuando...

Страница 19: ...rrancar el vehículo nuevo NOTA Si el coche no arranca por segunda vez compruebe el cable inteligente para ver si el LED verde está encendido Si oye un pitido o y el LED parpadea consulte la sección 10 Resolución de Problemas Cuando se corrige la condición el cable inteligente se reajustará automáticamente NOTA El clima frío puede afectar el rendimiento de la batería de litio del arrancador Si escu...

Страница 20: ...puerto USB desconecte el cable de carga de su dispositivo móvil y desconecte el cable de carga de la unidad 5 Cargue la unidad tan pronto sea posible después de usarse NOTA Si no está conectado un dispositivo USB la alimentación a los puertos USB se apagará automáticamente después de 30 segundos 7 3 CARGA INALÁMBRICA para dispositivos con tecnología Qi La base de carga inalámbrica suministra 10 W ...

Страница 21: ...ersonal técnico cualificado 9 INSTRUCCIONES DE ALMACENAMIENTO 1 Cargue la batería a plena capacidad antes de su almacenamiento 2 Almacene la unidad a temperaturas entre 20 C 60 C 4 F 140 F 3 Nunca descargue completamente la batería 4 Cargue después de cada uso 5 Cargue al menos una vez al mes si no en el uso frecuente para evitar la sobre descarga 10 RESOLUCIÓN DE PROBLEMAS Arrancador PROBLEMA SOL...

Страница 22: ...e estará parpadeando el LED rojo estará apagado Sin pitido Se detecta un alto voltaje falso de la batería pero la protección de carga inversa no se activó El usuario puede girar la llave para arrancar el motor del vehículo LED del cable inteligente y comportamiento de la alarma COMPORTAMIENTO RAZÓN LED verde parpadeando LED rojo apagado no bip El cable está conectado solamente a la batería El cabl...

Страница 23: ...e carga rápida USB 5V 3A 9V 2A 12V 1 5A Arranque de motor 2000A pico 1000A cranking Temperatura de carga 32 122 F 0 50 C 12 REPUESTOS Pinzas cable de batería inteligente 94500901Z Cable de carga micro USB USB 3899003781Z 13 ANTES DE DEVOLVER A REPARACIONES Para REPARACIONES O DEVOLUCIONES visite 365rma com Visite batterychargers com para obtener piezas de repuesto 14 GARANTÍA LIMITADA Para obtener...

Страница 24: ...ecommandés SA901 câble de démarrage L utilisation d accessoires non recommandés ou vendus par le fabricant pour l unité peut engendrer un risque d incendie un choc électrique ou des blessures 1 6 Pour réduire le risque d endommager le cordon électrique tirez sur la adaptateur plutôt que sur le cordon quand vous débranchez l unité 1 7 Ne pas utiliser l appareil avec des câbles ou des pinces endomma...

Страница 25: ...re le risque de laisser tomber un outil en métal sur la batterie Ça pourrait faire une étincelle ou produire un court circuit à la batterie ou à d autres parties électriques et pourrait produire une explosion 2 4 Veillez à ce que la batterie interne ne gèle pas Ne tentez jamais de recharger une batterie gelée 2 5 Pour éviter les étincelles NE JAMAIS laisser pinces se toucher ensemble ou contacter ...

Страница 26: ...3 Déterminez la tension de la batterie en vous référant au guide d utilisation de votre véhicule et assurez vous que le tension de sortie est de 12V 3 4 Assurez vous que les pinces des câbles du l unité sont fermement connectées 4 SUIVEZ CES ÉTAPES LORSQUE CONNEXION À UNE BATTERIE AVERTISSEMENT UNE ÉTINCELLE PRÈS DE BATTERIE PEUT CAUSER SON EXPLOSION POUR RÉDUIRE LES RISQUES D ÉTINCELLE PRÈS DE LA...

Страница 27: ...e à la masse de la batterie Raccorder la pince POSITIVE ROUGE au châssis du véhicule ou au moteur loin de la batterie Ne pas raccorder la pince au carburateur aux canalisations d essence ni aux pièces de la carrosserie en tôle Raccorder à une pièce du cadre ou du moteur en tôle de forte 4 8 Lorsque vous avez terminé avec le démarreur retirer la pince du châssis du véhicule puis retirer la pince de...

Страница 28: ...z l extrémité USB du câble de chargement dans le port d entrée Ensuite branchez l extrémité USB du câble de chargement dans le port USB d un chargeur 2 Branchez votre chargeur dans une prise de courantAC ou CC en direct 3 L écran LCD s allume le chiffre commencera à clignoter et montre IN indiquant que le chargement a commencé 4 Le démarreur charger complètement en 7 8 heures Lorsque l appareil es...

Страница 29: ... le véhicule a nouveau NOTE Si la voiture ne démarre pas une seconde fois vérifiez le câble intelligent pour voir si le voyant vert est allumé Si vous entendez des bips sonores ou si le voyant clignote reportez vous à la section 10 Dépannage Lorsque la condition est corrigée le câble intelligent se réinitialise automatiquement NOTE Le temps froid peut affecter la performance de la batterie au lith...

Страница 30: ... dès que possible après l avoir utilisé NOTE Si un périphérique USB est pas connecté l alimentation des ports USB sera automatiquement coupée après 30 secondes 7 3 CHARGEMENT SANS FIL pour dispositifs prenant Qi en charge Le support de rechargement sans fil procure une puissance de 10 W permettant de recharger rapidement les dispositifs mobiles compatibles 1 Consultez le fabricant de votre disposi...

Страница 31: ... chaque utilisation 5 Chargez au moins une fois tous chaque mois si elle n est pas fréquemment utilisée pour éviter une sur décharge 10 TABLEAU DE DÉPANNAGE Aide de Démarrage PROBLÈME SOLUTION L affichage de le démarreur ne sera pas allumer Assurez vous que l unité est chargée Connectez vous à une source d alimentation pour réinitialiser Le symbole du thermomètre clignote L appareil est trop chaud...

Страница 32: ...cté à la batterie et au démarreur LED rouge fixe LED verte éteinte Émet un bip une fois par seconde Protection contre de basse tension LED rouge fixe LED verte éteinte Émet deux bips par seconde Protection contre l inversion de polarité LEDs clignotantes rouges et vertes alternées Pas de bip Protection contre l inversion de charge LED rouge fixe LED verte éteinte Bip rapide Protection contre court...

Страница 33: ...visitez 365rma com Aller sur batterychargers com pour les pièces de rechange 14 GARANTIE LIMITÉE Pour plus d informations sur notre garantie limitée d un an veuillez visiter batterychargers com ou appeler le 1 800 621 5485 pour demander une copie Aller sur batterychargers com pour enregistrer votre produit en ligne Schumacher est une marque déposée de Schumacher Electric Corporation ...

Отзывы: