background image

• 6 •

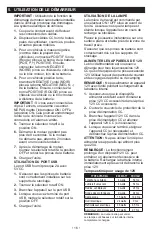
IMPORTANT:

 DO NOT CHARGE 

INTERNAL BATTERY FOR MORE THAN 

30 MINUTES OR LEAVE THE BATTERY 

UNATTENDED. IT COULD EXPLODE, 

CAUSING PROPERTY DAMAGE OR 

PERSONAL INJURY. 

1. 

Make sure the car is running.

2. 

Insert one end of the accessory cable 

into the 12V DC power outlet. 

3. 

Insert the other end of the accessory 

cable into the vehicle’s accessory 

outlet (lighter socket). 

NOTE:

 The 

RED LED 

does not operate 

during this method of charging. Using this 

method to charge the battery overrides 

the maintain mode and the battery can be 

overcharged. 

4. 

Monitor the progress of the charge by 

pressing the 

Battery Status

 button on 

the front of the unit. When the battery is 

fully charged, disconnect the accessory 

cable from the jump starter, then from 

the lighter socket of the vehicle. 

NOTE:

 Completely disconnect the charger 

cable when the engine is not running.

5.  USING THE JUMP STARTER

IMPORTANT:

 Using the Engine Start 

feature without a battery installed in the 

vehicle will damage the vehicle’s electrical 

system.

1. 

Turn the ignition OFF.

2. 

Lay the DC cables away from any  

fan blades, belts, pulleys and other 

moving parts.

3. 

For a negative-ground vehicle (as 

in most vehicles), connect the jump 

starter’s POSITIVE (RED) clamp to 

the POSITIVE (POS, P, +) battery 

post. Next, connect the NEGATIVE 

(BLACK) clamp to the vehicle chassis 

or engine block, away from the battery. 

4. 

For a positive-ground vehicle, 

connect the jump starter’s NEGATIVE 

(BLACK) clamp to the NEGATIVE 

(NEG, N, -) battery post. Next, 

connect the POSITIVE (RED) clamp 

to the vehicle chassis or engine block 

away from the battery.

IMPORTANT:

 If you have connected the 

clamps backwards, an audio alarm will 

sound. DO NOT turn the ON/OFF switch to 

the ON position. This could cause serious 

damage to the jump starter or the vehicle. 

Reverse the connections and the audio 

alarm will stop.

5. 

Turn the switch to the ON position.

6. 

Crank the engine for no more than  

8 seconds. If the engine does not start, 

wait 2 minutes before cranking again.

7. 

After the engine starts, turn the switch 

to the OFF position and remove the 

jump starter from the battery.

8. 

Charge the jump starter.

USING THE USB PORT 

The USB port provides up to 2A  

at 5V DC.

1. 

Ensure the battery clamps are 

securely clipped on the storage 

holders.

2. 

Turn the jump starter ON.

3. 

Plug your device into the USB port.

4. 

When finished using the USB port, 

turn the switch to the OFF position.

5. 

Charge the jump starter.

USING THE WORK LIGHT

The work light is controlled by a sliding 

ON/OFF switch located on the front of the 

jump starter. Make sure the lamp is turned 

OFF when the unit is being recharged or 

stored. 

Position the jump starter on a flat, stable 

surface near the intended work area.

Ensure the battery clamps are securely 

clipped on the storage holders.

POWERING A 12V DC DEVICE

The jump starter is a power source for all 

12V DC accessories that are equipped 

with a 12V accessory plug. Use it for power 

outages and on fishing or camping trips.

NOTE:

 Do not power a 12V device 

with the jump starter while charging the 

internal battery. 

1. 

Make sure the device to be powered 

is OFF before inserting the 12V DC 

accessory plug into the 12V DC 

accessory outlet.

2. 

Open the protective cover of the DC 

power outlet on the jump starter. 

3. 

Plug the 12V DC device into the DC 

power outlet and turn on the 12V DC 

device (if required).

4. 

When finished, turn off the DC device  

(if required) and unplug from the DC 

power outlet.

CAUTION:

 Do not use the jump starter  

to run appliances that draw more than  

20A DC.

NOTE: 

Extended operation of a 

12V DC device may result in excessive 

battery drain. Recharge the jump starter 

immediately after unplugging the 12V  

DC device.

Содержание FR01241

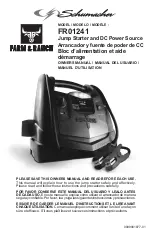
Страница 1: ...and effectively Please read and follow these instructions and precautions carefully POR FAVOR CONSERVE ESTE MANUAL DEL USUARIO Y LEALO ANTES DE CADA USO En este manual le explica c mo utilizar el arr...

Страница 2: ...FICATIONS 8 ACCESSORIES 8 LIMITED WARRANTY 8 WARRANTY CARD 19 CONTENIDOS INSTRUCCIONES IMPORTANTES DE SEGURIDAD 9 PRECAUCIONES DE SEGURIDAD PERSONAL 9 CARACTER STICAS 10 PARA CARGAR LA BATERIA INTERNA...

Страница 3: ...S CURIT PERSONNELLE 14 CARACT RISTIQUES 15 CHARGE DE LA BATTERIE INTERNE 15 UTILISATION DE LE D MARREUR 16 MAINTENANCE ET ENTRETIEN 17 D PANNAGE 17 AVANT DE RETOURNER POUR LES R PARATIONS 17 SP CIFIC...

Страница 4: ...starter Take it to a qualified service professional if service or repair is required Incorrect assembly may result in fire or electrical shock Do not use the jump starter to jump a vehicle while char...

Страница 5: ...ATTERY FULLY CHARGED AND PROLONG BATTERY LIFE CHECKING THE LEVEL OF THE INTERNAL BATTERY Press the Battery Status button on the front of the unit The LED lights will indicate the current charge level...

Страница 6: ...age to the jump starter or the vehicle Reverse the connections and the audio alarm will stop 5 Turn the switch to the ON position 6 Crank the engine for no more than 8 seconds If the engine does not s...

Страница 7: ...arter won t jump start my car Clamps are not making a good connection to the battery Connections are reversed The jump starter s battery is not charged The vehicle s battery is defective The jump star...

Страница 8: ...cturer does not provide any warranty for any accessories used with this product that are not manufactured by Schumacher Electric Corporation and approved for use with this product This Limited Warrant...

Страница 9: ...do ni vendido por Schumacher Electric Corporation puede ocasionar da os en la unidad o lesiones corporales Nunca opere el arrancador si est da ado Si otra persona usa el arrancador aseg rese de que es...

Страница 10: ...ROJO se mantendr encendida Una carga completa se puede tardar hasta 72 horas Cuando la luz LED ROJO se apagar el arrancador port til estar listo para usar 4 El cargador se fijar autom ticamente en mo...

Страница 11: ...O UTILIZAR LA LUZ DE TRABAJO La luz de trabajo se controla mediante un interruptor deslizante de Encendido Apagado ON OFF situado en la parte frontal del arrancador Aseg rese de que la l mpara est apa...

Страница 12: ...nte de poder Consulte la secci n de Indicadores LED en este manual Haga un chequeo de la bater a Gire el interruptor arrancador ON OFF a la posici n de encendido La fuente de poder no pone a funcionar...

Страница 13: ...ada es reparado o modificado por personas que nos sean el Fabricante o si esta unidad es revendida a trav s de un vendedor minorista no autorizado El fabricante pudiera anular esta Garant a Limitada s...

Страница 14: ...s dommages l appareil ou des blessures corporelle Ne jamais utiliser l unit si elle est endommag e Si quelqu un d autre utilise l unit assurez vous qu ils sont bien inform s sur la fa on de l utiliser...

Страница 15: ...rendre jusqu a 72 heures Quand le VOYANT ROUGE s teint l unit est pr te pour utiliser 4 Le chargeur passe automatiquement en mode maintien et de maintenir la batterie pleine charge sans l endommager P...

Страница 16: ...ion OFF 5 Chargez l unit UTILISATION DE LA LAMPE La lumi re de travail est command par un s lecteur ON OFF situ en avant de l unit Assurez vous que la lampe est teinte lorsque l appareil est en cours...

Страница 17: ...at de charge Faites v rifiez la batterie Mettez le sel cteur ON OFF sur la position ON L unit n allume pas mon appareil de 12V Le dispositif de 12V n est pas activ La batterie Interne n est pas charg...

Страница 18: ...oumis une manipulation imprudente r par ou modifi par une personne autre que le fabricant ou si cet appareil est revendu par un d taillant non autoris Le fabricant peut annuler la garantie si l tiquet...

Страница 19: ...___________________ Esta es la nica garant a limitada expresa y el productor no autoriza ni otorga a alguien a realizar alguna otra obligaci n No existe ninguna otra garant a m s que la descrita en el...

Страница 20: ...RIGINAL puisqu il sera requis pour une ventuelle r clamation au titre de la garantie Cette garantie n est pas transf rable Envoyer la carte de garantie seulement NE PAS ENVOYER L UNIT CETTE ADRESSE PO...

Отзывы: