02/2022
•
L-01431-4-08
9
!
!
!
4. Installation
The safety of this light fitting is only guaranteed as long as it is operated within its
assessment threshold. Installation and maintenance must be done in accordance with
the respective regulations!
The installation of explosion-proof light fittings must be done by Ex-skilled electricians
only!
In regard to the minimum and maximum admissible ambient temperature potential
sources of cold and heat (e.g. direct heat or solar radiation, cooling units) have to be
considered!
The application of this light fitting in an explosive dust atmosphere is depending on the
properties of the surrounding dust. Please ensure that there will be an adequate
difference between the maximum surface temperature of the fitting and the glowing and
the ignition temperature of the respective dust!
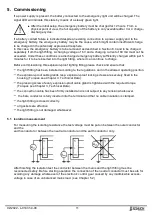
If there is a risk of accidental electrostatic charge the light fitting must be protected by
appropriate measures!
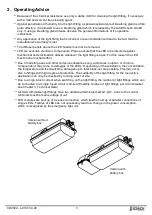
The light fitting must be mounted in the instructed operation position (see Chapter 3,
Technical Data)!
4.1 How to open the light fitting
Turn the hexagon socket at the locking side of the light fitting in direction
of the arrow ”Open”
Open the diffuser
4.2 Electrical connection
Screw the explosion-proof cable glands and explosion-proof locking screw supplied with the fitting
into the borings of the housing by using the lock nuts (Torques see Chapter 3, Technical Data).
After mounting the light fitting housing insert the connection cable through the explosion-proof cable
gland. An inlaid dust protective disc, if existing, must be removed before.
Fasten the pressing screw of the explosion-proof cable gland (Torque see Chapter 3, Technical
Data).
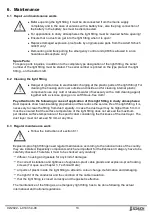
Outside the light fitting appropriate measures (e.g. pull relief clips) must be taken to
protect the connection cable from twist and it must be ensured that no tensile forces react
on the wiring and the cable entry!
The diameter of the connection cable must correspond to the sealing range of the
explosion-proof cable gland (see Chapter 3, Technical Data)!
Cable entries, which are not used, must be closed with the enclosed closure plug
(Torque see Chapter 3, Technical Data)! An inlaid dust protective disc, if existing, must
be removed before.
The conductors must not be damaged when skinning resp. stripping the cable!
When stripping the cable special attention needs to be paid to the correct length of the
conductor end sections (see Chapter 3, Technical Data)!
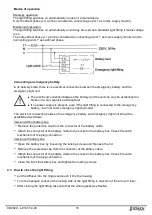
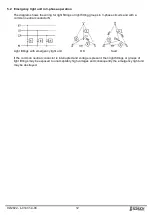
Connect the conductors of the connection cable to the right terminals as per marking.
It is important to ensure that the bare conductor is fully inserted into the terminal and that
no cable insulation is clamped!
Put the reflector into the housing and position it correctly. Then lock it by use of the wing nuts.


