GB
14
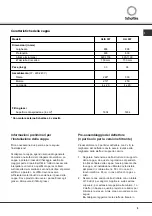
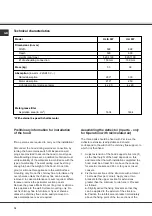
Model
HLIS 997
HLI 997
Dimensions (in mm)
Width
898 898
Depth
600 600
Height (min./max.)
820-1100
820-1100
Ø of exhausting connection
150 mm
150 mm
Mass (kg)
33
38
Absorption
(in watts - 220-240 V ~)
Rated absorption
290*
330
Motor absorption
210*
250
Light absorption (Halogen lamp)
4 x 20
4 x 20
Metal grease filter
Aspiration area (in cm
2
)
1634
1634
* With external 4-speed Scholtès motor
Technical characteristics
Preliminary information for installation
of the hood
!
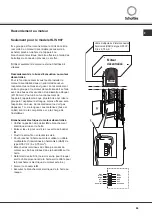
Two persons are required to carry out the installation!
Disconnect the hood during electrical connection, by
turning the home mains switch off. Expansion wall
plugs are provided to secure the hood to most types
of walls/ceilings. However, a qualified technician must
verify suitability of the materials in accordance with the
type of wall/ceiling. The wall/ ceiling must be strong
enough to bear the weight of the hood. Do not tile,
grout or silicone this appliance to the wall. Surface
mounting only. Do not fix chimney flue to furniture or fly
over shelves unless the chimney flue can be easily
removed, in case maintenance is ever required. Where
foreseen remove the perimeter suction panels.
Remove the grease filter/s Do not tile, grout or silicone
this appliance to the wall. Surface mounting only. Do
not fix chimney flue to furniture or fly over shelves
unless the chimney flue can be easily removed, in
case maintenance is ever required.
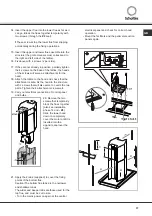
Assembling the deflector (3 parts - only
for Operation with recirculated air)
The three parts should be fixed with 2 screws, the
deflector extension is adjustable and should
correspond to the width of the chimney flue support, to
which it is then fixed.
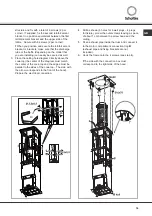
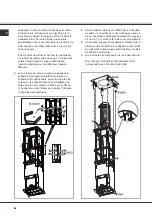
1.
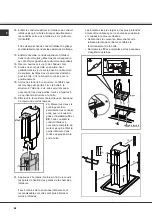
Adjust extension of the hood support structure (
1
) ,
as the final height of the hood depends on this,
and remember that with installation completed the
hood must be at least 50 cm above the cook-top
for electric cookers and 65 cm for gas or mixed
cookers.
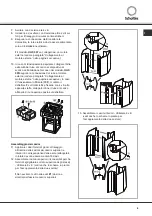
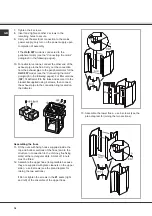
2.
Fix the two sections of the structure with a total of
16 screws (four per corner). Apply one or two
brackets to the upper section for extensions
greater than the minimum to reinforce it. Proceed
as follows:
a.
Slightly widen the fixing brackets so that they
can be applied to the exterior of the structure.
b.
Position the reinforcement bracket immediately
above the fixing point of the two sections of the
Содержание HLI 997
Страница 69: ......
Страница 70: ...LI2R9E Ed 02 08 ...


