GB
16
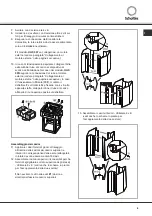
7.
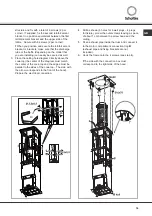
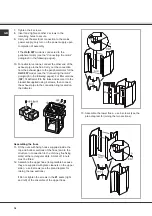
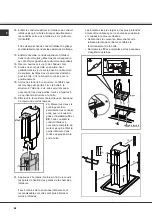
Tighten the 4 screws.
8.
Insert and tighten another 2 screws in the
remaining holes to secure.
9.
Carry out the electrical connection to the mains
power supply, only turn on the power supply upon
completion of assembly.
!
The
HLIS 997
model is connected to the
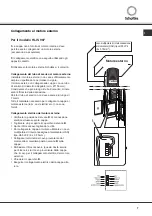
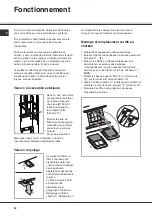
peripheral motor (
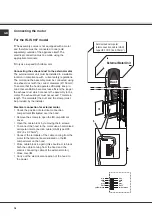
see the “Connecting the motor”
paragraph in the following pages).
10.
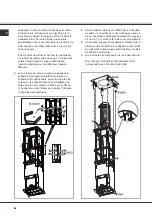
For extractor versions, connect the other end of the
exhaust pipe to the flue. Carry out the connection
from the exhaust pipe to the peripheral motor for the
HLIS 997
model. (
see the “Connecting the motor”
paragraph in the following pages). For filter versions
(
10F
), fit deflector
F
to the truss and secure it to the
bracket
G
supplied using 4 screws, then connect
the exhaust pipe to the connection ring located on
the deflector.
Assembling the flues
11.
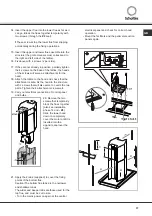
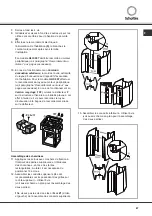
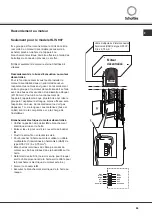
Fit the nuts with fixing hooks supplied inside the
top and bottom sections of the flues (and to the
structure in connection to the chimney flue fixing
slots) at the rectangular slots. A total of 16 nuts
must be fitted.
12.
Assemble the upper flues (recognisable because
they are supplied with grate cleaners on the upper
side) – use 8 screws (see the plan diagram for
joining the two sections).
!
Do not tighten the screws in the
Z1
seats (right
and left) of the ensemble of the upper flues.
13.
Assemble the lower flues – use 6 screws (see the
plan diagram for joining the two sections).
Содержание HLI 997
Страница 69: ......
Страница 70: ...LI2R9E Ed 02 08 ...


