international 71
Unpacking
Due to modern series production it is improbable that
your compressor has any defects or that a part is missing.
Should you note a fault, however, do not switch the ma-
chine on before the parts are replaced or the fault has
been remedied. Not observing this instruction can lead to
serious injuries.
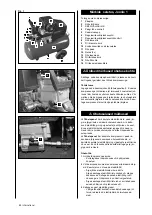
Assembly
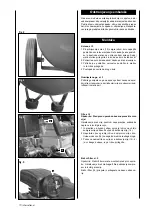
Wheels, fig. 2
1 To attach the wheels (12), pass a washer with the wheel
bolt through the wheel. Then add a washer and a hexa-
gon nut on the inside of the wheel. Fasten the nut by
hand so that the wheel still can be rotated.
2 Push the wheel unit through the ear below the tank.
3 Fasten it with a washer, a safety washer and a
nut and tighten them securely.
4 Repeat this process with the second wheel.
Rubber feet, fig. 3
Attach the rubber feet on the ear at the bottom of the
tank’s front side using the screws, washers and nuts pro-
vided.
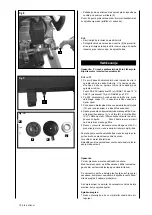
Oil, fig. 4
Warning: It is essential to check the oil level prior to initial
use!
Using the device without oil will lead to irreparable dama-
ges to device and the warranty will be void.
1 Remove the plastic oil inlet plug (14) on the top of the
compressor housing’s crankcase.
2 Fill the oil into the crankcase until the oil level in the
glass sight gauge (16) has reached the centre point of
the red circle.
3 Replace the new oil inlet bolt (14) included in the
delivery and tighten it securely.
Air filter, fig. 5
Warning: The air filter must be installed before the initial
use. Using the device without air filter will damage the
compressor and void the warranty.
The air filter (15) is attached on the right side of the cylin-
der and screwed tightly.
Содержание 5906107901
Страница 57: ...international 57...
Страница 155: ...international 155 14...
Страница 156: ...156 international...
Страница 157: ...international 157...
Страница 158: ...158 international...

