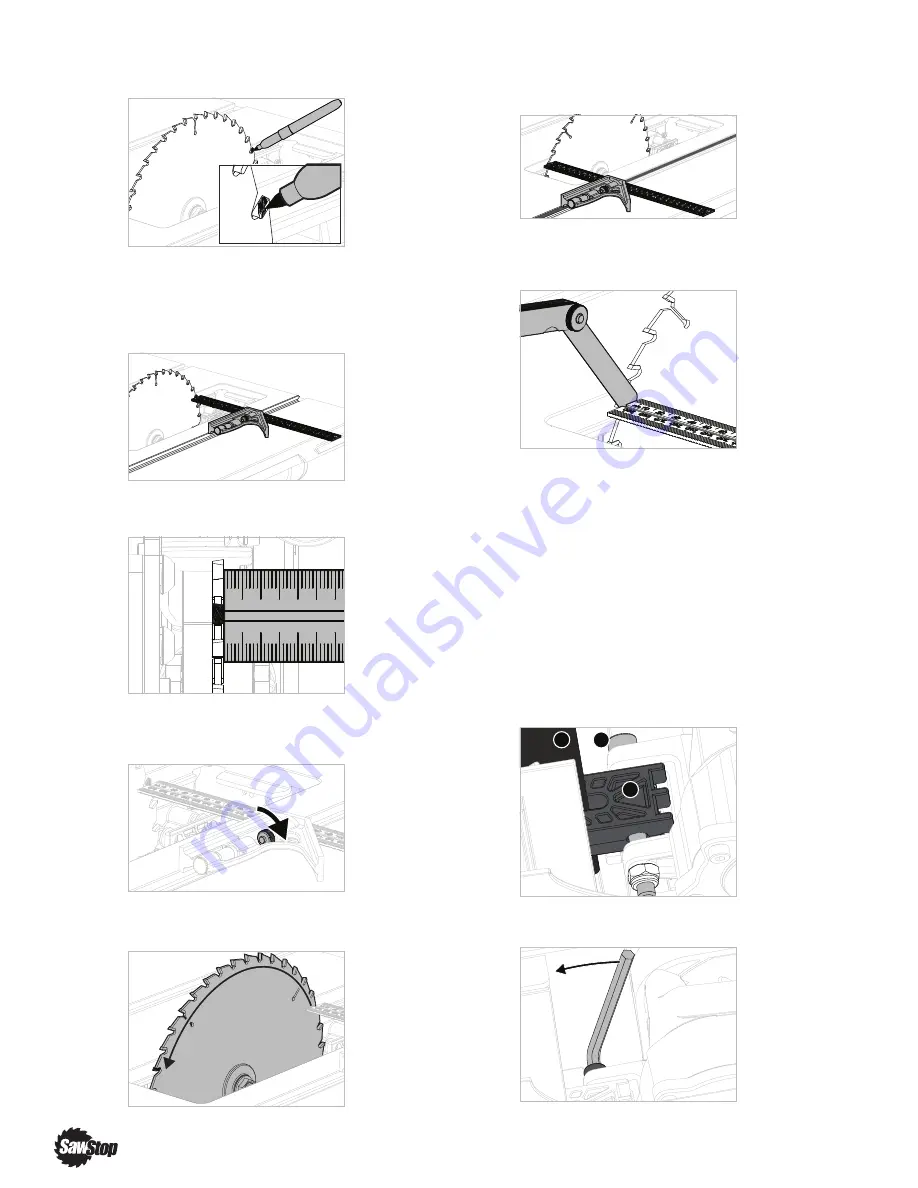
1. With the blade fully raised and the insert removed,
mark one of the teeth at the back of the blade.
2. Loosen the locking knob on the combination
square, and then place the square against the side
of the right-hand miter slot near the back of the
blade. Align the marked tooth and the end of the
ruler.
3. Slide the ruler against the side of the marked tooth.
Use a light touch, do not deflect the blade.
4. Tighten the locking knob on the combination
square.
5. Rotate the blade so that the marked tooth is at the
front of the blade.
6. Move the combination square so that the end of the
ruler aligns with the marked tooth, holding the
square firmly against the side of the miter slot.
7. If there is a gap, measure the gap with the feeler
gauge. If 0.25 mm (0.010") or less, the alignment is
within tolerance and no further work is required.
In this example, the gap is larger than 0.25 mm
(0.010") and the blade alignment should be adjusted.
Carefully set the square aside.
8. Remove the blade, and then fully lower the
elevation mechanism.
Here’s how the adjustment mechanism works:
•
Turn the alignment adjustment bolt (B), which is
threaded through the alignment block (C)
•
The alignment block rests against the blade
alignment bracket (D)
•
Turning the bolt pushes the trunnion assembly
right or left, which, in turn, shifts the blade.
9. Use the 5 mm hex-key wrench to turn the
alignment adjustment bolt a small amount.
B
C
D
42
|
SawStop
®
Compact Table Saw


