


Version 1.0.16
60
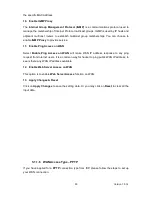
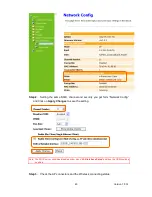
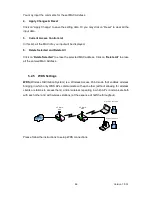
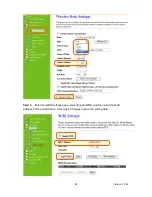
Step 2. Setting the same SSID, channel and security you got form “Network Config”
and Click on Apply Changes to save the setting
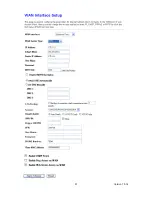
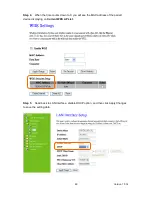
Note: The DHCP server should be disabled under menu “LAN Interface Setup” and then the URM could be
enabled.
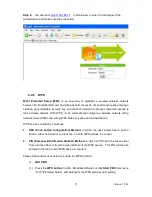
Step 3. Check the AP connectors and the Wireless connecting status.
Содержание RB-1232
Страница 1: ...Version 1 0 16 1 ...
Страница 12: ...Version 1 0 16 12 Step 2 Click on Properties Step 3 Double click on Internet Protocol TCP IP ...
Страница 16: ...Version 1 0 16 16 If it can t work it will show Request timed out ...
Страница 19: ...Version 1 0 16 19 Step 2 Click One Button Setup on the left of the main menu under router mode ...
Страница 30: ...Version 1 0 16 30 Click on Next button to go on next setting page ...
Страница 34: ...Version 1 0 16 34 Click on Next button to go on next setting page ...
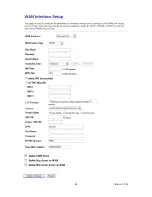
Страница 48: ...Version 1 0 16 48 ...
Страница 51: ...Version 1 0 16 51 ...
Страница 100: ...Version 1 0 16 100 Step 2 Fill in the form as required and then click on Create Account button ...
Страница 103: ...Version 1 0 16 103 Step 9 Your hostname has been created when you see the following page ...


