Version 1.0.16
110
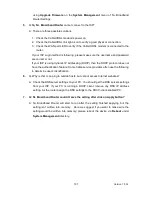
not function correctly. If this does solve the problem, you can use the DMZ function.
This should work with almost every application, but:
It is a security risk, since the firewall is disabled.
Only one (1) PC can use this feature.
5.
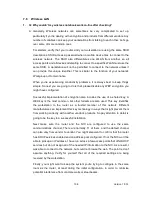
Q: I can’t connect to the Wireless Router to configure it.
A: Check the following:
The Wireless Router is properly installed, LAN connections are OK, and it is
powered ON.
Make sure that your PC and the Wireless Router are on the same network
segment.
If your PC is set to “Obtain an IP Address automatically” (DHCP client), restart it.
If your PC uses a Fixed (Static) IP address, make sure that it is using an IP
Address within the range 192.168.1.129 to 192.168.1.253 and thus compatible
with the Wireless Router’s default IP Address of 192.168.1.254. Also, the
Network Mask should be set to 255.255.255.0 to match the Wireless Router. In
Windows, you can check these settings by using Control Panel ~ Network to
check the Properties for the TCP/IP protocol.
6.
Q: The WinXP wireless interface couldn’t communicate the WEP with N+
Broadband Router’s wireless interface.
A: The default WEP of WinXP is Authentication Open System - WEP, but the WEP of
N+ Broadband Router is only for Shared Key - WEP, it caused both sides couldn’t
communicate. Please select the WEP of WinXP from Authentication Open System to
Pre-shared Key - WEP, and then the WEP wireless interface between WinXP and
N+ Broadband Router would be communicated.
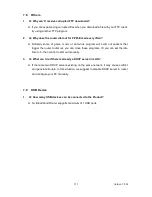
7.7
Support
1.
Q: What is the maximum number of IP addresses that the XDSL Router will
support?
A: The Router will support to 253 IP addresses with NAT mode.
5. Q: Is the Router cross-platform compatible?
A: Any platform that supports Ethernet and TCP/IP is compatible with the Router.
Содержание RB-1232
Страница 1: ...Version 1 0 16 1 ...
Страница 12: ...Version 1 0 16 12 Step 2 Click on Properties Step 3 Double click on Internet Protocol TCP IP ...
Страница 16: ...Version 1 0 16 16 If it can t work it will show Request timed out ...
Страница 19: ...Version 1 0 16 19 Step 2 Click One Button Setup on the left of the main menu under router mode ...
Страница 30: ...Version 1 0 16 30 Click on Next button to go on next setting page ...
Страница 34: ...Version 1 0 16 34 Click on Next button to go on next setting page ...
Страница 48: ...Version 1 0 16 48 ...
Страница 51: ...Version 1 0 16 51 ...
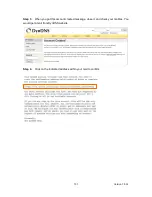
Страница 100: ...Version 1 0 16 100 Step 2 Fill in the form as required and then click on Create Account button ...
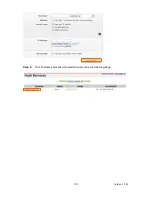
Страница 103: ...Version 1 0 16 103 Step 9 Your hostname has been created when you see the following page ...

