


SPEED of focus setting
Use the CURSOR button (
j
or
l
) to move
the cursor to SPEED, then use the CURSOR
button (
d
or
c
) to select the focus
adjustment speed value.
Available settings: 1, 2, 3, 4 (Quickest speed)
To return the settings in this screen to their
defaults, change PRESET to ON and then
press the SET button.
To close the menu screen or return to the
previous screen, select BACK or END for
MENU and press the SET button.
B
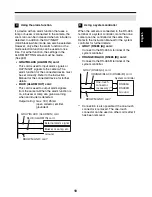
Setting the auto-focus (AUTO)
Sets a limit for near distance focusing and sets
focusing sensitivity and focus target area.
Note:
As a normal practice, use manual focus when
keeping the camera focused on the same target
object for a long period of time (over 24 hours).
This can be used with the one-push auto-focus
function when needed (operated from the
system controller). Long periods of surveillance
with the auto-focus in operation will shorten the
work life of the lens.
In the LENS screen, use the CURSOR button
(
j
or
l
) to select AUTO for FOCUS, then
press the SET button.
The FOCUS SETTING screen will appear.
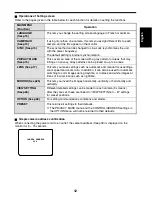
LIMIT NEAR focus distance setting
Use the CURSOR button (
j
or
l
) to move
the cursor to LIMIT NEAR, then use the
CURSOR button (
d
or
c
) to change the
distance value.
Available settings: 1M (meter), 3M, 10C
(centimeters), 30C, 50C
Note: Focusing becomes difficult when near
distance limit is set to less than “1M”.
Setting focus SENSITIVITY
Use the CURSOR button (
j
or
l
) to move
the cursor to SENSITIVITY, then use the
CURSOR button (
d
or
c
) to change the
setting.
Available settings:
HIGH: High sensitivity focusing
LOW: Low sensitivity focusing
Note: When focus SENSITIVITY is set to HIGH,
it may react to even slight movements of
the target object. In this case, change the
setting to LOW.
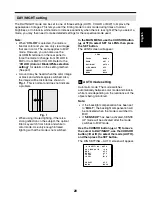
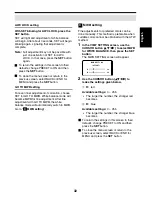
AREA setting
1
Use the CURSOR button (
j
or
l
) to
move the cursor to SET for AREA, and
press the SET button.
The AREA SETTING screen for AREA 2
(default setting) will appear to allow setting of
focus target area.
2
Use the CURSOR button (
d
or
c
) to
select the focus target area.
Available settings: 1-full screen, 2-center of
screen, 3-smaller center
To return the settings in this screen to their
defaults, change PRESET to ON and then
press the SET button.
To close the menu screen or return to the
previous screen, select BACK or END for
MENU and press the SET button.
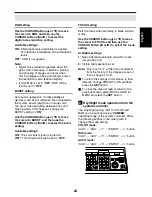
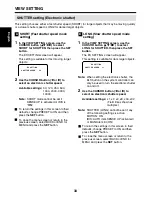
FOCUS SETTING
LIMIT NEAR 1M
SENSITIVITY HIGH
AREA SET ‚
AREA SETTING
AREA 2
PRESET OFF
MENU BACK
En
gl
is
h
18
Содержание VCC-XZ400P
Страница 46: ......


