5
Getting Star
ted
Accessing the Main Menu
You can configure various adjustments and preference settings on the monitor screen.
☞
In this manual, the buttons and their names on the camera are used for description.
■
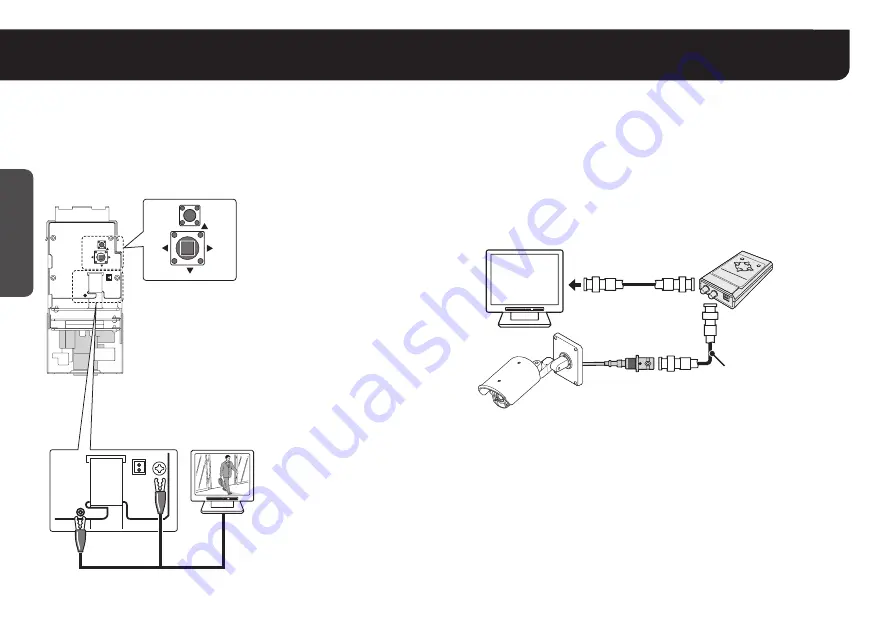
Removing the camera cover and setting up the camera
using the buttons on the circuit board
Place the camera cover back once you have finished settings
(See the INSTALLATION MANUAL that comes with the unit).
■
Using the Camera Control Unit
(VAC-70: Separately ordered)
Camera can be controlled remotely during setting or adjustment.
• Please refer to the instruction manual for VAC-70.
SET
S4002
CN411
S4001
DOWN
UP
RIGHT
TP431
LEFT
MONIT
OR OUT
MONITOR
OUT
SET
DOWN
UP
RIGHT
LEFT
CN411
TP431
MONIT
OR OUT
MONITOR
OUT
SET button
Press and hold for about 1 second
for the main menu to appear.
Select button (UP, DOWN, RIGHT, LEFT)
Press up, down, left, right to select an item on the
settings screen or change a setting value.
<Zoom operations>
The zoom functions can be operated using the Select
button during live mode (with no settings screen
displayed).
Wide:
Press
d
(LEFT)
Tele:
Press
c
(RIGHT)
Note:
Make sure to disconnect the unit after setting or adjustment is
completed.
VAC-70
RG-6U (5C-2V) cable,
500 m max.
• Maximum 300 m
when using the
communication
option board
(VA-20ST).
BNC type
Video in
VIDEO
OUT
CAMERA
■
Checking the settings screen or camera angle on a portable
monitor
Connect the MONITOR OUT pin and the ground on the circuit board to a monitor
using an alligator clip cable.
It is also possible to connect a monitor using the MONITOR OUT connector.


