background image

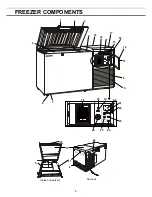
  FREEZER COMPONENTS 


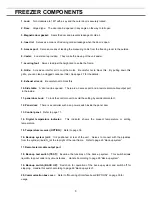
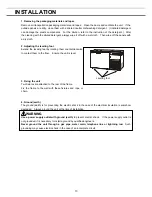
1.


Lock:

    Turn clockwise to 180

o

 with a key and the outer door is securely locked. 


2. Door:   

Hinged type.    The door can be opened in any angle on the way to full open. 


3. Magnetic door gasket:   

Seals the door and prevents leakage of cold air.


4. Inner lid:

    Serves as a means of reducing cold air leakage when the door is open. 


5. Access port:

    Serves a means of leading the measuring cable from the freezing room to the outside.   


6. Caster:

    6 casters are provided.    They make the moving of the unit easier. 


7. Leveling foot:

    Serves to adjust the height and to settle the frame. 


8. Grille:

    Acts as an inlet for air to cool the motor.    Be careful not to block this.    By pulling down this 

grille, you can clean a clogged condenser filter. See page 27 for the details. 
 

9. Exhaust air vent:

    Be careful not to block this. 


10. Side table:   

A door can be opened.    There are an access port and a remote alarm cable output port 

in the inside. 


11. panel door Lock:   

To lock the control cover to avoid the setting by accidental contact. 


12. Panel door:   

There is a controller such as a power switch inside the panel door.   


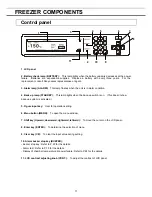
13. Control panel:   

Refer to page 11. 


14. Digital temperature indicator:

  This indicator shows the present temperature or setting 

temperature. 
 

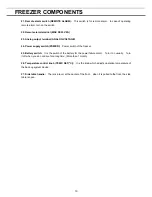
15. Temperature recorder (OPTION):   

Refer to page 38. 


16. Back-up system joint:

  It is positioned at rear of the unit.  Serves to connect with the pipelines 

from the cylinder (liquid N

2

) at the top right of the rear frame.    Refer to page 26 “Back-up system” 


17. Remote alarm cable output port


18. Back-up test switch (TEST):

  Examine the functions of the back-up system.  This switch allows 

liquid N

2

 to spout under any circumstances.    Handle it according to page 26 “Back-up system”. 


19. Back-up switch (BACK UP):

  Switch on for operation of the back-up system and switch off for 

stopping.    Handle this switch according to page 26 “Back-up system”.   
 

20. Communication box cover:   

Refer to “Mounting of interface board (OPTION)” on page 39 for 

usage. 


9


Содержание MDF-C2156VAN

Страница 1: ...MDF C2156VAN MDF C2156VANC INSTRUCTION MANUAL Ultra Low Temperature Freezer ...

Страница 2: ...ols P 20 Initialization Tools Default Setting P 20 Date Time Set of log interval Tools Date Time P 21 Set of key lock password Tools Key lock PW Setting P 22 ALALRM BUZZER P 22 MONITOR OF FREEZER STATUS P 23 ALARMS SELF DIAGNOSIS FUNCTION P 23 ALARMS SAFETY FUNCTIONS P 24 REMOTE ALARM TERMINAL P 25 BACK UP SYSTEM P 25 ROUTINE MAINTENANCE Cleaning of cabinet P 27 Cleaning of condenser filter P 27 D...

Страница 3: ...al in an adequate place to refer to it as necessary The contents of the manual will be subjected to change without notice due to the improvement of performance or functions Contact Sanyo sales representative or agent if any page of the manual is lost or page order is incorrect Contact Sanyo sales representative or agent if any point in this manual is unclear or if there are any inaccuracies No par...

Страница 4: ...ymbol shows this symbol means caution this symbol means an action is prohibited this symbol means an instruction must be followed Be sure to keep this manual in a place accessible to users of this unit Label on the unit This mark is labeled on the cover in which the electrical components of high voltage are enclosed to prevent the electric shock The cover should be removed by a qualified engineer ...

Страница 5: ... the power supply outlet is not grounded it will be necessary to install a ground by qualified engineers Never ground the unit through a gas pipe water main telephone line or lightning rod Such grounding may cause electric shock in the case of an incomplete circuit Connect the unit to a power source as indicated on the rating label attached to the unit Use of any other voltage or frequency other t...

Страница 6: ... malfunction Disconnect the power supply plug if there is something wrong with the unit Continued abnormal operation may cause electric shock or fire When removing the plug from the power supply outlet grip the power supply plug not the cord Pulling the cord may result in electric shock or fire by short circuit Disconnect the power supply plug before moving the unit Take care not to damage the pow...

Страница 7: ...ion may cause a heat or ignition Never store corrosive substances such as acid or alkali in this unit if the cylinder cannot be sealed These may cause corrosion of inner components or electric parts Check the setting when starting up of operation after power failure or turning off of power switch The stored items may be damaged due to the change of setting Be careful not to tip over the unit durin...

Страница 8: ...idity 80 for temperature up to 31o C decreasing linearly to 50 relative humidity at 40o C Mains supply voltage fluctuations not to exceed 10 of the nominal voltage Other supply voltage fluctuations as stated by the manufacturer Transient overvoltages according to Installation Categories Overvoltage Categories II For mains supply the minimum and normal category is II Pollution degree 2 in accordanc...

Страница 9: ...FREEZER COMPONENTS 15 18 19 20 22 23 21 26 25 24 1 3 2 5 6 7 9 8 10 11 12 13 14 16 17 4 27 16 27 10 5 9 17 Inside of side table Rear side 8 ...

Страница 10: ...d a remote alarm cable output port in the inside 11 panel door Lock To lock the control cover to avoid the setting by accidental contact 12 Panel door There is a controller such as a power switch inside the panel door 13 Control panel Refer to page 11 14 Digital temperature indicator This indicator shows the present temperature or setting temperature 15 Temperature recorder OPTION Refer to page 38...

Страница 11: ... POWER Power switch of the freezer 25 Battery switch It is the switch of the battery for the power failure alarm Turn it on usually Turn it off when you do not drive for a long time More than 1 month 26 Temperature control knob TEMP SET o C It is the knob which adjusts operation temperature of the back up system device 27 Side table handle There is a lever at the center of the front when it is pul...

Страница 12: ...hts when the back up switch is on This doesn t show back up system is activated 5 Figure input key User for operation setting 6 Menu button MENU To open the menu window 7 Shift key Upward downward rightward leftward To move the cursor on the LCD panel 8 Enter key ENTER To determine the selection of menu 9 Clear key CE To clear the input value during setting 10 Alarm buzzer stop key BUZZER Buzzer s...

Страница 13: ...use vibration or noise WARNING Install the unit on a sturdy floor If the floor is not strong enough or the installation site is not adequate this may result in injury from the unit falling or tipping over Select a level and sturdy floor for installation This precaution will prevent the unit from tipping Improper installation may result in water spillage or injury from the unit tipping over A locat...

Страница 14: ... by rotating them counterclockwise to contact them to the floor Ensure the unit is level 3 Fixing the unit Two fixtures are attached to the rear of the frame Fix the frame to the wall with these fixtures and rope or chain 4 Ground earth The ground earth is for preventing the electric shock in the case of the electrical insulation is somehow degraded Always ground the unit at the time of installati...

Страница 15: ... the alalm buzzer stop key BUZZER for about 5 seconds and confirm the flashing of the alarm lamp and a buzzer sound When it is pushed again an alarm test movement is finished 8 Push the back up test switch and confirm that liquid N2 flows into the freezer 9 Turn off a remote alarm switch and a back up switch when temperature of the sample is high Then turn on these switches under the condition tha...

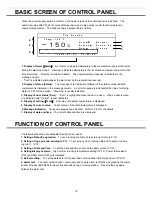
Страница 16: ...e time of warning Refer to P 23 for the details Stand by is usually indicated 3 Display of door status Door Door is highlighted when the door is open When a door is close it is indicated with Closed usual character 4 Display of setting Temp Set value of chamber temperature is displayed 5 Display of current value Current value of chamber temperature is displayed 6 Message indication Various message...

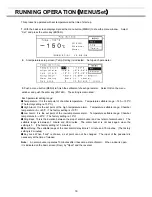
Страница 17: ...mperature settable range Chamber temperature 5 20o C The factory setting is 10o C Low Alarm It is the set point of the low temperature alarm Temperature settable range Chamber temperature 5 20o C The factory setting is 10o C Ring Back This is the duration between the stop of alarm buzzer and next start of alarm buzzer The settable range is between 1 minute and 99 minutes The alarm buzzer is not ba...

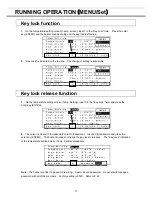
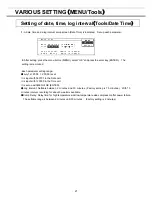
Страница 18: ... key ENTER The buzzer sounds shortly and the key lock is released The Key Lock indication of the temperature setting screen Temp Setting disappears 0 1 0 2 1 1 1 2 1 3 1 4 1 5 1 6 1 7 1 8 1 9 2 0 2 1 2 2 2 3 2 4 2 5 2 6 2 7 2 8 2 9 3 0 3 1 3 2 3 3 3 4 3 5 3 6 3 7 3 8 3 9 4 0 1 T e mp S e t t i n g K e y L o c k 2 T e mp e r a t u r e 1 5 0 o C 1 2 5 o C 1 5 5 o C 3 H i g h A l a r m 1 0 o C 5 o C ...

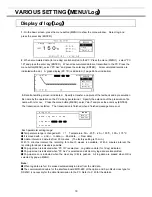
Страница 19: ... 0 9 1 0 1 1 1 2 1 3 1 4 1 5 1 6 1 7 1 8 1 9 2 0 2 1 2 2 2 3 2 4 2 5 2 6 2 7 2 8 2 9 3 0 3 1 3 2 3 3 3 4 3 5 3 6 3 7 3 8 3 9 4 0 1 P r o g r e s s 3 S e n d l o g d a t a t o P C 4 5 L o g D a t e 2 0 0 6 0 7 0 1 6 F i n i s h e d M E N U S t a r t C a n c e l 2006 06 30 Temperature range is changed with Temperature 50 25 o C 25 100 o C 100 175 o C It is moved with and to date Past date New date A...

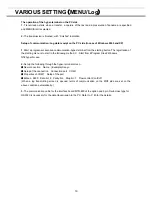
Страница 20: ... starting menu is to start in the following method C Start from Program Files Windows NT hypertrm exe 2 Set up the following through the hyper terminal screen New connection Name Example Sanyo Setup of the connection Connection port COM1 Properties of COM1 Setup of the port Bit sec 9600 Data bit 8 Parity No Stop bit 1 Flow control Xon Xoff When a log transmitting screen is opened terms of communic...

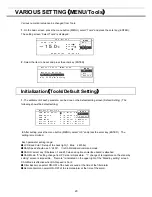
Страница 21: ...ult Setting The following shows the default setting 0 1 0 2 0 3 0 4 0 5 0 6 0 7 0 8 0 9 1 0 1 1 1 2 1 3 1 4 1 5 1 6 1 7 1 8 1 9 2 0 2 1 2 2 2 3 2 4 2 5 2 6 2 7 2 8 2 9 3 0 3 1 3 2 3 3 3 4 3 5 3 6 3 7 3 8 3 9 4 0 1 D e f a u l t S e t t i n g 3 L C D B a c k C o l o r 1 1 B l u e 2 Wh i t e D AQ S p e e d 0 0 2 4 0 0 2 9 6 0 0 4 D AQ I D 0 0 O f f 1 2 5 5 5 D A Q M o d e 0 0 L o c a l 1 R e mo t e ...

Страница 22: ... n 2 1 5 mi n M E N U O K C a n c e l C o m p D e l a y 15 2 After setting press the menu button MENU select OK and press the enter key ENTER The setting is memorized Each parameter setting range July 1st 2006 12 00 00 is set It is input with 060701 in the Date cell It is input with 120000 in the Time cell It is set up with MENU OK ENTER Log Interval Settable between 2 minutes and 30 minutes Facto...

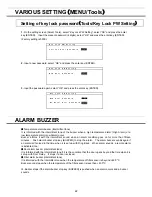
Страница 23: ...2 7 2 8 2 9 3 0 3 1 3 2 3 3 3 4 3 5 3 6 3 7 3 8 3 9 4 0 1 K e y L o c k P W S e t t i n g N e w U s e r P a s s w o r d 4 5 R e E n t e r U s e r P a s s w o r d 6 ALARM BUZZER Temperature alarm buzzer intermittent tone It is informed with the intermittent tone of the buzzer when a high temperature alarm High Alarm or a low temperature alarm Low Alarm occur Buzzer informs it with the intermittent ...

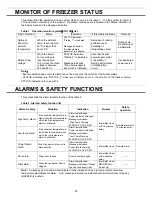
Страница 24: ...ur in the monitor of the freezer status STATUS indicated is to cope with it ALARMS SAFETY FUNCTIONS This product has the alarm safety function of the table 2 Table 2 Alarm safety function list Alarm safety Situation Indication Buzzer Safety operation High temp alarm If the chamber temperature is higher than the temperature at which the high temperature alarm is activated Alarm lamp flashed Temp in...

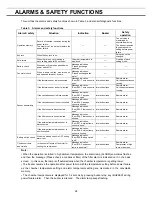
Страница 25: ...s shorted Intermittent tone Remote alarm If the filter sensor is disconnected Message indication Error E05 Filter sensor is open Intermittent tone Remote alarm If the filter sensor is short circuited Message indication Error E06 Filter sensor is shorted Intermittent tone Remote alarm If the ambient temperature sensor is disconnected Message indication Error E07 Ambient temp sensor is open Intermit...

Страница 26: ...and N C At normal Open Close At abnormal Close Open Note The alarm is actuated when the power cord is disconnected from the outlet or the power switch is OFF REMOTE ALARM MAX DC30 V 2 A N C COM N O BACK UP SYSTEM The holding time of chamber temperature due to the change in the ambient temperature MDF C2156VAN 5 10 15 20 25 0 5 10 15 20 25 30 35 Temperature Time h The above data use optional MDF 13...

Страница 27: ...nder with the back up system joint by using the pipeline and the joint attached with this freezer This work should be done by high pressure gas works specialists The pressure of liquid N2 cylinder should be regulated at 0 5 kg cm2 G 2 Operate the freezer until the freezer temperature reaches the required level 3 Set the warning indicator of the recorder at 15o C higher than the freezer temperature...

Страница 28: ...pour water onto or into the unit Doing so can damage the electric insulation and cause failure The compressor and other mechanical parts are completely sealed This unit requires absolutely no lubrication Check the back up system by pressing test switch once a month if it is installed Remove the frost or ice on the chamber wall and clean the condenser filter once a month Cleaning of condenser filte...

Страница 29: ...ther freezer or container which contains liquid N2 or dry ice Switch off the remote alarm and back up system Switch off the power supply 2 Open the door and remove the inner lid Leave the freezer as it is The water remaining in the freezer compartment should be wiped up 3 After cleaning is completed restart the operation according to the procedure Put back the articles into the sufficiently cooled...

Страница 30: ... by a qualified engineer or a service personnel only to prevent the electric shock Removal of lead storage battery 1 Turn off the power switch and disconnect the power supply plug 2 Lift the handle of the side table to the top as shown in the fig 2 and open the door of the side table Remove 6 screws of the battery box cover and remove a battery box cover 3 Remove 4 screws which fix a battery fitti...

Страница 31: ...is not installed correctly The set temperature in the controller is not set properly The grille is blocked out The filter is clogged Clean a filter if an alarm display lamp has a flash and Please check a condenser filter is indicated by you on the basic screen The freezer is in the direct sunlight There is any heating source near the freezer A rubber cap and insulation for the access port are not ...

Страница 32: ...sposal of the unit should be accomplished by appropriate personnel Always remove doors to prevent accidents such as suffocation Recycle of battery 廢電池 請回收 Pb The unit contains a rechargeable battery The battery is recyclable At the end of it s useful life check with you local solid officials option or proper disposal Label indication is obliged to comply with Taiwanese battery regulation 31 ...

Страница 33: ...waste collection recycling centre In the European Union there are separate collection systems for used electrical and electronic products Please help us to conserve the environment we live in German Ihr SANYO Produkt wurde entworfen und hergestellt mit qualitativ hochwertigen Materialien und Komponenten die recycelt und wiederverwendet werden können Dieses Symbol bedeutet daß elektrische und elekt...

Страница 34: ...es de manière inappropriée peuvent s avérer potentiellement dangereuses pour la santé humaine et pour l environnement Cependant ces matières sont nécessaires au bon fonctionnement de votre appareil ou de votre machine Pour cette raison il vous est demandé de ne pas vous débarrasser de votre appareil ou machine usagé avec vos ordures ménagères Spanish Los productos SANYO están diseñados y fabricado...

Страница 35: ...temas de recolha separados para produtos eléctricos e electrónicos usados Por favor ajude nos a conservar o ambiente em que vivemos Italian Il vostro prodotto SANYO è stato costruito da materiali e componenti di alta qualità che sono riutilizzabili o riciclabili Prodotti elettrici ed elettronici portando questo simbolo alla fine dell uso devono essere smaltiti separatamente dai rifiuti casalinghi ...

Страница 36: ... elektronische apparatuur bij de daarvoor wettelijke instanties aangeboden Alstublieft help allen mee om het milieu te beschermen Swedish Din SANYO produkt är designad och tillverkad av material och komponenter med hög kvalitet som kan återvinnas och återanvändas Denna symbol betyder att elektriska och elektroniska produkter efter slutanvändande skall sorteras och lämnas separat från Ditt hushålls...

Страница 37: ...wing shows the installation procedure 36 Screw Panel door Temperature cover Fig 1 Screw The installation method of MTR 155H 1 Remove four screws shown by arrows on the front After that remove a recorder cover 4 screws Fig 2 Temperature recorder fitting Mounting plate Temperature recorder 2 It gains a temperature record by using the fixture accessory of the temperature record and MDF S30150 tempera...

Страница 38: ... have a gap in the recorder sensor hole with a silicone caulking material Fig 5 6 Fix a recorder sensor cover with 2 screws Fig 3 7 The rest of the sensor tubes are to be banded with lead wire fixed part together before the sensor hole Fig 4 After that fix it with 4 screws as the Fig 1 8 Check that setup temperature is the same as chamber temperature of the freezer After that record indication tem...

Страница 39: ... according to the mark of day and time Fig 3 5 When mounting lay down the cartridge first and push into the mounting position with the groove set a the projection on the position 6 Set up the cartridge and settle in position Replacement of cell Replace the dry cell once a year as follows 1 Put up the penholder first then pull out cartridge from the mounted position 2 Reset the battery chamber cove...

Страница 40: ...the pen is completely inserted for accurate recording The pen is packed together with the chart 1 Let down the lever of the penholder then pull out the cartridge from the mounted position 2 Insert a new pen 3 Mount the cartridge into place 4 Lift up the penholder lever and make sure that the pen point touches the chart 39 ...

Страница 41: ... the setup of the TERMINATOR switch of the interface board MTR 480 Fig 3 4 Connect to the connector side the back side of the interface board of a communication cable RS 232C or RS 485 to use for the interface board MTR 480 Fig 5 is a connection example to use RS 232C Fig 4 and 5 5 Fix an interface board MTR 480 on the control panel with 4 screws Fig 6 Fig 1 Fig 2 Fig 3 Fig 4 Fig 5 Fig 6 When a da...

Страница 42: ...arm Low temp alarm Power failure alarm Filter check Remote alarm contact Allowable contact capacity DC 30 V 2 A Battery Lead storage battery DC 6 V 7 2 Ah x 4pcs Auto recharge Accessories 1 set of key 1 scraper 1 set connect tube for back up system Weight 318 kg 325 kg Voltage booster None Built in Optional component Automatic temperature recorder Mounting kit MTR 155H MDF S30150 Liquid N2 gas cyl...

Страница 43: ...C to 150o C ambient temperature 30o C no load Power source 220V 50Hz 220V 60Hz 230V 50Hz 240V 50Hz Rated power consumption 1550 W 1700 W 1550 W 1600 W Noise level 51 dB A background noise 20 dB Maximum pressure 3085 kPa Note Specifications will be subject to change without notice The unit with CE mark complies with EC directives 89 336 EEC 93 68 EEC and 73 23 EEC 42 ...

Страница 44: ...2 Contamination of the unit Unit interior Yes No No contamination Yes No Decontaminated Yes No Contaminated Yes No Others 3 Instructions for safe repair maintenance of the unit a The unit is safe to work on Yes No b There is some danger see below Yes No Procedure to be adhered to in order to reduce safety risk indicated in b below Date Signature Address Division Telephone Product name Model Serial...

Страница 45: ...5 5 Keihan Hondori 2 Chome Moriguchi City Osaka 570 8677 Japan Printed in Japan 7FB6P10144500 01 Sep 2006 Recycled paper ...

Отзывы: