background image

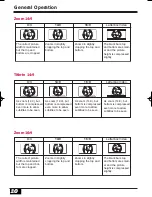
General Operation

11

11

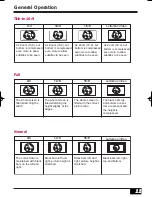
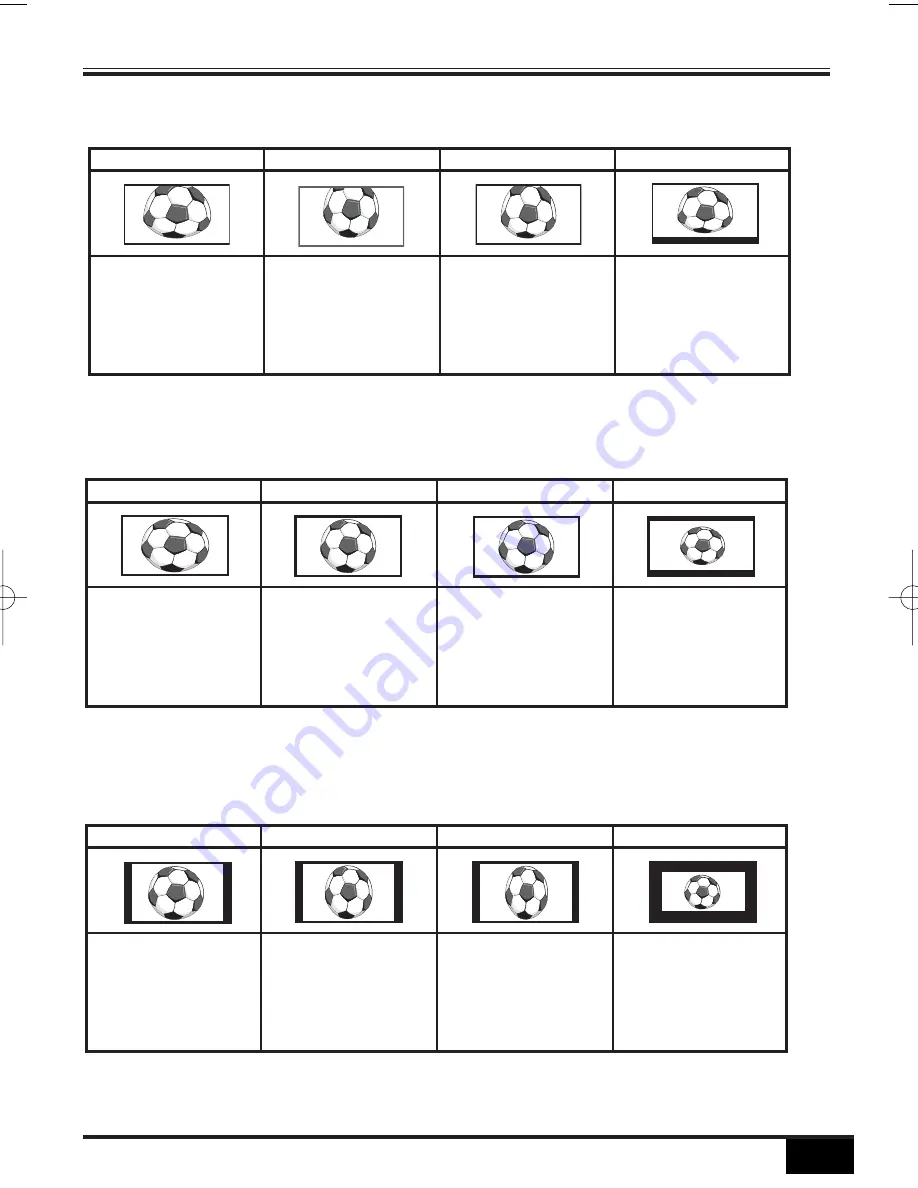
Title-in 16:9

Full

Normal

TITLES ON SCREEN

TITLES ON SCREEN

TITLES ON SCREEN

TITLES ON SCREEN

4:3

14:9

16:9

Letterbox Video

As Zoom (16:9), but
bottom is compressed
even more to allow
subtitles to be seen.

As Zoom (16:9), but
bottom is compressed
even more to allow
subtitles to be seen.

As Zoom (16:9), but
bottom is compressed
even more to allow
subtitles to be seen.

As Zoom (16:9), but
bottom is compressed
even more to allow
subtitles to be seen.

4:3

14:9

16:9

Letterbox Video

The whole screen is
filled stretching the
width.

The whole screen is
filled stretching the
height slightly at the
edges.

The whole screen is
filled with the correct
picture ratio.

The black bars top
and bottom are bot-
tom are present and
the height is 
compressed.


4:3

14:9

16:9

Letterbox Video

The correct ratio is
maintained with black
bars on the left and
right.

Black bars left and
right, picture height is
stretched.

Black bars left and
right, picture height is
stretched.

Black bars left, right,
top and bottom.

Inst. Manual_N2WW(UE2-A)  5/30/05 3:08 PM  Page 11

Содержание LCD-32XA2

Страница 1: ...INSTRUCTION MANUAL LCD Colour Television LCD 27XA2 LCD 32XA2 P Please read this Instruction Manual before using your television We wish you many hours of pleasure from your new television ...

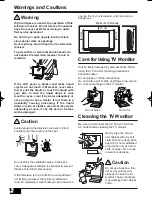
Страница 2: ...h dry soft cloth Screen is likely dam aged if it is not maintained properly Do not use hard cloth or paper Do not use solvents or abrasive Do not use benzene thin ner or any volatile sub stances to clean the TV monitor These chemicals may damaged the cabinet finish Caution Care for Using TV Monitor Screen likely damaged by external shock When using the TV monitor following precautions should be ta...

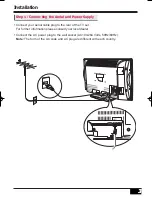
Страница 3: ... Supply Connect your aerial cable plug to the rear of the TV set For further information please consult your local dealer Connect the AC power plug to the wall socket AC100 264 Volts 50Hz 60Hz Note The form of the AC code and AC plug are different with each country ...

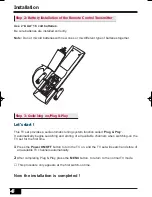
Страница 4: ...TV set provides a self automatic tuning system function called Plug Play It automatically begins searching and storing of all available channels when switching on the TV set for the first time 1 1 Press the Power ON OFF button to turn the TV on and the TV set will search and store of all available TV channels automatically 2 2 After completing Plug Play press the MENU button to return to the norma...

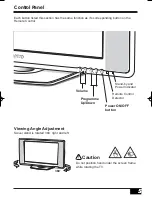
Страница 5: ...rresponding button on the Remote Control Programme Up Down Power ON OFF button Remote Control Detector Stand by and Power Indicator Volume P 360 Do not position hand under the screen frame while rotating the TV Caution Viewing Angle Adjustment Swivel stand is rotated 360 right and left ...

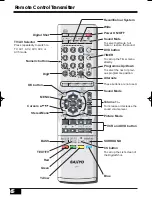
Страница 6: ... ous programme position Digital Shot TIMER DVD button Programme Up Down Sound Mode CS button OK button Cursors These buttons are not used VCR and DVD button To call up the List screen of the Digital Shot To increase or decrease the sound volume level Press repeatedly to switch to TV AV1 AV2 AV3 AV4 or AV5 mode Red Green Yellow Blue To call up the Timer menu directly To select half mute full mute o...

Страница 7: ...the TV set changes to the standby mode within 10 minutes after all broadcasts have ended Lighting of the Stand by and Power Indicator shows that there is a power supply For shut ting off a power supply completely discon nect the power cord from the power outlet Bass Expander On Of Bass Expander On Off f Press the BASS button to get an emphasised bass sound Press the Sound Mode button repeatedly to...

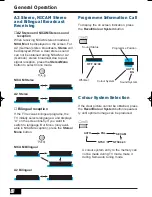
Страница 8: ...eceiving NICAM stereo broadcast NICAM will be displayed on the screen For A2 German stereo broadcasts Stereo will be displayed When a clear stereo sound can not be obtained during NICAM or A2 German stereo broadcast due to poor signal reception press the Stereo Mono button to select mono mode NICAM Stereo A2 Stereo NICAM Bilingual Sound Status Off timer Programme Position Sound System OFF 02 00 Mo...

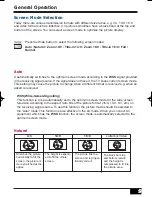
Страница 9: ...h has the WSS function the screen mode is automatically selected to the optimum screen mode Press the Wide button to select the following screen modes Auto Natural Zoom 14 9 Title in 14 9 Zoom 16 9 Title in 16 9 Full Normal General Operation 9 9 Natural Scr Screen Mode Selection een Mode Selection Today there are various transmission formats with different size ratios e g 4 3 14 9 16 9 and video f...

Страница 10: ...9 16 9 Letterbox Video As zoom 14 9 but bottom is compressed even more to allow subtitles to be seen As zoom 14 9 but bottom is compressed even more to allow subtitles to be seen As zoom 14 9 but bottom is compressed even more to allow subtitles to be seen As zoom 14 9 but bottom is compressed even more to allow subtitles to be seen 4 3 14 9 16 9 Letterbox Video The correct picture width is mainta...

Страница 11: ...ut bottom is compressed even more to allow subtitles to be seen 4 3 14 9 16 9 Letterbox Video The whole screen is filled stretching the width The whole screen is filled stretching the height slightly at the edges The whole screen is filled with the correct picture ratio The black bars top and bottom are bot tom are present and the height is compressed 4 3 14 9 16 9 Letterbox Video The correct rati...

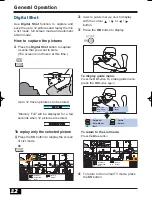
Страница 12: ...ed 1 12 12 12 Memory Full Memory Full No Image 2 2 Select a picture that you want to display with the cursor or button 3 3 Press the OK button to display Delete All Delete Cancel 1 12 4 4 To return to the normal TV mode press the CS button To return to the List mode Press the Blue button CS Delete All Auto Album Exit Delete Select CS OK 1 To replay only the selected picture 1 1 Press the CS button...

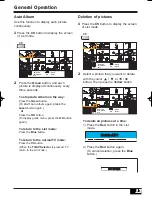
Страница 13: ...st mode Press the Blue button To return to the normal TV mode Press the CS button When the TV AV Selector is pressed TV return to the AV mode CS Delete All Auto Album Exit Delete Select CS OK 1 12 Deletion of pictures 1 1 Press the CS button to display the screen of List mode 2 2 Select a picture that you want to delete with the cursor or button Then press the Yellow button 2 Press the Red button ...

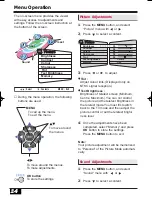
Страница 14: ...Picture Contrast Colour Sharpness Tint Text Brightness Brightness Memory Preset Setting Sound P P Timer To move around the menus Picture Picture Contrast Colour Sharpness Tint Text Brightness 35 36 44 52 Centre OK Memory 32 Brightness 2 2 Press to select a content Tint Adjust colour tints Displayed only on NTSC signal reception Text Brightness Brightness of teletext screen Minimum Centre Maximum Y...

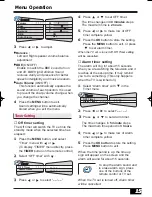
Страница 15: ... the time period is up the time up sign will appear on the screen and the alarm will sound for about 15 seconds Alarm timer setting The alarm will ring for about 15 seconds when you are watching the television and it reaches at the set up time It may remind you to do something This only happens when the TV is switched on Off timer setting The Off timer will switch the TV set into the standby mode ...

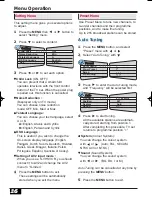
Страница 16: ...m You can change the sound system with or BG DK I or M Auto Tuning can be cancelled at any time by pressing the MENU button 5 5 Press the MENU button to exit This setting menu gives you several options to adjust 4 4 Press to start tuning All the available stations are automati cally stored starting from position 1 After completing this procedure TV set returns to programme position 1 Child Lock ON...

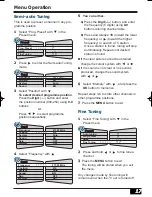
Страница 17: ...mme position sequentially 6 6 Select Memory with and press the OK button to memorize 7 7 Press the MENU button to exit Repeat steps 3 6 to store other channels in other programme positions If the clear picture cannot be obtained change the colour system with or If the sound is not clear or no sound is produced change the sound system with or 1 1 Select Fine Tuning with in the Preset menu 2 2 Press...

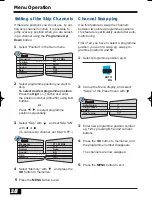
Страница 18: ...numeric buttons Setting of the Skip Channels Setting of the Skip Channels If there are positions you do not use by set ting skip channel function it is possible to jump over any position when you are select ing a channel using the Programme Up Down button 1 1 Select Position in the Semi menu Semi Semi Sound Skip P P System Memory OK OFF BG Auto 007 Position Frequency 271 65 MHz 3 3 Select Skip wit...

Страница 19: ...the Programme Up button on the TV set 3 3 Select desired item with or and set the option with or 4 4 Press the Recall Colour System button to exit Prohibition ON OFF Current volume will be set as the maxi mum volume and channel tuning is prohibited Start Position Setting of the start up programme position when the TV is turned on OFF Last programme position start P1 Programme position 1 start P2 P...

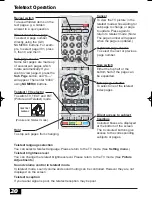
Страница 20: ...g a hidden answer to a quiz question Direct access to a page To select a page number directly using the 0 9 NUMERIC buttons For exam ple to select page 301 press 3 then 0 and then 1 Hold To stop sub pages from changing Teletext language selection You can select a teletext language Please return to the TV mode See Setting menu Teletext brightness level You can change the teletext brightness level P...

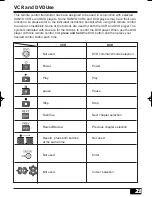
Страница 21: ...he buttons are used for both the VCR and DVD player The symbols indicated with blue are for the buttons to control the DVD player When use the DVD player with this remote control first press and hold the DVD button and then press your desired control button each time VCR DVD Not used DVD command mode selection Power Power Play Play pause Pause Stop Stop Fast Cue Next chapter selection Rewind Revie...

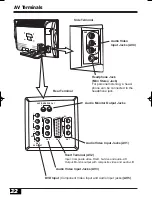
Страница 22: ...deo Input and Audio Input jacks AV5 Headphone Jack Mini Stereo Jack For personal listening a head phone can be connected to the headphone jack Audio Monitor Output Jacks Audio Video Input Jacks AV1 Scart Terminal AV2 Input Composite video RGB S video and audio L R Output Monitor output with composite video and audio L R Audio Video Input Jacks AV3 Side Terminal Rear Terminal ...

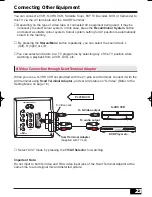
Страница 23: ...me by selecting any of the TV position while watching a playback from a VCR DVD etc Select AV2 mode by pressing the TV AV Selector for watching S Video Connection through Scart Terminal Adaptor AV1 AV2 AV3 AUDIO MONITOR OUT L R AV5 Y CB CR AUDIO L R L R VIDEO L R DVD INPUT DVD R AUDIO L MONO VIDEO S VIDEO When you use a S VHS VCR not provided with the 21 pins scart terminal connect it with the AV2...

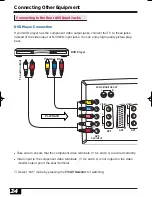
Страница 24: ...t jacks connect the TV to these jacks instead of the video input or S VIDEO input jacks You can enjoy high quality picture play back Take care to ensure that the component video terminals Y CB and CR are wired correctly Video input to the component video terminals Y CB and CR is not output on the video monitor output pin of the scart terminal To audio output Y CR CB Y CR CB PLAYBACK Select AV5 mod...

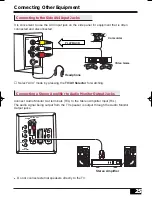
Страница 25: ... Connecting a Stereo Amplifier to Audio Monitor Output Jacks Select AV4 mode by pressing the TV AV Selector for watching AV1 AV2 AV3 AUDIO MONITOR OUT L R AV5 Y CB CR AUDIO L R L R VIDEO L R VIDEO DVD INPUT Stereo Amplifier Do not connect external speakers directly to the TV Connect Audio Monitor Out terminals R L to the Stereo Amplifier Input R L The audio signal being output from the TV speaker ...

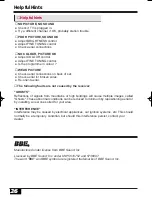
Страница 26: ...llowing faults are not caused by the receiver GHOSTS Reflections of signals from mountains or high buildings will cause multiple images called Ghosts These abnormal conditions can be reduced to minimum by repositioning aerial or by installing a new one suited for your area INTERFERENCE Interference may be caused by electrical appliances car ignition systems etc This should normally be a temporary ...

Страница 27: ... Horiz 176 Vert 176 Contrast Ratio 1000 1 Brightness 550 cd m2 Audio Output RMS 10W 10W Speaker 6 cm x 12 cm x 2 pcs AV Terminals AV1 Video Composite video RCA Jack x 1 Audio L R Stereo Input RCA Jack x 1 set AV2 CENELEC Standard Scart Terminal Input Composite video RGB S video and audio L R Output Monitor output with composite video and audio L R AV3 Video Composite video RCA Jack x 1 Audio L R S...

Страница 28: ... No 1AA6P1P4901 N2WW UE2 A Specifications Dimensions 210 436 476 800 599 338 377 233 109 153 Model LCD 27XA2 Model LCD 32XA2 Specification subject to change without notice 377 245 506 545 922 711 401 233 115 153 Unit mm Unit mm ...

Отзывы: