English
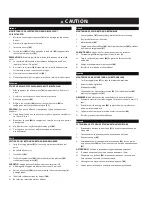
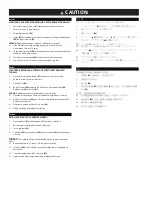
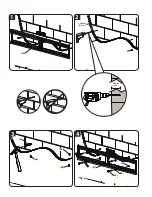
SOLID CONCRETE AND CONCRETE BLOCK MOUNTING
1.
Level the wall plate
[01
]
and mark the hole locations.
2.
Drill pilot holes as illustrated.
3
.
Insert anchors
[06]
.
4.
Tighten the lag bolts
[04]
only until the washers
[05]
are pulled against
the wall plate
[01].
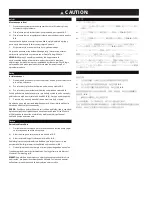
CAUTION:
Avoid potential injuries or property damage!
!
Any material covering the wall must not exceed 16 mm (5/8 in.).
!
Be sure the anchors
[06]
seat
fl
ush with solid concrete or concrete
block.
!
Do not over-tighten the lag bolts
[04]
.
!
Never drill into the mortar between blocks
.
Français
MONTAGE SUR BÉTON PLEIN OU SUR BLOC DE BÉTON PLEIN
1.
Mettez la plaque murale
[01]
à
niveau et marquez les emplacements
des trous.
2.
Percez des avant-trous tel qu’illustré.
3
.
Insérez ancres
[06]
.
4.
Serrez les tire-fond
[04]
uniquement jusqu’
à
ce que les rondelles
[05]
soient appuyées contre la plaque murale
[01]
.
ATTENTION:
Évitez de possibles blessures corporelles ou dommages
matériels!
!
Tout matériel couvrant le mur ne doit pas excéder 16 mm.
!
Assurez-vous que les ancrages
[06]
ne dépassent pas de la surface en
béton coulé ou en blocs de béton.
!
Ne pas trop serrer les boulons tire-fond
[04]
.
!
Ne jamais percer dans le mortier entre les blocs.
Deutsch
MONTAGE AN EINER WAND AUS MASSIVBETON ODER BETONSTEINEN
1.
Richten Sie die Wandplatte
[01]
aus
,
und markieren Sie die Stellen für
die Bohrl
ö
cher.
2.
Bohren Sie Vorbohrungen wie in der Abbildung dargestellt.
3
.
Legen Sie Anker
[06]
.
4.
Ziehen Sie die Ankerschrauben
[04]
nur so weit an
,
bis die
Unterlegscheiben
[05]
fest an der Wandplatte
[01]
anliegen.
VORSICHT:
Vermeiden Sie Verletzungen und Sachschäden!
!
Jegliches Material
,
das die Decke bedeckt
,
darf 16 mm nicht
überschreiten.
!
Stellen Sie sicher
,
dass die Dübel
[06]
bündig mit der Trockenbauwand
bzw. der Wand aus Massivbeton abschlieβen.
!
Ziehen Sie die Ankerschrauben
[04]
nicht zu fest an.
!
Bohren Sie niemals in den M
ö
rtel zwischen Steinen.
CAUTION:
3-2
10 mm
3
/8 in.
1
3
mm
1/2 in.
?
Español
MONTAJE EN BLOQUES DE HORMIGÓN U HORMIGÓN SIMPLE
1.
Nivele la placa mural
[01]
y marque la ubicación de los orifi cios.
2.
Realice los orifi cios como se indica en la ilustración.
3
.
Inserte los anclajes
[06]
.
4.
Apriete los pernos
[04]
sólo hasta que las arandelas
[05]
hagan tope
contra la placa para la pared
[01]
.
PRECAUCIÓN:
Evite posibles lesiones o da
ñ
os materiales!
!
Cualquier material que recubra la pared no debe superar los 16 mm
(5/8 pulg.)
!
Si instala el producto sobre concreto sólido o bloques de concreto
,
cerciórese de que los anclajes
[06]
estén nivelados con dicha
superfi cie.
!
No apriete excesivamente los pernos
[04]
.
!
Nunca taladre sobre el cemento entre los bloques.
Português
BETÃO ARMADO E ESTRUTURA DE BLOCOS DE BETÃO
1.
Nivele a placa de parede
[01]
e marque os locais dos orif
í
cios.
2.
Perfure orif
í
cios guia conforme mostra a ilustração.
3
.
Â
ncoras de Inserção
[06]
.
4.
Apertar os parafusos sextavados
[04]
apenas até que as anilhas
[05]
sejam encostadas
à
placa de parede
[01]
.
ATENÇÃO:
Evite potenciais danos f
í
sicos ou materiais!
!
Qualquer material que cubra a parede não deve exceder os 16 mm
(5/8 pol.).
!
Verifi que se as
â
ncoras
[06]
estão niveladas com o concreto sólido ou
com o bloco de concreto.
!
Não apertar os parafusos sextavados em excesso
[04]
.
!
Nunca perfure na argamassa entre os blocos.
Nederlands
BEVESTIGING IN MASSIEVE BETON OF IN BETONBLOKKEN
1.
Plaats de wandplaat
[01]
en markeer de locaties van de gaten.
2.
Boor de montagegaten zoals in de illustratie wordt getoond.
3
.
Invoegen ankers
[06]
.
4.
Draai de schroeven
[04]
slechts aan totdat de ringen
[05]
tegen de
muurplaat worden geduwd
[01]
.
LET OP:
Voorkom mogelijk letsel of apparatuurschade!
!
Materiaal op de muur mag niet dikker zijn dan 16 mm.
!
Zorg ervoor dat de ankers
[06]
gelijk zijn aan met het massief beton of
betonblok.
!
Draai de schroeven niet te strak aan
[04]
.
!
Boor nooit in het cement tussen blokken.
Содержание SECURA QXL12
Страница 9: ......
Страница 13: ...Option 1 5 Tilt Option 2 No Tilt 0 02 03 S S S S 02 03 02 03 02 03 1 1 2 2 ...
Страница 17: ......
Страница 18: ...2 1 07 09 14 17 17 18 18 02 03 M5 M4 M6 M8 11 or 12 ...
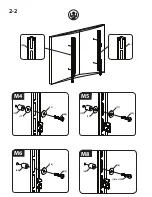
Страница 19: ...2 2 17 18 18 17 17 17 19 20 20 19 08 13 10 03 02 M5 M4 M6 M8 15 or 16 ...
Страница 23: ...1 01 2 16 mm 5 8 in 3 05 01 04 4 75 mm 3 in 406 609 mm 16 24 in ...
Страница 27: ...1 01 2 16 mm 5 8 in 3 05 06 06 06 01 04 4 75 mm 3 in 06 06 ...


