09
GB
F
E
NL
D
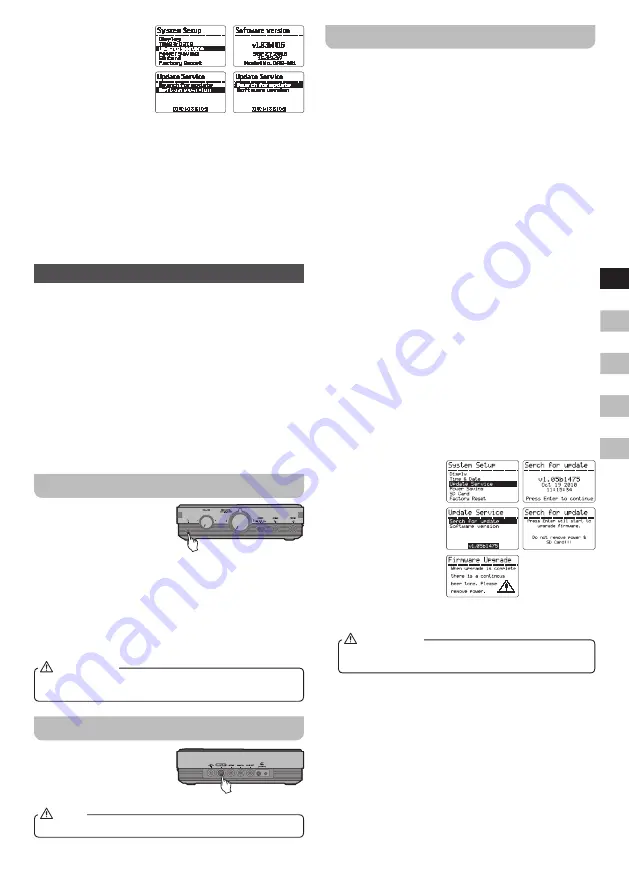
2.
Rotate the Tuning
control to highlight
SYSTEM SETUP,
and press the Enter
button. Rotate the
Tuning control to
highlight UPDATE
SERVICE, and press
the Enter button to enter the setting.
3.
Rotate the Tuning control again to highlight
SOFTWARE VERSION, and press the Enter button to
view the software version of your recorder.
4.
To update your software version from the connected
storage device, choose SEARCH FOR UPDATE and
press the Enter button.
The recorder will update its software to the version in your
storage device. The display will show the files found in
your storage device for update.
System reset
If your recorder fails to operate correctly, or some digits
on the display are missing or incomplete, carry out the
following procedure.
1.
Switch on your recorder, and press the Menu button to
enter the main menu.
2.
Rotate the Tuning control until SYSTEM SETUP is
shown on the display, and press the Enter button to
enter the setting.
3.
Rotate the Tuning control to highlight FACTORY
RESET, and pressthe Enter button to enter the setting.
Choose YES by rotating the Tuning control and press
the Enter button. The setting of your recorder will be
reset to the default value.
Headphone socket
A 3.5mm headphone socket
located on the left hand
side on the front of your
recorder is provided for use
with either headphones or
Earphone.
Inserting a plug automatically mutes the internal speaker.
Please be aware that the sensitivity of headphones can
vary widely. We therefore recommend setting volume to
a low level before connecting headphones to the unit.
It is also recommended to reduce the volume before
unplugging your headphones.
Excessive sound pressure from earphones and
headphones can cause hearing loss.
IMPORTANT
Digital output
The system can be used as
a separate external device
by connecting this output to
Hi-Fi amplify system which
equips with a digital input.
digital output is disabled while recording.
NOTE
Software upgrade
Things to do before performing software upgrade:
● Make sure connect with power supply or insert
batteries with the amount of power remaining for proper
operation during software upgrade.
● Disable all setup (including Sleep, Alarm and Timer
Record setup) to prevent activation during software
upgrade, which in turn may cause software upgrade
failure.
● If software upgrade failure occurs, upgrade cannot
be performed anymore. It is necessary to send
back to Sangean Service department for repair.
Before returning the repaired unit, please contact:
[email protected] for detailed return instruction.
Please note that free repair service or free of charge
replacement do not cover issues regarding software
upgrade failure.
Following the procedures below:
1.
Download upgrade files / firmware (DAR-101.rat) from
the link below: http://www.sangean.com Extract files of
‘nemo.bin’ and ‘Boot.sei’ and copy these files into SD
card.
2.
Connect power supply or insert batteries. To prevent
from power failure, you can connect both main power
adaptor and insert batteries.
3.
Insert SD card to your DAR-101.
4.
Press the Power button to turn on the radio.
5.
Rotate the Volume control to adjust the volume to an
appropriate level, so that you can hear the beep tone
when software upgrade complete.
6.
P r e s s t h e M e n u
b u t t o n > e n t e r
‘ S y s t e m S e t u p ’
> e n t e r ‘ U p d a t e
S e r v i c e ’ > e n t e r
‘Search for update’
> press the Enter
button to proceed
upgrade procedure.
At the start of the
upgrade you hear 5
short beep tones. For
approx. 1 minute, the upgrade procedure completes
followed by a long beep tone.
Do not press any buttons or turn off the unit while
upgrading.
IMPORTANT
7.
Unplug the power adaptor or remove the batteries.
8.
Remove the SD card from the unit and use PC to
delete the upgrade files on the SD card to prevent files
interference with other upgrade firmware which may
cause damage of the unit.


