background image

Random Playback

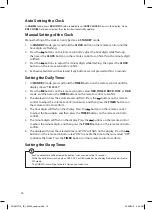
All the tracks on the disc can be played in a random order.
•  During playback, press the SHUFFLE button on the remote control. “SHUFFLE” will 

show on the display.

•  Tap the 

   icons on the unit or press the     buttons on the remote control to 

play the next random track.

•  After all the tracks have been played once, playback will stop automatically.
•  To cancel random playback, press the SHUFFLE button on the remote control during 

SHUFFLE playback. Normal playback will resume.

Repeat Playback

1.  Press the REPEAT button once on the remote control, “RPT ONE” will show on the 

display. The unit will play the current track repeatedly.

2.  Press the REPEAT button again, “RPT ALL“ will show on the display. The unit will play all 

tracks repeatedly.

3.  Press the REPEAT button again, “RPT OFF“ will show on the display. The REPEAT 

function will be cancelled.

Programme Setting

The user can programme up to 30 tracks in CD mode in any desired order. Programme 

mode is activated while in STOP mode (programming only available on Audio CD).
1.  Tap the PROG icon on the unit or press the PROG button on the remote control to 

enter MEMORY mode.

2.  Tap the 

   icons on the unit or press the     buttons on the remote control to 

select the track that you want to preset. Tap the PROG icon on the unit or press the 

PROG button on the remote control to confirm.

3.  Repeat steps 1-2 to programme more tracks.
4.  Tap the 

 icon on the unit or press the   button on the remote control to playback 

programme tracks. The unit will play the first track of the programme.

Programme Cancel

Tap and hold the   icon on the unit or press and hold the   button on the remote control, 

or open the CD tray and close it again to erase the memory.

During Programme Mode
•  Press the REPEAT button once on the remote control, “RPT ONE” will show on the display. The CD will 

play the current track repeatedly.

•  Press the REPEAT button twice, “RPT ALL“ will show on the display. The CD will play all tracks 

repeatedly.

•  Press the REPEAT button once more again, “RPT OFF“ will show on the display. The REPEAT function 

will be cancelled.

25

SDABTIP12_IB_130624_candice.indd   25

24/06/2013   2:43 PM

Содержание SDABTIP12

Страница 1: ...iPod and iPhone are not included Instruction Manual Wireless DAB Hi Fi with a 30 pin dock for iPad iPhone and iPod SDABTIP12 SDABTIP12_IB_130624_candice indd 1 24 06 2013 2 43 PM...

Страница 2: ...SDABTIP12_IB_130624_candice indd 2 24 06 2013 2 43 PM...

Страница 3: ...ce 14 General Operation 15 Powering ON OFF 15 Selecting Modes 15 Adjusting the Volume 15 Adjusting the Sound Effect 15 Adjusting the Bass 15 Adjusting the Brightness 15 Time Display 15 Auto Setting th...

Страница 4: ...top Playback 24 Skipping to Another Track 24 Random Playback 25 Repeat Playback 25 Programme Setting 25 Programme Cancel 25 iPod iPhone iPad Operation 26 Docking the iPhone iPod and Selecting iPhone i...

Страница 5: ...he holes slots or any other openings in the case this could result in a fatal electric shock Read all the instructions carefully before using the unit and keep them for future reference Retain the man...

Страница 6: ...operating and maintenance servicing instructions in the manual accompanying the unit Service To reduce the risk of electric shock do not remove screws The unit does not contain any user serviceable p...

Страница 7: ...his instruction manual in order that you fully understand all the operational features offered You will also find some hints and tips to help you resolve any issues Read all the safety instructions ca...

Страница 8: ...lue when the unit is ON Rear View 1 2 3 4 R DAB L AC ON OFF R L SPEAKER OUT AUX 1 SPEAKER OUT Sockets 2 DAB Aerial Socket 3 AUX IN Sockets 1 4 3 2 5 2 CD Tray 3 Remote Sensor Receives signals from the...

Страница 9: ...arches for a radio station going backwards forwards through accessible radio frequencies 8 Icon Stops playback 9 Icon Skips backwards to the beginning of the track or to the previous track Allows fast...

Страница 10: ...elects bass level 10 PAIR Button Plays pauses resumes playback Pairs with Bluetooth device 11 Button Stops playback 12 VOLUME Buttons Increases or decreases the volume 13 MENU Button Displays menu scr...

Страница 11: ...CK or Bluetooth mode 25 AUX Button Selects AUX mode 26 CLOCK Button Displays the time 27 SLEEP Button Selects a sleep timer 28 TIMER Button Sets up an alarm timer 29 INTRO SCAN Button Plays soundtrack...

Страница 12: ...andling the Remote Control Do not drop the remote control Do not allow anything to impact the remote control Do not spill water or any liquid on the remote control Do not place the remote control on a...

Страница 13: ...not included to connect an auxiliary equipment to the main unit s AUX IN sockets Connecting the Aerial Connect one end of the aerial cable included to the DAB socket at the rear of the unit Then posit...

Страница 14: ...ocket Playing MP3 s from a USB Device When a USB device is connected to the unit tap the icon repeatedly on the unit or press the USB button on the remote control to select the USB mode The unit can o...

Страница 15: ...the desired mode If there is no signal under the USB DOCK Bluetooth AUX and DISC mode the unit will automatically switch off within 15 minutes Please turn the unit off completely to save energy when n...

Страница 16: ...press the TIMER buttons on the remote control to confirm 3 The display will show the volume level and flash Press the buttons on the remote control to adjust the volume to Vol 8 minimum and then pres...

Страница 17: ...lay System Reset There may be times when you need to reset your unit back to the factory settings especially when you have moved house If you experience reception problems you may want to reset and tr...

Страница 18: ...primary station e g a sports station may want to add extra commentaries The secondary services are inserted directly after the primary station in the station list To select the secondary station press...

Страница 19: ...tations will be saved into the memory and power off will not erase it Storing a new station in a preset location will erase the previously stored station in that location DAB Display Modes Every time...

Страница 20: ...ion of radio stations that are bundled and transmitted on one frequency There are national and local multiplexes Local ones contain stations that are specific to that area Frequency The frequency of t...

Страница 21: ...on with a very weak signal Searching for a Station Manually In TUNER mode repeatedly press the TU buttons on the remote control until the desired frequency reception quality is found With FM radio it...

Страница 22: ...the PRESET buttons to select your desired station preset number 3 Press the PROG button to confirm your station the display will show STORE You can auto store the first 20 DAB stations that found pres...

Страница 23: ...ion signal Example News Rock Classical music Audio Mode When in FM mode the display will show if the station being received is in mono or stereo Time and Date The RDS CLOCK system may not properly ope...

Страница 24: ...or press the button on the remote control again To Stop Playback Tap the icon on the unit or press the button on the remote control to stop playback Skipping to Another Track Tap the icons on the uni...

Страница 25: ...ted while in STOP mode programming only available on Audio CD 1 Tap the PROG icon on the unit or press the PROG button on the remote control to enter MEMORY mode 2 Tap the icons on the unit or press t...

Страница 26: ...Pad dock 3 If the iPod iPhone iPad is connected the iPOD indicator will show on the display it will take around 10 seconds for the unit to identify the iPod iPhone iPad 4 Tap the icon on the unit or p...

Страница 27: ...enter the iPod iPhone iPad MENU mode 2 Press the buttons on the remote control to navigate in the iPod iPhone iPad menu 3 Press the ENTER button on the remote control to confirm selection 4 Press the...

Страница 28: ...king cover 2 While in the ON mode tap the icon repeatedly on the unit or press the USB button on the remote control to select USB mode 3 Connect a USB device to USB port directly or with a USB cable n...

Страница 29: ...UX IN L R sockets via a RCA stereo audio cable not included 2 While in the ON mode tap the icon repeatedly on the unit or press the AUX button on the remote control to select AUX mode 3 Turn the VOLUM...

Страница 30: ...re outwards with a soft cloth Always keep the disc clean If you cannot wipe off the dust with a cloth wipe the disc lightly with a slightly moistened cloth and finish with a dry cloth Do not use any t...

Страница 31: ...abel side facing up Clean the disc PAUSE mode may be activated deactivate it A non valid disc has been inserted Condensation may have formed inside the unit due to a sudden change in temperature Wait...

Страница 32: ...ck DOCK mode is selected Reinsert iPod iPhone iPad USB Unable to insert USB device Insert the USB device the other way round Cannot play some files from USB device Some USB devices may not be compatib...

Страница 33: ...t x 1 Frequency Range FM 87 5 108 MHz DAB 174 240MHz Power Supply Power Consumption AC 220 240V 50Hz 35W Output Speaker Power 50W x 2 Net Weight 7 5kg Dimensions Unit Speaker 305mm W x 205mm D x 80mm...

Страница 34: ...SDABTIP12_IB_130624_candice indd 34 24 06 2013 2 43 PM...

Страница 35: ...note that the use of this accessory with iPod iPhone or iPad may affect wireless performance iPod iPhone and iPad are trademarks of Apple Inc registered in the U S and other countries Visit Partmaster...

Страница 36: ...DSG Retail Ltd co no 504877 Maylands Avenue Hemel Hempstead Herts HP2 7TG UK IB SDABTIP12 130624V4 SDABTIP12_IB_130624_candice indd 36 24 06 2013 2 43 PM...

Отзывы: