


Operating Instructions
Samsung Electronics
4-9
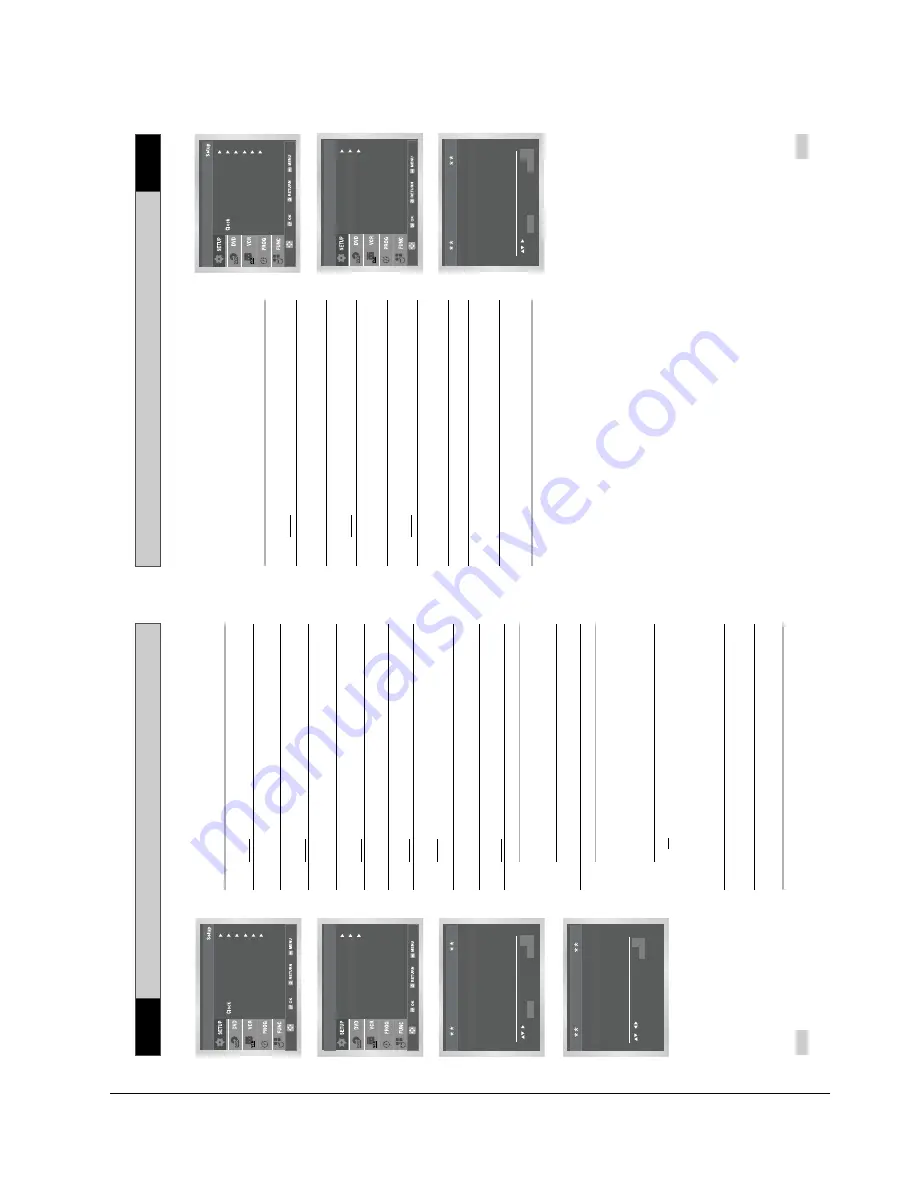
Clearing a Pr
eset Station
Pr
esetting the Stations Manually
23
If you have stored a TV station:
◆
That you do not require
◆
At the wrong programme position
you can cancel it.
1
After pressing the MENU, press the OK or
.
Result
:
The Setup menu is displayed.
2
Press the corresponding
,
buttons to select the
Install
option.
3
Press the OK or
to select this option.
Result
:T
he
Install
menu is displayed.
4
Press the corresponding
or
buttons, until the
Manual
Setup
option is selected.
5
Press the OK or
to select a
Manual Setup
option.
Result
:T
he
TV STATION TABLE
menu is displayed.
6
Press the corresponding
or
buttons, until the required preset
TV station (PR) is selected.
7
Press the CLEAR button.
8
Repeat the same procedure from Step
6
onwards until all the
required stations have been cleared.
9
On completion, press the RETURN button four times to exit the
menu.
☛
You do not need to preset the stations manually if you
have already set them automatically.
1
After pressing the MENU, press the OK or
.
Result
:
The Setup menu is displayed.
2
Press the corresponding
,
buttons to select the
Install
option.
3
Press the OK or
to select this option.
Result
:T
he
Install
menu is displayed.
4
Press the corresponding
or
buttons, until the
Manual
Setup
option is selected.
5
Press the OK or
to select a
Manual Setup
option.
Result
:T
h
e
TV STATION TABLE
menu is displayed.
6
Press the
or
buttons to select a programme number as
required.
7
Press the
button to preset the station.
Result
:T
h
e
MANUAL TUNING
menu is displayed.
8
Press the
¥
or
buttons to start scanning channel.
Result
:T
he frequency band is scanned and the first station
found is displayed.
9
Press the
or
buttons until the
NAME
is selected.
The station name is set automatically from the broadcast signal.
10
To change the programme’s name, press the
button.
Result
:
The first letter of the name flashes.
11
To...
Then...
Select a character
Press the
or
button until the
in the name
required character is displayed
(letters, numbers or “-” character).
Move to the next or
Press the
or
¥
buttons
previous character
respectively.
12
If you...
Then...
Wish to store the
◆
Press the corresponding
or
buttons,
station displayed
until the
MFT
is selected.
◆
Press the
¥
or
buttons to adjust the
picture, if necessary.
◆
Press OK to store the station
Do not
wish to
◆
Press the corresponding
or
buttons,
store the station
until the
CH
is selected.
displayed
◆
Press the
¥
or
buttons to go on
scanning the frequency band and display
the next station
◆
Go back to the beginning of Step
12
13
Repeat this procedure from Step
6
onwards, until all the required
stations have been stored.
14
On completion, press the RETURN button four times to exit the
menu.
22
VCR
VCR
Auto Setup
Manual Setup
Install
VCR Output CH : CH 60
Language : English
Use
r
Set
Auto
Power
Off :
Off
Screen
Messages :
On
Install
MANUAL
TUNING
PR :
CH : - - -
MFT : -
DECODER : OFF
NAME : - - - -
MEMOR
Y
: OK
RETURN
TV ST
A
TION T
ABLE
PR CH NAME DEC
1
2
3
4
5
SW
APPING : OK
DELETE : CLEAR
RETURN
Language : English
Use
r
Set
Auto
Power
Off :
Off
Screen
Messages :
On
Install
Auto Setup
Manual Setup
Install
VCR Output CH : CH 60
PR CH NAME DEC
1 21
2
3
4
5
TV ST
A
TION T
ABLE
SW
APPING : OK
DELETE : CLEAR
RETURN
Содержание SV-DVD50
Страница 26: ...Exploded View and Parts List 3 10 Samsung Electronics MEMO ...
Страница 88: ...VCR Deck Operating Description 8 12 Samsung Electronics Fig 8 14 Mecha Timing Chart ...
Страница 102: ...VCR Deck Operating Description 8 26 Samsung Electronics MEMO ...
Страница 109: ...Circuit Operating Descriptions 7 7 Fig 7 12 Block Diagram ...
Страница 143: ...Circuit Operating Descriptions 7 41 3 Block Diagram Fig 7 38 LA70100M Block Diagram ...
Страница 158: ...Block Diagram 10 2 Samsung Electronics MEMO ...
Страница 159: ...Samsung Electronics 11 1 11 Wiring Diagram ...
Страница 160: ...Block Diagram 11 2 Samsung Electronics MEMO ...
Страница 162: ...Schematic Diagrams 12 2 Samsung Electronics 6 1 S M P S ...
Страница 163: ...Schematic Diagrams Samsung Electronics 12 3 6 2 Power Drive ...
Страница 164: ...Schematic Diagrams 12 4 Samsung Electronics DT701 6 3 Display Function ...
Страница 165: ...Schematic Diagrams Samsung Electronics 12 5 6 4 System Control Servo ...
Страница 166: ...Schematic Diagrams 12 6 Samsung Electronics 6 5 A V ...
Страница 167: ...Schematic Diagrams Samsung Electronics 12 7 6 6 Hi Fi ...
Страница 168: ...Schematic Diagrams 12 8 Samsung Electronics 6 7 A2 NICAM ...
Страница 169: ...Schematic Diagrams Samsung Electronics 12 9 6 8 SECAM Option ...
Страница 170: ...Schematic Diagrams 12 10 Samsung Electronics 6 9 OSD VPS PDC ...
Страница 171: ...Schematic Diagrams Samsung Electronics 12 11 6 10 TM ...
Страница 172: ...Schematic Diagrams 12 12 Samsung Electronics 6 11 Input Output ...
Страница 173: ...Schematic Diagrams Samsung Electronics 12 13 6 12 DVD AV Decoder ...
Страница 174: ...Schematic Diagrams 12 14 Samsung Electronics 6 13 DVD Servo ...
Страница 175: ...Schematic Diagrams Samsung Electronics 12 15 6 14 DVD Audio Video ...
Страница 176: ...Schematic Diagrams 12 16 Samsung Electronics MEMO ...


