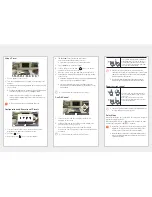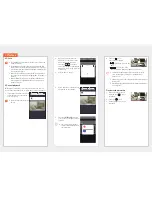
Using a Preset
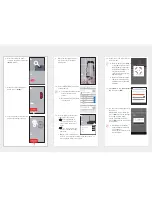
1.
Press a number on the screen.
2.
Turn the camera direction to an angle corresponding to the
number.
3.
Activating auto tracking automatically tracks objects moving
on the screen.
During auto tracking operation, motion/audio detection is automatically
canceled and motion detection for auto tracking is activated.
If there is no movement for a certain period of time during auto
tracking operation, it automatically returns to the position where auto
tracking started.
J
This function is only supported in SmartCam A1 models.
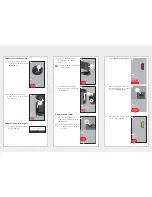
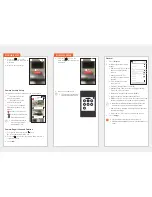
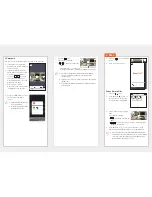
Configuration and Execution of Presets
1.
To move to the desired screen, press the move screen
direction key to adjust the camera’s direction.
2.
Push the [
] icon.
3.
Select the home [
] icon, or a preset number.
4.
Tab <
Confirm
> after entering the preset name.
Save the currently visible position as a preset.
Preset names can consist of up to 12 letters and numbers.
5.
Press <
Cancel
> to cancel the change.
6.
To run a preset, press the Home [
] icon or the preset
number at the bottom of the screen.
7.
Move the camera to the specified Home/Preset position.
8.
Activating auto tracking automatically tracks objects moving
on the screen.
During auto tracking, motion/audio detection is automatically canceled
and motion detection for auto tracking is activated.
If there is no movement for a certain period of time during auto
tracking operation, it automatically returns to the position where auto
tracking started.
M
This is a function that is only supported in PT models.
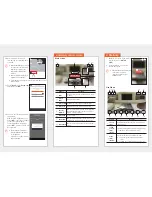
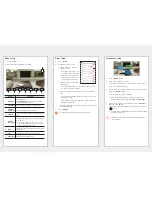
Pan/Tilt Control
1.
Touch the screen, and the Pan/Tilt Control button is
displayed on the screen.
2.
Touch the direction button and the camera performs the
Pan/Tilt operation once per touch.
3.
Press and hold the direction button and the camera
performs the Pan/Tilt operation continuously until the button
is released.
M
This is a function that is only supported in PT models.
You can perform Pan/Tilt operation by dragging up/
down/left/right on the screen. As the camera does
not recognize the diagonal direction, it is designed
to move in a more adjacent direction between the
vertical and the horizontal direction.
M
Pan/tilt control result requires time for processing, since the
command needs to reach the camera device and be executed by the
camera. Video data size grows as the size of the move data grows,
which may result in delayed display.
In an unstable network environment, using pan/tilt control by
lowering the video resolution may help to reduce such delays.
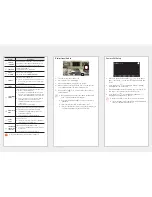
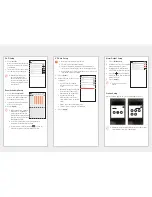
Zoom function control
You can also zoom in by stretching the image on
the screen using two fingers. To zoom out, pinch
on the screen.
Drag on the screen in any direction to reveal
hidden parts of the image that could not seen due
to the screen magnification.
M
The zoom magnification ratio is displayed in the Digital Zoom Box of
the upper right screen. Up to 4 is supported.
Relay Mode
When the network is poor or unstable, the function to monitor is
provided using Relay Mode.
When Relay Mode works, a [
] indication is shown on video,
and the video playback is limited to 7 minutes.
J
When UPnP of the router is not set, the connection may operate in
Relay Mode. The setup method may different depending on the
router model used. Please refer to the router user manual.
When the camera is connected to a duplicately installed router or
when the wired/wireless network is unstable, the connection may
operate in Relay Mode.
1
2
3
Auto Tracking
1
2
3
Auto Tracking
OK
Cancel
Camera direction will be saved.
1
2
3
1
2
3
4
5
6
7
8
Auto Tracking


