background image

COLOR DOME CAMERA

User’s Manual

30

COLOR DOME CAMERA

User’s Manual

31

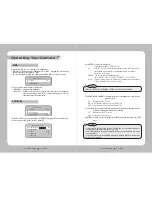
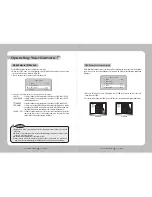
Select a desired EXIT mode using the Function Setup switch.
- SAVE : Save the current settings and exit the MAIN SETUP menu.
- NOT SAVE : Do not save the current settings and exit the MAIN SETUP menu.
- RESET :  Resets the camera settings to the factory defaults. Language and Monitor settings are not 

initialized.

EXIT

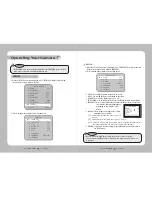
   COMM ADJ (Communication Adjustment) : 

This function sets up the camera communication status when controlling the camera 
through an external control device.

   1) 

 When the SPECIAL menu screen is displayed, press the 

Function Setup switch so that the arrow indicates 
‘COMM ADJ’.

… …

 2) 

 Set up the mode using the Function Setup witch.


- CAM ID :  Determines the camera's identification 

number (between 0 and 255).


- BAUD RATE :  You can select 2400/4800/9600/19200/

38400/57600 bps.


- UART MODE :  You can select NONE, EVEN or ODD for 

the parity bits.


- RET PKT :   Determines whether to send a command back to the controller device when a 

communication control command is sent to the camera.


- DISP CAM ID :  Display camera title on top left corner of the screen.


- Protocol :  Select the communication PROTOCOL.  

(STW(SPD)/PELCO-D/PELCO-P/BOSCH/HONEYWELL/VICON/SEC/PANASONIC)


- RETURN :  Select this to save the PRIVACY menu settings and return to the SPECIAL menu.

* Initial value of communication adjustment 

Item

Camera ID

BAUD RATE UART MODE

PET PKT

Initial value

1

9600

8-NONE-1

ENABLE


 LANGUAGE  : You can select the menu language according to your requirements.


 RETURN   :  Select this to save the SPECIAL menu settings and return to the MAIN 

SETUP menu.

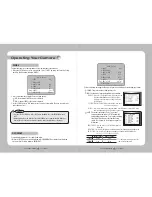
•  As the DIS function uses the digital zoom the camera's resolution will decrease.

•  DIS doesn’t operate when background illumination is too low. 

•  DIS doesn’t operate when object pattern is monotonic as like sky or white wall.

Notes


  DIS (Digital Image Stabilizer) :  

This function mitigates any picture movement due to external factors such as wind.

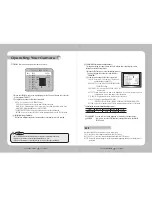
  PRIVACY :  Mask an area you want to hide on the screen.


PRIVACY AREA SETUP

  1. AREA 

AREA1


2. MODE 

OFF

  3. MASK COLOR 

GREEN

  4. MASK TONE 

1

  5. TOP 

39

  6. BOTTOM 

79

  7. LEFT 

13

  8. RIGHT 

52

  9. RETURN

  1) 

 When the SPECIAL menu screen is displayed, press the Function Setup switch so that the 

arrow indicates ‘PRIVACY’.

… …

 2) 

 Set up the mode using the Function Setup switch.

    - AREA : You can select up to 12 PRIVACY areas.
    - MODE :  Determines whether to use the area selected in the AREA.
    - MASK COLOR :   Determine area color. You can select Green, Red, Blue, Black, White, Gray.
    - MASK TONE :  Adjust the brightness of MASK COLOR.
    - TOP/BOTTOM/LEFT/RIGHT :  Adjust the size and position of the selected area.
    - RETURN :  Select this to save the PRIVACY menu settings and return to the SPECIAL menu.

Operating Your Camera

Содержание SIR-4260V

Страница 1: ...Thank you for choosing this Samsung High Resolution D N IR Vandal Dome Camera Before attempting to connect or operate this product please read the instructions contained in this manual carefully Please save this instruction manual for future reference ENGLISH ...

Страница 2: ...ting and maintenance servicing instructions in the literature accompanying the appliance INFORMATION This equipment has been tested and found to comply with limits for a Class A digital device pursuant to part 15 of the FCC Rules These limits are designed to provide reasonable protection against harmful interference when the equipment is operated in a commercial environment This equipment generate...

Страница 3: ...this camera selectively illuminates darker areas while retaining the same light level for brighter areas to even out the overall brightness DIS Digital Image Stabilizer The DIS function compensates for any camera movement to produce more stable pictures Communication RS 485 Coaxial communication methods are supported RS 485 Communications STW SPD Pelco P Pelco D Vicon Panasonic Bosch Honeywell SEC...

Страница 4: ...efore we can t compensate for material loss and or personal injuriesbyrobbery fire naturaldisasterorsomethinglikethistype Ignoring this information may result in material loss and or serious personal injuries including death Indicates Never Allowed Ignoring this information may result in material loss and or a slight injuries Indicates No Disassembling Warning Attention Special Mark Messages Preca...

Страница 5: ...Output Cable 7 8 5 6 9 2 4 Components and Accessories 4 2 3 5 1 Overview 3 7 6 8 Do not expose the camera to radioactivity Radioactivity exposure may damage the CCD Pan Base control panning angle of camera Rotate Base control rotating angle of camera X3 6 Vari focal Lens Module Flush Housing Pan Base Holding Screws fix panned position Video output terminal RS 485 Control terminal The detailed decr...

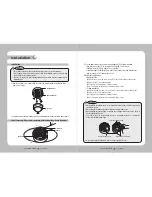
Страница 6: ...angle range of the Rotate Base is the same as that of the Pan Base But one direction range is 195 and another is 145 2 Methods of adjustment Wall installation After mounting the camera to the wall loosen the rotate base holding screws Adjust to the correct panning angle Then adjust the tilt angle by rotating the base Once complete re tighten the rotate base holding screws Ceiling installation Afte...

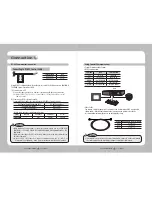
Страница 7: ...lease select Hi Z on the 75Ω Hi Z switch for the intermediate videoTV set and select 75Ω for the Intermediate device as shown in the picture below Connecting to Power The recommended adaptor specification for SIR 4260V is DC 12V 4A Please check the standard power requirement before connecting the power Therefore having an excessively long distance between the power adaptor and the camera may affec...

Страница 8: ...ation establishment initial value 485 Control Board Connection Port RS 485 Control Port CONNECTIONTERMINAL WHITE TRX CONNECTIONTERMINAL BLACK TRX Item Camera ID BAUD RATE UART MODE RET PKT Initial value 1 9600 8 NONE 1 ENABLE 2 Connection to a DVR or System Controller Connect the RS 485 cable to the connection ports of the DVR or System Controller Coaxial Communications System OSD Control method D...

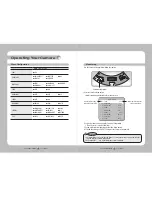
Страница 9: ...p switch Main setup menu is displayed on the monitor screen 2 Select a desired function using the Function Setup switch Place the cursor over a desired item 3 Set up a selected item by using the Function Setup switch 4 To finish the setting select EXIT and press the Function Setup switch Select the function using the Function Setup switch Change the status using the Function Setup switch MAIN SETU...

Страница 10: ...e ambient illumination of the subject MANUAL You can control shutter speed manually NTSC MODEL 1 60 1 120 000 PAL MODEL 1 50 1 120 000 A FLK Select this when you see picture flicker this can happen when the frequency of the local lighting clashes with the camera EXPOSURE SETUP 1 BRIGHTNESS 25 2 SHUTTER 3 AGC HIGH 4 SENS UP OFF 5 RETURN If you press the Function Setup switch to AUTO mode you can ad...

Страница 11: ...ce manually SetWhite Balance first by using the ATW or AWC mode After that switch to MANUAL mode fine tune theWhite Balance and then press the Function Setup switch AWC SET To find the optimal luminance level for the current environment point the camera towards a sheet of white paper and press the Function Setup switch If the environment changes readjust it White Balance may not work properly unde...

Страница 12: ...remely brightly light areas such as from car headlights the light can mask out much of the on screen detail Using SamsungTechwin s HLC feature to remove exceptionally brightly light areas allows details such as car number plates to become visible LEVEL Adjust level of the HLC function LIMIT Enable to change the operating condition MASK COLOR TONE Change the color transparency of the masking area B...

Страница 13: ...MODE ON 2 COLOR B W DURATION FAST DWELL TIME 3SEC 3 B W COLOR DURATION FAST DWELL TIME 10SEC 4 RETURN You can display pictures in color or black and white 1 When the SETUP menu screen is displayed select DAY NIGHT by using the Function Setup switch so that the arrow indicates DAY NIGHT DAY NIGHT MAIN SETUP 1 LENS DC 2 EXPOSURE 3 WHITE BAL ATW 4 SSDR OFF 5 BACKLIGHT OFF 6 SSNR3 ON 7 DAY NIGHT AUTO ...

Страница 14: ...monitor CRT Please select this menu item when using a CRT monitor USER Please use this menu item when using a monitor other than standard ones You can change the gamma PED level and color gain in the sub menus RETURN Select this to save the settings for the IMAGEADJ menu and to return to the SETUP menu 1 When the SETUP menu screen is displayed select SPECIAL by using the Function Setup switch so t...

Страница 15: ...d phase from 0 to 359 when select phase When using AC power at 60Hz NTSC 50Hz PAL frequency you can use the L L type synchronization When the power is DC 12V the SYNC menu is fixed to the INT mode Notes FRONT DOOR When the CAM TITLE menu is OFF no title will be displayed on the monitor screen even if you enter one Only English is available in this mode If you move the cursor to CLR and press the F...

Страница 16: ...IVACY menu settings and return to the SPECIAL menu Initial value of communication adjustment Item Camera ID BAUD RATE UART MODE PET PKT Initial value 1 9600 8 NONE 1 ENABLE LANGUAGE You can select the menu language according to your requirements RETURN Select this to save the SPECIAL menu settings and return to the MAIN SETUP menu As the DIS function uses the digital zoom the camera s resolution w...

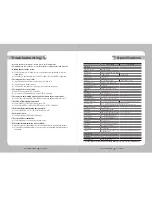
Страница 17: ...ff Camera Title On Off Displayed 15 Characters Sharpness On Off Level adjustable Flip Mirror On Off Communication Coaxial RS 485 Protocol Coaxial Pelco RS 485 STW SPD PELCO P PELCO D VICON PANASONIC BOSCH HONEYWELL SEC ENVIRONMENTAL Operating Temperature Humidity 10 C 50 C 30 80 RH MECHANICAL Water Resistance IP66 Dimension Weight Ø148 x 126mm 1 3Kg Troubleshooting If you have trouble operating yo...

Страница 18: ...ype Environment CCTV Camera Model Name SIR 4260VP Beginning Serial NO C10S7010007 Year of Manufacture 2009 07 03 Conformance to EN 50081 1 1992 EMC Directive 89 336 EEC and 92 31 EEC EN 50130 4 1996 We the undersigned hereby declare that the equipment specified above conforms to the above Directive s Manufacturer SAMSUNGTECHWIN CO LTD LegalRepresentativeinEurope Signature Signature Full Name BONJE...

Страница 19: ...TEL 82 31 740 8151 8 FAX 82 31 740 8145 SAMSUNG TECHWIN EUROPE CO LTD Samsung House 1000 Hillswood Drive Hillswood Business Park Chertsey Surrey UNITED KINGDOM KT16 OPS TEL 44 1932 45 5300 FAX 44 1932 45 5325 SAMSUNG TECHWIN AMERICA Inc 1480 Charles Willard St Carson CA 90746 UNITED STATES Tol Free 1 877 213 1222 FAX 1 310 632 2195 www samsungcctvusa com SALES NETWORK ...

Отзывы: