Getting Started 3
2.
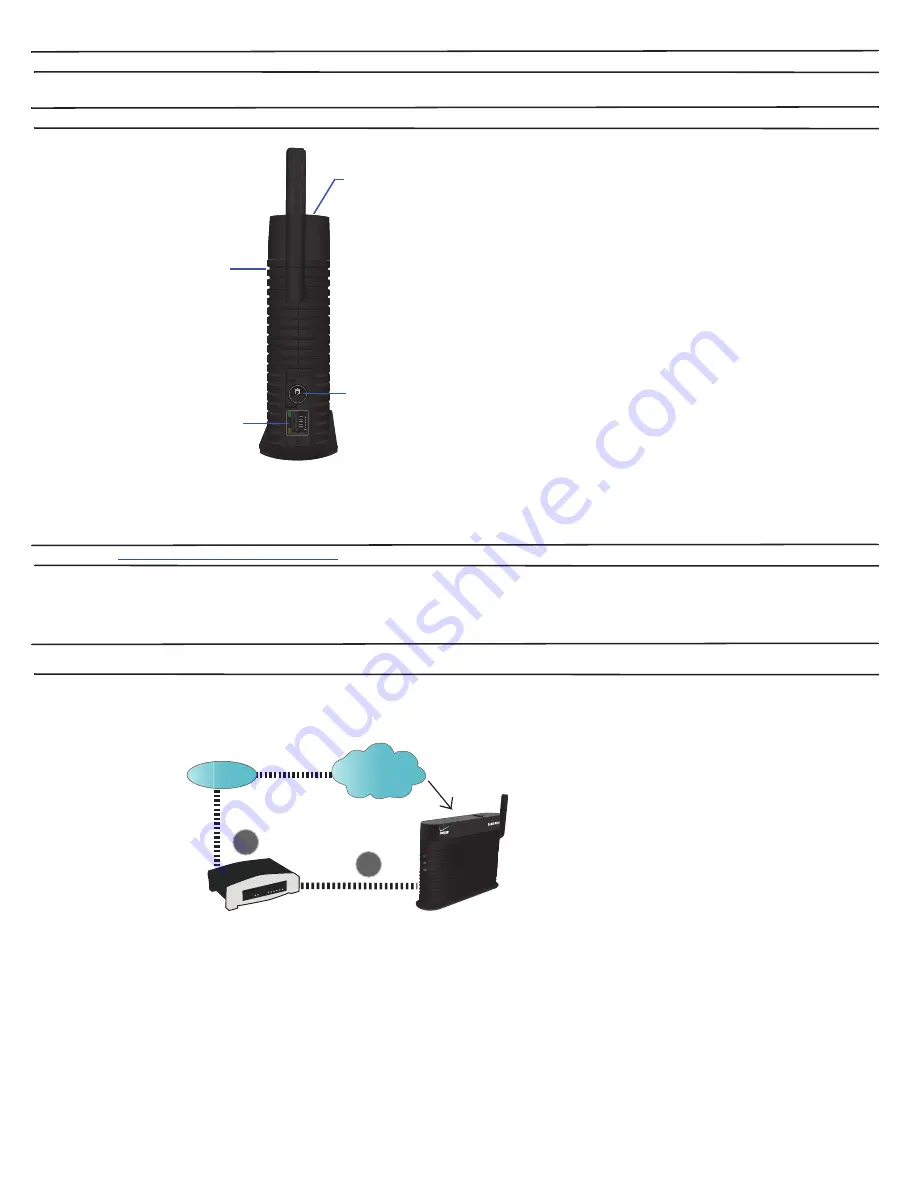
Heat Vents
provide passive ventilation for the Network Extender for Business and allow for dissipation of internally generated heat.
Note:
The Network Extender for Business needs to remain vertical and in a well-ventilated location. The vertical position allows proper air flow to the internal components.
3.
DC 12V Power Port
provides power to the Network Extender for Business when connected to the AC power supply and cord (included).
Warning!:
Only use the provided power cord and supply. Using any other power source may damage the Network Extender for Business.
4.
WAN Port
allows you to connect the Ethernet cable provided to establish secure communication with the Verizon Wireless network.
•
The WAN port provides Ethernet connectivity at 10/100 Mbps.
Network Extender for Business Setup
This section outlines the procedures needed to set up the Network Extender for Business.
Note:
You may also visit
www.verizonwireless.com/b2c/store/accessory?action=gotoSetup
to view the online setup and usage tutorial. Follow the on screen prompts.
•
Confirm your package contains all components.
•
Review the "Important Safety Information" on page 25 before installing the Network Extender for Business.
•
Place the unit near a window to acquire a GPS signal. If this is not convenient, See “External GPS Antenna” on page 18.
–
A GPS signal is required to maintain continuous timing for proper operation and E911 service.
Note:
For a single Network Extender for Business deployment refer to the following Stand Alone Setup diagram. If you are planning on deploying more than one Network Extender for Business at your site, please see
“Clustering
Guidelines”
on page 6.
Stand Alone Setup
1.
Connect one end of the included Ethernet cable to an open LAN port on the Router (1) and connect the other end to the WAN port located at the rear of the Network Extender for Business. (2)
DC 12V Power Port
Heat
Vents
WAN
Port
GPS Antenna Port
1HWZRUN([WHQGHUIRU%XVLQHVV
5RXWHU
Internet
Internet
ISP
ISP


