4-18
Manual
▶
Setting Up a Sharing Server
1. Run
Samsung Network Manager
on the computer to be used as the
sharing server.
2. Click the
Add
button.
3. Select a network location icon and enter the name of the location (e.g. Home).
Click the
Next
button.
4. Select
Internet direct Connection for sharing
and click the
Next
button.
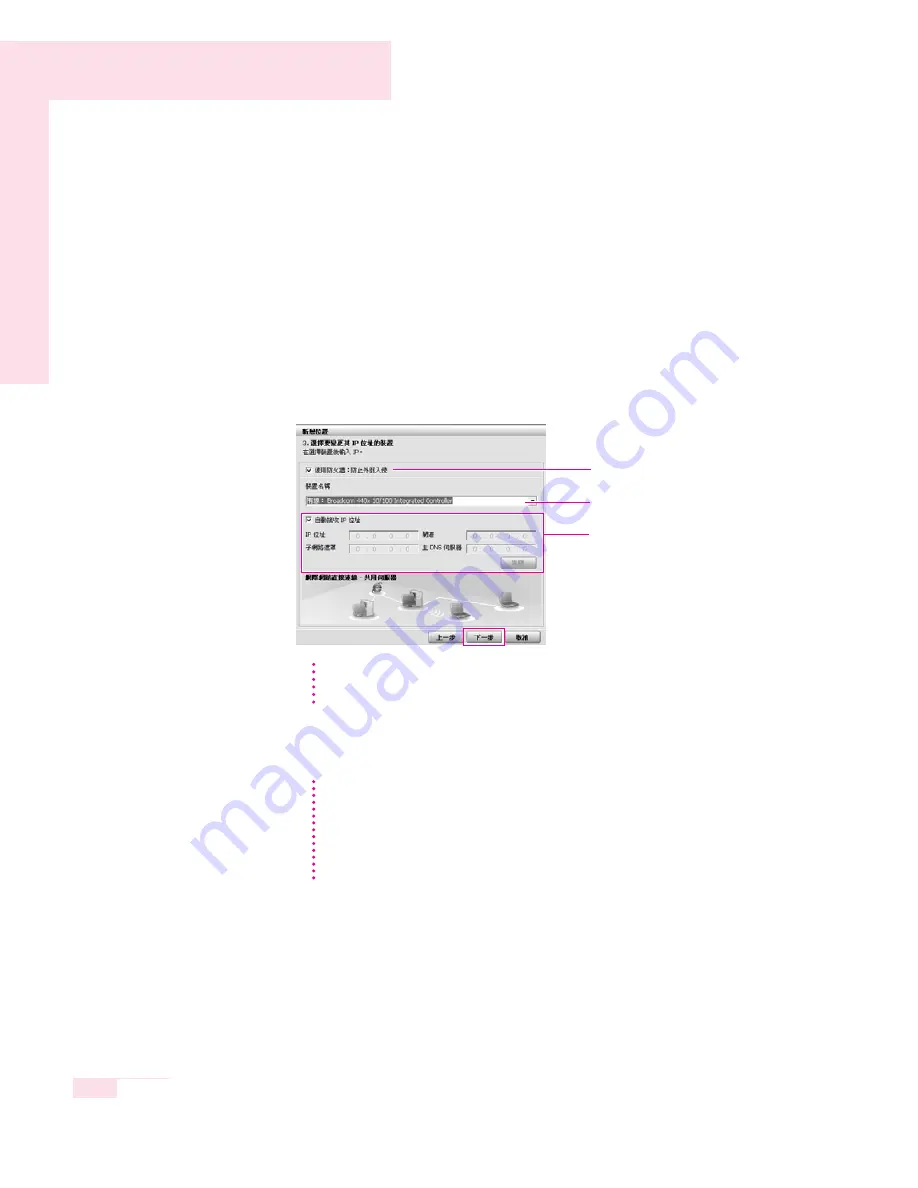
5. Set up the network device to be connected to the external Internet. Determine
whether to use a firewall and select a network device to be connected to the
external Internet (e.g. Wired LAN). Set the IP address and then click the
Next
button.
6. Select a network device to connect to the sharing client (e.g. wireless LAN) and
click the
Next
button.
7. The setup information is displayed. Confirm the settings and click the
Next
button.
8. When the Printer Setting window appears, click
Finish
.
For the printer setup procedures, refer to
Setting Up a Network
on page 4-15.
When the Shared Server setting is completed, set up the shared client.
Determine whether to use a firewall
Select a device
Set an IP address
·
To protect against external intrusion attempts, using a firewall is recommended.
·
For more information on selecting a device and setting the IP address, refer to
the description of item 6 of Setting Up a Network on page 4-15.
N
N
N
N
o
o
o
o
tt
tt
e
e
e
e
To Share Internet Access through a Wireless LAN
·
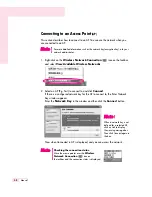
In the Select Device field,
select Wireless
.
·
In the
Wireless Connection Name
(e.g. Samsung) field, enter the network name.
·
To use the network key (security key), select the
‘
Use Network Key,,
,
’
option and
enter a network key. Remember the network key because you have to re-enter the key
on the sharing client to connect to the sharing server.
N
N
N
N
o
o
o
o
tt
tt
e
e
e
e
Содержание R45
Страница 58: ...3 32 Manual ...
Страница 93: ...System Management This chapter provides information on efficient computer management Chapter 5 Chapter 5 ...
Страница 104: ...5 12 Manual ...
Страница 116: ...6 12 Manual ...
Страница 145: ...Appendix System specifications software types and safety instructions are provided here Appendix Appendix ...


