background image

English - 16

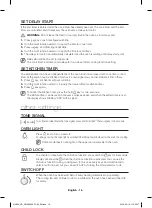
SET DELAY START

If the end timer is entered after the cook timer has already been set, the cook timer and the end 

timer are calculated and if necessary the oven sets a delay start point.

WARNING: 

Do not leave the food for too long time in the oven as food may spoil.

1. 

Press 

 key, cook timer figure will blink.

2. 

Turn the multi function selector to apply the time for cook timer.

3. 

Press 

 key, end timer figure will blink.

4. 

Turn the multi function selector to apply the time for end timer.

5. 

The delay start point is automatically calculated and the oven is waiting until delay start point.

Delay start will not be set in twin mode.

The cook timer, end timer and delay start can be set after cooking function setting.

SET KITCHEN TIMER

The kitchen timer can be set independently of the oven function and used with cook timer or end 

timer at the same time. As kitchen timer has it’s own signal you can discriminate it from others.

1. 

Press   key, kitchen timer figure will blink.

2. 

Turn the multi function selector, to apply the desired time for kitchen timer.

3. 

Press   key again.

To cancel the kitchen timer, press the hold   key for two seconds.

The kitchen timer can be reset in the same order as above and when the setted time is over, 

the display shows blinking “0:00” with a signal.

other settings

TONE SIGNAL

To activate or deactivate the tone signal, press and hold the 

 and 

 key for 3 seconds.

OVEN LIGHT

Press 

 key to turn on and off.

For energy saving, the oven light is switched off within a few minutes after the start of a cooking.

Some model has 2 oven light on the upper and lower side in the oven.

CHILD LOCK

To activate or deactivate the child lock function, press and hold   key for 3 seconds.
Display will show the   when the child lock function is activated. You can use the 

child lock function during cooking also. In this case every keys and multi function 

selector will not react but you can switch off by turning the mode selector to off.

SWITCH OFF

When the oven has been switched off every heating elements stop operating.

The cooling fan will continue to run for a while after the oven has been switched off 

for safety.

+

NV690_HC_DG68-00593C-00_EN.indd   16

2014-05-12   �� 3:22:17

Содержание NV690

Страница 1: ...هیه شده بازیابی درصد 100 کاغذ از راهنما کتابچه این توکار فر کاربر راهنماي دفترچه كنيد تصور را امكانات متشكرمي كرديد خريداري را Samsung محصول اين اينكه از NV690 NV690_HC_DG68 00593C 00_FA indd 1 2014 06 03 6 34 07 ...

Страница 2: ...ی عملکرد تنظیم 14 دما تنظیم 14 دوگانه حالت از استفاده 14 کارآمد دوگانه حالت 14 خودکار سریع کردن گرم پیش مفید عملکرد 14 زمان تنظیم 15 زمان تنظیم 15 آشپزی تایمر تنظیم 15 خامته تایمر تنظیم 15 تاخیری شروع تنظیم 16 آشپزخانه تایمر تنظیم 16 تنظیمات سایر 16 صوتی سیگنال 16 فر چراغ 16 کودک قفل 16 شدن خاموش 16 NV690_HC_DG68 00593C 00_FA indd 2 2014 06 03 6 34 07 ...

Страница 3: ...فر خودکار آشپزی های برنامه 21 حتتانی فر خودکار آشپزی های برنامه 21 فر خودکار آشپزی دوگانه های برنامه 22 آشپزی عملکرد 17 آشپزی عملکرد 17 مراقبت و کردن متیز 28 مدل به بسته بخار با کردن متیز 28 مدل به بسته کاتالیزور لعابی سطح 28 دست با کردن متیز 28 آب کننده جمع کردن متیز 29 مدل به بسته کناری های ریل کردن جدا 29 مدل به بسته دستگاه سقف کردن متیز 29 اشکاالت رفع 30 اطالعاتی کدهای 30 NV690_HC_DG68 00593C ...

Страница 4: ...فاده برای دستگاه این نشده ساخته ندارند کافی دانش یا جتربه یا دارند محدود فکری یا حسی در را دستوراتی یا نظارت آنهاست ایمنی مسئول که شخصی توسط مگراینکه باشند کرده دریافت دستگاه از استفاده با رابطه منی بازی دستگاه با که شود حاصل اطمینان تا کرد مراقبت بایستی کودکان از کنند یا سازنده سوی از که قطعاتی یا سیم با بایستی دارد اشکالی برق سیم اگر ثابت کشی سیم نوع مدل فقط شود تعویض است موجود مجاز تعمیرکار یا ...

Страница 5: ...احتمال از تا شود فر دریچه کردن متیز برای تیز فلزی های دهنده تراش یا زبر متیزکننده وسایل از و شده شیشه سطح شدن خراشیده موجب است ممکن چون نکنید استفاده شوند شیشه خردشدن موجب می داغ استفاده حین در آن دسترسی قابل های بخش و دستگاه این هشدار شوند سال 8 زیر کودکان کرد پرهیز حرارتی های املنت به زدن دست از بایستی باشند نظارت حتت مداوم طور به اینکه مگر شوند داشته نگه دور بایستی یا جسمانی محدود های توانائی ک...

Страница 6: ...منبع بایستی شود می متیز یا تعمیر دستگاه هنگامیکه باشید مراقب فر نزدیکی در پریز به برقی های دستگاه کردن وصل هنگام کنید کار دستگاه با نباید است دیده آسیب تغذیه آب کارتریج که صورتی در است بخار با آشپزی عملکرد دارای دستگاه اگر بخار عملکرد مدل فقط بگیرید متاس خدمات مرکز ترین نزدیک با و نکرده استفاده آن از است شکسته یا خورده ترک کارتریج اگر بخار عملکرد مدل فقط است شده طراحی خانگی غذاهای پخنت برای ً ا صر...

Страница 7: ...لکه ها میوه آب کنید استفاده عمیق ظرف از دار ندهید تکیه فر دریچه روی را پزی شیرینی ظروف کنند منی بازی دستگاه با که شود حاصل اطمینان تا شود مراقبت بایستی خردسال کودکان از کند گیر در به هایشان انگشت یا کرده اصابت در به است ممکن چون دارید نگه دور آن از در کردن بسته یا باز هنگام را کودکان ندهید قرار آن روی سنگین اجسام یا نداده تکیه آن به نایستید در روی نکنید باز غیرضروری و حد از بیش فشار با را در اینکه...

Страница 8: ... که جایی در را ای شیشه سرپوش 4 بگردانید ساعت عقربه جهت در مباند باقی سرجایش مدل به بسته فر داخل چراغ ای شیشه پوشش برداشنت برای 1 گرفته دست یک با را حتتانی انتهای کارد یک قبیل از تیز و صاف شیئ یک کنید وارد قاب و شیشه بین را بردارید را پوشش 2 مقابل در مقاوم وات 40 تا 25 هالوژن فر المپ یک با را المپ لزوم صورت در 3 کنید تعویض حرارت گراد سانتی درجه 300 استفاده پارچه یک از هالوژن المپ به زدن دست هنگام د...

Страница 9: ...ه Glass 1 Glass 2 1 شیشه 2 شیشه راست و چپ سمت در را دکمه دو 1 دهید فشار دریچه شماره شیشه و کرده جدا را پوشش 2 بردارید دریچه از را 2 و 1 دریچه های شیشه کردن متیز از بعد 3 به را 2 و 1 مراحل کردن نصب برای موقعیت کنید تکرار عکس ترتیب فوق تصویر با را 2 و 1 شیشه صحیح کنید کنترل است متفاوت عدد 4 تا عدد 2 از مدل تا مدل از دریچه شیشه کردن سوار بگذارید پایین سمت به را چاپی قسمت 1 شماره داخلی شیشه کردن سوار ...

Страница 10: ...انتی درجه 90 میزان به داخل در بایستی توکار خانگی اسباب چسبنده و پالستیکی سطوح منی قبول گرما نتیجه در چسبنده و پالستیکی سطوح به شدن وارد آسیب قبال در را مسئولیتی Samsung باشند مقاوم گرما مقابل در گراد سانتی کند 1 545 560 572 595 595 21 2 حتتانی املنت تهویه منفذ طریق از هوا جریان فوقانی املنت گرفت خواهد قرار آن در فر که آشپزخانه کابینت پایین در برقراری برای باشد داشته وجود تهویه منفذ یک باید و حتتان...

Страница 11: ...بعد شکل تغییر یابند شکل تغییر است ممکن شدن داغ صورت در لوازم ندارد جداکننده کرد استفاده جداکننده از بایستی کنید استفاده فر دوگانه و حتتانی فوقانی حالت از خواهید می اگر شود استفاده 3 قفسه ردیف در بایستی و کرده جدا را حتتانی و فوقانی محفظه جداکننده ای میله قفسه ظروف برای آن از توانید می شود استفاده غذاها کردن بریان و کباب برای بایستی بزرگ ای میله قفسه از هنگام تا بگذارید پشت در را قاب شده خم سمت کنی...

Страница 12: ... دهید قرار سیخ روی را شود می بریان که گوشتی قطعه بلغزانید سیخ روی را ها چنگال از یکی بریانی حال عین در که داد قرار سینی لبه اطراف در توان می را شده پز نیم سبزیجات و زمینی سیب شوند دهید قرار جلو سمت به را v شکل و گذاشته وسط ای میله سینی روی را تاوه کرد پیچ کند انتهای به توان می را دسته سیخ کردن وارد در کمک برای دهید فشار مالیمت با و داده قرار گاه تکیه روی است عقب سمت به آن تیز نوک که طوری به را سیخ...

Страница 13: ...تر مقادیر پخت برای ها حالت این دهید قرار 3 قفسه سطح در را جداکننده باید حالت این از استفاده حتتانی یا فوقانی حالت کنید آشپزی محفظه نیم حالت در خواهید می که صورتی در شود جمع بخار نشده استفاده محفظه ای شیشه دریچه روی است ممکن حتتانی حالت دوگانه حالت خود به مخصوص دماهای و متفاوت عملکردهای با حتتانی محفظه یا فوقانی محفظه دوگانه حالت در این از استفاده برای باشند می موجود یک هر برای نیز خامته تایمر و آش...

Страница 14: ...د تا بچرخانید را عملکردی چند گزینشگر و داده فشار را کلید 4 منایید انتخاب را مطلوب دمای تا بچرخانید را عملکردی چند گزینشگر و داده فشار را کلید 5 بار یک را کلید یا کلید اگر منایید انتخاب را حتتانی یا فوقانی محفظه ابتدا باید دوگانه حالت با دما یا آشپزی عملکرد دادن تغییر برای محفظه توانید می دهید فشار بار دو را کلید یا کلید اگر دهید تغییر را تنظیم و کرده انتخاب را فوقانی محفظه توانید می دهید فشار دهید...

Страница 15: ...پزی تایمر شکل دهید فشار را کلید 1 بچرخانید را عملکردی چند گزینشگر آشپزی تایمر برای دخلواه زمان اعمال برای 2 دهید فشار دوباره را کلید 3 چشمک منایشگر در 0 00 شد سپری شده تعیین زمان اینکه از بعد کرد تنظیم نو از فوق ترتیب همان به توان می را آشپزی تایمر کنید خاموش را فر یا کرده تنظیم جدید آشپزی تایمر یک توانید می شما شد خواهد داده سیگنال یک و زده کنید تنظیم صفر روی را آشپزی تایمر و داده فشار را کلید آش...

Страница 16: ...ل دهید فشار را کلید 1 بچرخانید را عملکردی چند گزینشگر آشپزخانه تایمر برای دخلواه زمان اعمال برای 2 دهید فشار دوباره را کلید 3 دارید نگه ثانیه دو برای و داده فشار را کلید آشپزخانه تایمر لغو برای زن چشمک بصورت 0 00 گردید سپری شده تعیین زمان وقتی و کرد تنظیم نو از فوق ترتیب همان به توان می را آشپزخانه تایمر شد خواهد داده سیگنال یک و شده دیده منایشگر در تنظیمات سایر صوتی سیگنال دارید نگه ثانیه 3 برای ...

Страница 17: ...ی تولید کیک و نان پیتزا برای بایستی عملکرد این از شود می کرد استفاده گراد سانتی درجه 190 شده توصیه دمای O X O تر پایین 250 40 250 40 250 170 گریل اکو این از شود می ساطع کوچک سطح به منتقل از گرما گرمای به که تر کوچک ظروف برای بایستی عملکرد شیرینی نان و ماهی قبیل از کرد استفاده دارند نیاز کمتری توپر گراد سانتی درجه 240 شده توصیه دمای O O X باال 270 40 250 40 250 200 بزرگ منقل این از شود می ساطع بزرگ...

Страница 18: ...را همرفت پنکه و حتتانی حرارتی املنت حالت این سرامیکی های کاسه کردن گرم برای حالت این سازد است مناسب ها فنجان و ها بشقاب گراد سانتی درجه 60 شده توصیه دمای X X O X 80 40 خودکار آشپزی کنید انتخاب پزی شیرینی و کردن بریان آشپزی برای را دخلواه خودکار های برنامه توانید می خودکار آشپزی عملکرد با بچرخانید خودکار آشپزی حالت روی را حالت گزینشگر دکمه 1 دهید فشار را کلید دخلواه محفظه انتخاب برای 2 کنید صبر ثان...

Страница 19: ...A 06 گوساله گوشت بریانی 0 8 0 6 1 1 0 9 منظوره همه سینی میله سینی با عمیق ورودی ای 2 ای میله سینی روی را شده خوابانده چاشنی در که بریانی گاو گوشت برگردانید کرد بیپ فر اینکه محض به دهید قرار ورودی A 07 بره گوشت سینی 0 8 0 6 1 1 0 9 منظوره همه سینی میله سینی با عمیق ورودی ای 2 قرار ای میله سینی روی طوری را شده زده چاشنی بره گوشت سینی بیپ فر اینکه محض به باشد پایین سمت به آن پوست که دهید برگردانید کر...

Страница 20: ...استفاده با را سبزی خرده بگذارید فر وسط در را ظرف کنید آماده است A 19 پلنگی کیک 0 6 0 5 0 8 0 7 1 0 0 9 ای میله قفسه 2 کیک قالب برای مناسب اندازه به پزی شیرینی ظرف در را کیک خمیر دهید قرار اید زده کره که A 20 میوه کیک 0 4 0 3 بزرگ 0 3 0 2 کوچک مربائی شیرینی ای میله قفسه 2 دهید قرار اید زده کره که کیک برای پزی شیرینی ظرف در را خمیر 6 تا 5 برای دوم تنظیم است ای میوه کیک یک برای اول تنظیم است کوچک مرب...

Страница 21: ...و کردن بریان آشپزی برای خودکار برنامه 5 منایشگر زیر جدول اند شده ریزی برنامه قبل از شما آسایش برای آشپزی های زمان و ها حالت دهید قرار استفاده برای را جداکننده باشد می کنید گرم قبل از را فر باشد شده توصیه آنکه مگر دهید قرار سرد فر در را غذا کنید مراجعه آشپزی برای رهنمودها این به توانید می خير غذا وزن کیلوگرم لوازم سینی سطح ای میله توصیه A 01 در زده یخ آزاد ماهی کرده پف پای 0 3 0 2 0 6 0 5 پزی شیرین...

Страница 22: ...ار سینی روی پخت کاغذ روی را پیتزا نان A 03 فوقانی بریان ماهی 0 5 0 3 0 8 0 6 همه سینی عمیق منظوره ای میله سینی با ورودی 4 سیم ماهی آال قزل مانند درسته های ماهی کرده آماده و شسته را سرطالیی سیم یا سوف پوست کنید اضافه سبزیجات و ادویه لیمو آب روی بزنید ادویه و زیتون روغن مو قلم با را آنها دهید قرار ورودی ای میله سینی حتتانی تنوری زمینی سیب شده قاچ 0 4 0 3 0 6 0 5 پزی شیرینی سینی منظوره همه 1 قاچ را آ...

Страница 23: ...رف 7 5 دوم طرف گریل اکو کنید گرم قبل از گریل اکو حالت از استفاده با را فر که کنیم می توصیه بگذارید یدکی ابزار وسط در را غذا غذا سینی سطح ای میله لوازم دما گراد سانتی درجه زمان دقیقه فر زده یخ کاممبر گرم 75 کدام هر 4 2 کردن گرم از قبل دهید قرار سرد فر در 3 ای میله قفسه 200 12 10 مخلفات با زده یخ ساندویچی نان پنیر و خوک گوشت یا ماتسرال پنیر فرنگی گوجه 3 سینی ورودی ای میله سینی منظوره همه پزی شیرینی ...

Страница 24: ...یرینی سینی منظوره همه 200 20 13 گرم 1000 تا 350 زده یخ کتلت روغن کمی قارچ یا پنیر ژانبون با کرده چرخ گوش 3 پزی شیرینی سینی منظوره همه 200 35 25 هویج کرده چرخ گوش از زده یخ های کتلت گرم 1000 تا 350 زمینی سیب یا چغندر روغن کمی 3 پزی شیرینی سینی منظوره همه 200 30 20 شده قاچ تنوری زمینی سیب گرم 1000 تا 500 3 پزی شیرینی سینی منظوره همه 200 180 45 30 گرم 1000 تا 500 قارچ زده یخ گوشت حلقه روغن کمی 3 پزی ...

Страница 25: ... در را فر که کنیم می توصیه غذا سینی سطح ای میله لوازم دما گراد سانتی درجه زمان دقیقه گرم 700 تا 350 گوسفند مازوی پشت گوشت بزنید ادویه و روغن مو قلم با 3 ورودی ای میله سینی منظوره همه سینی عمیق 200 190 50 40 شکالت گرم 15 تا 10 داده برش باال در کارت با قطعه 5 تا 3 تنوری موز کاغذ در و کرده اضافه شکر آب ریخته ها برش در آجیل گرم 10 تا 5 بپیچید آلومینیمی 3 ای میله قفسه 240 220 25 15 گرم 200 تا 150 هرکدا...

Страница 26: ... 1 200 180 35 25 دوگانه حالت های حالت دماها از توانید می حتتانی و فوقانی فضای در آشپزی هنگام بپزید فر در را غذا نوع دو دوگانه حالت از استفاده با توانید می شما می کنید تنوری را نان های خرده و کرده بریان را استیک واحد آن در توانید می مثال برای کنید استفاده مختلفی آشپزی های زمان و آشپزی جداکننده آشپزی شروع از قبل همیشه بپزید فر فوقانی بخش در را استیک و حتتانی بخش در را نان های خرده جداکننده از استفاد...

Страница 27: ... 150 75 65 2 گرما همرفت 170 150 80 70 منظوره همه پزی شیرینی سینی عمیق منظوره همه سینی 4 1 گرما همرفت 170 150 85 75 سیب پای گرد کیک حلبی ظرف 2 ای میله قفسه متر سانتی 20 قطر تیره پوشش مورب صورت به 1 شود گذاشته گرما همرفت 190 170 90 70 منظوره همه پزی شیرینی سینی گرد کیک حلبی ظرف 2 ای میله قفسه متر سانتی 20 قطر تیره پوشش 3 1 گرما همرفت 190 170 100 80 شوند می داده قرار شبکه روی راست جلو قسمت و چپ عقب ق...

Страница 28: ...طح تا مباند باقی باز درجه 15 میزان به فر دریچه که بگذارید کردن متیز از پس مدل به بسته کاتالیزور لعابی سطح شده پخش چربی و روغن با است ممکن که شده پوشیده تیره خاکستری رنگ به کاتالیزور لعاب یک با جداسازی قابل پوششی سطح سوزند می فر داخل باالتر و گراد سانتی درجه 200 دمای در بقایا این شود پوشیده گرما همرفت گرمای طول در هوا جریان توسط بردارید فر روی از را لوازم همه 1 کنید تنظیم گراد سانتی درجه 250 گرما ه...

Страница 29: ... ا تقریب را کناری ریل 2 بگردانید سوارخ دو از و کشیده را کناری ریل 3 کنید خارج زیرین مدل به بسته دستگاه سقف کردن متیز پایین را منقل کننده گرم توانید می فر سقف کردن متیز شدن تر ساده برای 1 بیاورید عقربه حرکت خالف جهت در را مهره اید گرفته را منقل کننده گرم که حالی در کنید باز و چرخانده ساعت های منی را منقل کننده گرم و شده متمایل پایین سمت به منقل کننده گرم جلوی 2 ساخت خارج فر از توان گرم یافنت شکل تغ...

Страница 30: ...کز اطالعاتی کدهای می داده نشان اطالعاتی کدهای هم باز اگر کنید مراجعه زیر راهکارهای به ابتدا ً ا لطف نیستند فر خطاهای به مربوط اطالعاتی کدهای متام بگیرید متاس SAMSUNG مشتریان خدمات محلی مرکز با شوند کد مشکل حل راه 1 ایمنی کننده خاموش است ادامه کردن کار به معین دمای به و طوالنی مدت برای فر ساعت 16 گراد سانتی درجه 105 زیر ساعت 8 گراد سانتی درجه 240 تا گراد سانتی درجه 105 از ساعت 4 حداکثر تا گراد سانت...

Страница 31: ... یادداشت NV690_HC_DG68 00593C 00_FA indd 31 2014 06 03 6 34 19 ...

Страница 32: ... TANZANIA 9999 RWANDA 200 BURUNDI 499999 DRC 1969 SUDAN 0860 SAMSUNG 726 7864 SOUTH AFRICA 8007260000 BOTSWANA 08 197 267 864 NAMIBIA 0211 350370 ZAMBIA 847267864 827267864 MOZAMBIQUE www samsung com eg support www samsung com tr support www samsung com support www samsung com africa_en support www samsung com africa_fr support www samsung com pk support www samsung com n_africa support www samsun...

Страница 33: ...This manual is made with 100 recycled paper Built in Oven user manual imagine the possibilities Thank you for purchasing this Samsung product NV690 NV690_HC_DG68 00593C 00_EN indd 1 2014 05 12 3 22 06 ...

Страница 34: ...avity 14 Set cooking function 14 Set temperature 14 Using the twin mode 14 Useful twin mode 14 Useful auto speed preheating TIME SETTING 15 15 Set time 15 Set cook timer 15 Set end timer 16 Set delay start 16 Set kitchen timer OTHER SETTINGS 16 16 Tone signal 16 Oven light 16 Child lock 16 Switch off NV690_HC_DG68 00593C 00_EN indd 2 2014 05 12 3 22 06 ...

Страница 35: ... 21 Lower oven auto cook programmes 22 Twin oven auto cook programmes COOKING FUNCTION 17 17 Cooking function CLEANING AND CARES 28 28 Steam cleaning Depending on model 28 Catalytic enamel surface Depending on model 28 Hand cleaning 29 Water collector cleaning 29 Detaching the side runners Depending on model 29 Cleaning the ceiling Depending on model 30 Troubleshooting 30 Information codes NV690_H...

Страница 36: ...en with reduced physical sensory or mental capabilities or lack of experience and knowledge unless they have been given supervision or instruction concerning use of the appliance by a person responsible for their safety Children should be supervised to ensure that they do not play with the appliance If the supply cord is defective it must be replaced by a special cord or assembly available from th...

Страница 37: ...off before replacing the lamp to avoid the possibility of electric shock Do not use harsh abrasive cleaners or sharp metal scrapers to clean the oven door glass since they can scratch the surface which may result in shattering of the glass WARNING The appliance and its accessible parts become hot during use Care should be taken to avoid touching heating elements Children less than 8 years of age s...

Страница 38: ...er or fuse Never use multiple plug adapters or extension leads The power supply of the appliance should be turned off when it is being repaired or cleaned Take care when connecting electrical appliances to sockets near the oven If this appliance has steam cooking function do not operate this appliance when the water supply cartridge is damaged Steam function model only When the cartridge is cracke...

Страница 39: ...est bakeware on the open oven door Young children should be supervised to ensure that they do not play with the appliance Keep children away from the door when opening or closing it as they may bump themselves on the door or catch their fingers in the door Do not step lean sit or place heavy stuff on the door Do not open the door with unnecessarily strong power WARNING Do not disconnect the applia...

Страница 40: ...t clockwise to keep it in place Oven side light Depending on model 1 To remove the glass cover hold the lower end with one hand insert a flat sharp implement such as a table knife between the glass and the frame 2 Pop out the cover 3 If necessary replace the halogen bulb with a 25 40 watt 300 C heat resistant halogen oven light bulb Tip Always use a dry cloth when handling a halogen bulb to preven...

Страница 41: ...2 Glass 1 Glass 2 1 Press the both buttons on the left and right sides of the door 2 Detach the covering and remove glass 1 and 2 from the door 3 After cleaning the door glasses for assembly repeat 1 2 steps in revers order Check the right locations of glass 1 and 2 with above picture ATTACHING The Door Glass is different from 2 EA to 4 EA model by model When assembly the inner glass 1 put printin...

Страница 42: ...ilt in furniture plastic surfaces and adhesive for the oven should be resistant to 90 C inside of the furniture and to 75 C for adjacent furniture Samsung will take no responsibility for damage of plastic surfaces or adhesive from the heat 1 545 560 572 595 595 21 2 Lower element Airflow through the ventilation gap Top element There should be a ventilation gap in the base of the kitchen cabinet wh...

Страница 43: ...me deformed when they become hot When they have cooled down the deformation disappears with no effect on the function Divider The divider needs to be applied if you want to use the ovens upper lower and twin mode It separates the upper and lower compartment and must be used in shelf level 3 Wire shelf The wire shelf should be used for grilling and roasting meals You could use it with casseroles an...

Страница 44: ...put the piece of meat to be roasted onto the spit Parboiled potatoes and vegetables can be placed around the edge of the tray to roast at the same time Place the cradle on the middle shelf and position with the v shape at the front To help insert the spit the handle can be screwed onto the blunt end Rest the spit onto the cradle with the pointed end towards the back and gently push until the tip o...

Страница 45: ... and different temperature settings Divider is required to use this mode Single Mode The total cavity is used for cooking Remove the divider Lower mode The lower cavity is used for cooking Divider is required to use this mode SINGLE MODE In single mode the oven operates like a traditional oven Use this mode for large amounts of food or if you need special accessories such as the spit Remove divide...

Страница 46: ...Lower Mode setting 4 Press the key and turn the multi function selector to select the desired lower cooking function 5 Press the key and turn the multi function selector to select the desired temperature To change the cooking function or temperature with the twin mode you should choose the cavity upper or lower first If you press key or key ONCE you can choose the upper cavity and change the setti...

Страница 47: ...lly turn off 1 Press key cook timer figure will blink 2 Turn the multi function selector to apply the desired time for cook timer 3 Press key again The cook timer can be reset in the same order as above When the setted time is over the display shows blinking 0 00 with a signal You can set a new cook timer or turn off the oven To cancel the cook timer press key and set the cook timer to zero SET EN...

Страница 48: ... multi function selector to apply the desired time for kitchen timer 3 Press key again To cancel the kitchen timer press the hold key for two seconds The kitchen timer can be reset in the same order as above and when the setted time is over the display shows blinking 0 00 with a signal other settings TONE SIGNAL To activate or deactivate the tone signal press and hold the and key for 3 seconds OVE...

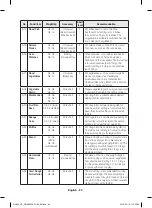
Страница 49: ... fans This function should be used for pizzas bread and cakes Suggested temperature 190 C O X O Lower 40 250 40 250 170 250 Eco grill Heat is emitted from the small area grill This function should be used for smaller dishes that need less heat like fish and filled baguettes Suggested temperature 240 C O O X Upper 40 270 40 250 200 250 Large grill Heat is emitted from the large area grill This func...

Страница 50: ...de activates bottom heating element and convection fan This mode is suitable for warming Ceramic bowls plates and cups Suggested temperature 60 C X X O X 40 80 automatic cooking With automatic cooking function you can select desired auto programmes for cooking roasting and baking 1 Turn the Mode selector to Auto cook mode 2 Press the key to select desired cavity 3 Turn the Multi function selector ...

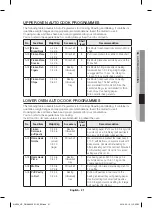
Страница 51: ...p tray with Wire tray insert 2 Put marinated roast beef on Wire tray insert Turn over as soon as the oven beeps A 07 Lamb Rack 0 6 0 8 0 9 1 1 Universal Deep tray with Wire tray insert 2 Put marinated lamb rack on Wire tray insert with the rind side down Turn over as soon as the oven beeps A 08 Lamb Chops 0 3 0 4 0 5 0 6 Universal Deep tray with Wire tray insert 4 Marinate lamb chops Put lamp chop...

Страница 52: ...ed baking dish for bundt cake A 20 Fruit Flan Base 0 3 0 4 large 0 2 0 3 tartlets Wire shelf 2 Put dough into buttered baking dish for cake base First setting is for one fruit flan base the second setting is for 5 6 small tartlets A 21 Sponge Cake 0 4 0 5 midsize 0 2 0 3 small Wire shelf 2 Put dough into a round black metal baking tin First setting is for Ø 26 cm and the second setting is for smal...

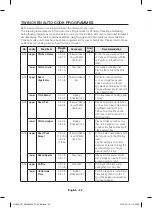
Страница 53: ...5 Auto Programmes for Cooking Roasting and Baking It contains its quantities weight ranges and appropriate recommendations Insert the divider to use it Cooking modes and times have been pre programmed for your convenience You can refer to these guide lines for cooking Insert food in cold oven unless it is recommended to preheat the oven No Food item Weight kg Accessory Shelf level Recommendation A...

Страница 54: ...h with olive oil and spices lower Pizza Bread 0 1 0 2 0 3 0 4 Baking Universal tray 1 Put pizza bread on baking paper on tray A 03 upper Roast Fish 0 3 0 5 0 6 0 8 Universal Deep tray with Wire tray insert 4 Rinse and prepare whole fishes such as trout bream pike perch or gilthead add lemon juice herbs and spices Brush skin with olive oil and spices Put on Wire tray insert lower Potato wedges 0 3 ...

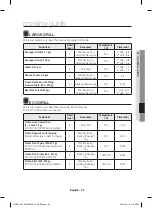
Страница 55: ...sal Deep tray 240 1st side 8 10 2st side 5 7 ECO GRILL We recommend to pre heat the oven using Eco Grill mode Put food in the centre of accessory Food item Shelf level Accessory Temperature C Time min Frozen Oven Camembert 2 4 each 75 g PUT IN COLD OVEN before preheat 3 Wire shelf 200 10 12 Frozen Baguettes with topping Tomato Mozzarella or Ham Cheese 3 Wire tray insert Baking Universal tray 200 1...

Страница 56: ...ing Universal tray 200 13 20 Frozen cutlets 350 1000 g minced meat with ham cheese or mushroom filing DROP OIL 3 Baking Universal tray 200 25 35 Frozen cutlets from minced carrot beetroot or potato 350 1000 g DROP OIL 3 Baking Universal tray 200 20 30 Baked potato cut in half 500 1000 g 3 Baking Universal tray 180 200 30 45 Frozen Meat roll with mushrooms filing 500 1000 g DROP OIL 3 Baking Univer...

Страница 57: ...t the oven in convection mode Food item Shelf level Accessory Temperature C Time min Lamb rack 350 700 g BRUSH WITH OIL SPICES 3 Wire tray insert Universal Deep tray 190 200 40 50 Baked Bananas 3 5 pcs cut with knife on top add10 15 g chocolate 5 10 g nuts into cuts drop sugar water wrap in aluminium foil 3 Wire shelf 220 240 15 25 Baked apples 5 8 pcs each 150 200 g Take out the hearts add raisin...

Страница 58: ...n mode you can cook two different food items in your oven When cooking in upper and lower cavity you can use different temperatures cooking modes and cooking times For example you can grill steaks and bake gratin simultaneously Using the divider you can cook gratin in the lower and steaks in the upper part of the oven Always insert divider into shelf level 3 before you start cooking Notice Put foo...

Страница 59: ...entional 150 170 65 75 2 Convection 150 170 70 80 Baking Universal tray Universal Deep tray 1 4 Convection 150 170 75 85 Apple Pie Wire shelf 2 Springform cake tins Dark coated ø 20 cm 1 Placed diagonally Convectional 170 190 70 90 Baking Universal tray Wire shelf 2 Springform cake tins Dark coated ø 20 cm 1 3 Convection 170 190 80 100 Two cakes are arranged on the grid at the back left and at the...

Страница 60: ...nterior enamel surface to dry thoroughly CATALYTIC ENAMEL SURFACE DEPENDING ON MODEL The removable cover casing is coated with a dark gray catalytic enamel this can become coated with oil and fat distributed by circulating air during convection heating These deposits will burn off at oven temperatures of 200 C and higher 1 Remove all accessories from the oven 2 After cleaning all interior oven sur...

Страница 61: ...the side runner top portion 2 Rotate the side runner by approximately 45 º 3 Pull and remove the side runner from bottom two holes CLEANING THE CEILING DEPENDING ON MODEL 1 You can let down the grill heater and it is helpful for cleaning the ceiling of the oven Remove the nut circular by turning it anticlockwise while holding the grill heater 2 The front of the grill heater inclines downwards and ...

Страница 62: ...ot pressed Check if the child lock function is active or not If the child lock function is not activated call your local service centre INFORMATION CODES All information codes are not from the fault of the oven Please refer to below solution first if the information codes still occur please call your local SAMSUNG Customer Care Centre CODE PROBLEM SOLUTION 1 Safety Shutoff Oven has continued opera...

Страница 63: ...memo NV690_HC_DG68 00593C 00_EN indd 31 2014 05 12 3 22 23 ...

Страница 64: ... 7864 OMAN 800 SAMSUNG 726 7864 KUWAIT 183 2255 183 CALL BAHRAIN 8000 4726 QATAR 800 2255 800 CALL EGYPT 08000 726786 16580 ALGERIA 021 36 11 00 PAKISTAN 0800 Samsung 72678 TUNISIA 80 1000 12 JORDAN 0800 22273 06 5777444 SYRIA 18252273 IRAN 021 8255 MOROCCO 080 100 2255 SAUDI ARABIA 920021230 TURKEY 444 77 11 NIGERIA 0800 726 7864 GHANA 0800 10077 0302 200077 Cote D Ivoire 8000 0077 SENEGAL 800 00...

Отзывы: