4-22
Samsung Electronics
Maintenance & Troubleshooting
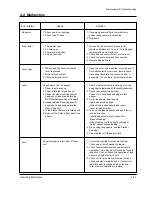
Error Status
Check
Solution
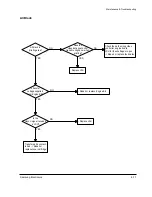
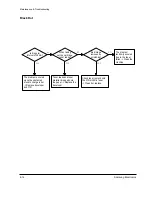
Jam 2
Jam 2 at face-up
tray
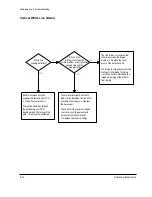
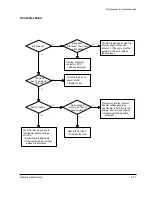
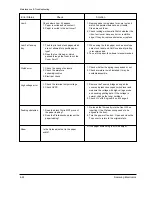
Clutch error
High voltage error
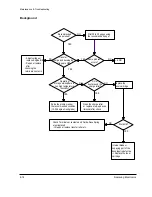
Feeding obstacles
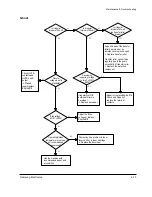
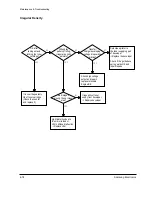
Skew
1. Remove paper using pinset or some tool and
watch if separate claws have any trouble.
Clean around fuser.
2. Check locking works wells. Watch whether the
ribs of exit cover hace any burr or resisitive
edge. If they do, remove obstacles or replace.
1. When using the thick paper such as envelope,
card stock, label and OHP, one-sheet printing
is recommended
2. To use thin paper, face-down is recommended
1. Check whether the spring is expanded or not.
2. Check armature is well installed. It may be
unstable assemble.
1. Remove the Toner cartridge and open the
cover and press cover open switch lever and
measure the voltage with high voltage probe
and sending printing data. If the voltage is
normal, change the toner cartridge.
2. Check HV of in Engine B’d and change it.
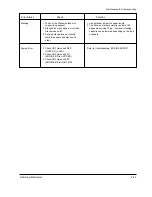
1. Re-insert the film neatly into the front. When
inserting it, the Plate-knockup needs to be
aligned to the front.
2. Turn the power off and on. Open and close the
Top cover to return to the original state.
Fit the paper width using the Guide adjust.
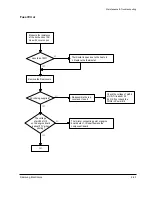
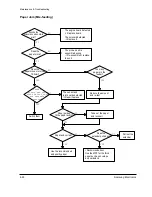
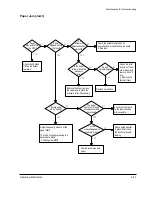
Check where Jam 2 happens
1. Paper is curled and cannot exit.
2. Paper is curled in the exit cover?.
1. Tried to print and stack pages which
are not allowed for specific paper
type?
2. Does the too thin paper, which
passed through the fuser, touch the
Cover Fornt?
1. Check the spring of solenoid
2. Check the armature
assembly/cushion
3. Electrical check
1. Check the terminal output voltage
2. Check HVPS
1. Does the black film in MPF prevent
the paper loading?
2. Does the Plate-knockup prevent the
paper loading?
Is the Guide adjust set to the paper
width?
Содержание Msys 6750
Страница 2: ...ELECTRONICS Samsung Electronics Co Ltd December 1999 Printed in Korea VERSION NO 2 00 P N JC81 00285A ...
Страница 10: ...2 6 Samsung Electronics Specification Memo ...
Страница 58: ...4 28 Samsung Electronics Maintenance Troubleshooting MEMO ...
Страница 81: ...5 22 Samsung Electronics Exploded Views and Parts Lists MEMO ...
Страница 95: ...MEMO Samsung Electronics 8 2 ...
Страница 96: ...PCB Diagrams Samsung Electronics 9 1 9 1 Main PCB Diagram Top 9 PCB Diagrams ...
Страница 97: ...PCB Diagrams Samsung Electronics 9 2 9 2 Main PCB Diagram Bottom ...
Страница 98: ...PCB Diagrams Samsung Electronics 9 3 9 3 LIU PCB Diagram Top 9 4 LIU PCB Diagram Bottom ...
Страница 99: ...PCB Diagrams Samsung Electronics 9 4 9 5 Engine PCB Diagram Top ...
Страница 100: ...PCB Diagrams Samsung Electronics 9 5 Engine PCB Diagram Top ...
Страница 101: ...PCB Diagrams Samsung Electronics 9 6 9 6 Engine PCB Diagram Bottom ...
Страница 102: ...PCB Diagrams Samsung Electronics 9 7 Engine PCB Diagram Bottom ...
Страница 103: ...PCB Diagrams Samsung Electronics 9 8 9 7 OPE PCB Diagram ...
Страница 104: ...PCB Diagrams Samsung Electronics 9 9 OPE PCB Diagram ...
Страница 105: ...PCB Diagrams Samsung Electronics 9 10 MEMO ...
Страница 106: ...Connection diagram Samsung Electronics 8 1 8 Connection diagram ...
Страница 107: ...MEMO Samsung Electronics 8 2 ...
Страница 110: ...Main Circuit Diagram 3 5 Samsung Electronics 10 3 Schematic Diagrams ...
Страница 111: ...Schematic Diagrams 10 4 Samsung Electronics Main Circuit Diagram 4 5 ...
Страница 113: ...Schematic Diagrams 10 6 Samsung Electronics 10 2 Engine Circuit Diagram 1 4 ...
Страница 114: ...Engine Circuit Diagram 2 4 Samsung Electronics 10 7 Schematic Diagrams ...
Страница 115: ...Schematic Diagrams 10 8 Samsung Electronics Engine Circuit Diagram 3 4 ...
Страница 116: ...Engine Circuit Diagram 4 4 Samsung Electronics 10 9 Schematic Diagrams ...
Страница 117: ...Schematic Diagrams 10 10 Samsung Electronics 10 3 LIU Circuit Diagram ...
Страница 118: ...10 4 OPE Circuit Diagram Samsung Electronics 10 11 Schematic Diagrams D6 D5 D4 D3 D2 D1 D0 D6 D5 D0 D1 D2 D3 D4 ...


