ENG
39
40
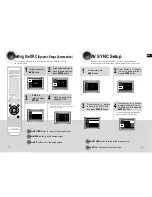
Setting TV Screen type
2
1
4
3
In stop mode,Press
MENU button.
Press Cursor
button to move to
‘Setup’ and then
press ENTER button.
•
Once the setup is complete, you will
be taken to the previous screen.
Press Cursor
button to move to ‘TV
DISPLAY’ and then
press ENTER button.
Press Cursor ,
button to select the
desired item and then
press ENTER button.
SETUP
DEMO/DIMMER
POWER
CD RIPPING
CANCEL
STEP
MUTE
VOLUME
MENU
AUDIO
EXIT
SUB
TITLE
SLEEP
INFO
REPEAT
SLOW
MO/ST
P.SOUND
DSP/EQ
TIMER/CLOCK
TUNER
MEMORY
SD/HD
P.BASS
ECHO
ENTER
RETURN
TUNING
PAUSE
STOP
PLAY
DVD
TUNER
AUX
USB
ZOOM
LOGO
REMAIN
TIMER
ON/OFF
-
MIC VOL.
+
The horizontal to vertical screen size ratio of conventional TVs is 4:3, while that of wide screen and high definition TVs is 16:9. This ratio is
called the aspect ratio. When playing DVDs recorded in different screen sizes, you should adjust the aspect ratio to fit your TV or monitor.
For a standard TV, select either <4:3PS> or <4:3LB> option according to personal preference. Select <WIDE/HDTV> if you have
a wide screen TV.
Adjusting the TV Aspect Ratio (Screen Size)
4:3PS (4:3 Pan&Scan)
Select this to play a 16:9 picture in the pan & scan mode on a conventional TV.
■
You can see the central portion of the screen only (with the sides of the 16:9 picture cut off).
4:3LB (4:3 Letterbox)
Select this to play a 16:9 picture in the letter box mode on a conventional TV.
■
Black bars will appear at the top and bottom of the screen.
WIDE/HDTV
Select this to view a 16:9 picture in the full-screen mode on your wide screen TV.
■
You can enjoy the wide screen aspect.
• If a DVD is in the 4:3 ratio, you cannot view it in wide screen.
• Since DVD discs are recorded in various image formats, they will look different depending on the software,
the type of TV, and the TV aspect ratio setting.
• When using HDMI, the screen is automatically converted to Wide mode.
Press MENU button to exit the setup screen.
Press RETURN button to return to the previous level.
Press EXIT button to exit the setup screen.


