10 Operating Instructions and Installation
10-1
10 Operating Instructions and Installation
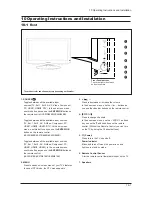
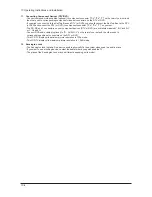
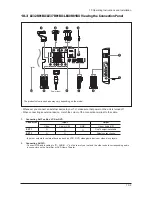
10-1 Front
1. SOURCE
Toggles between all the available input
sources (TV, Ext.1, Ext.2, AV, S-Video, Component,
PC, HDMI1, HDMI2, DTV). In the on-screen menu,
use this button as you use the
ENTER/OK
button on
the remote control. (LE23R86BD/LE26R86BD)
Toggles between all the available input sources
(TV, Ext.1, Ext.2, AV, S-Video, Component, PC,
HDMI1, HDMI2, HDMI3, DTV). In the on-screen
menu, use this button as you use the
ENTER/OK
button on the remote control.
(LE32R86BD/LE37R86BD/LE40R86BD)
Toggles between all the available input sources
(TV, Ext.1, Ext.2, AV, S-Video, Component, PC,
HDMI1, HDMI2, HDMI3). In the on-screen menu,
use this button as you use the
ENTER/OK
button on
the remote control.
(LE32R81BX/LE37R81BX/LE40R81BX)
2. MENU
Press to see an on-screen menu of your TV's features.
In case of DTV mode, the DTV menu appears.
3.
Press to decrease or increase the volume.
In the on-screen menu, use the buttons as
you use the and buttons on the remote control.
4. C/P.
Press to change channels.
In the on-screen menu, use the <
C/P.
> buttons
as you use the and buttons on the remote
control. (Without the Remote Control, you can turn
on the TV by using the Channel buttons.)
5. (Power)
Press to turn the TV on and off.
Power Indicator
Blinks and turns off when the power is on and
lights up in stand-by mode.
6. Remote Control Sensor
Aim the remote control towards this spot on the TV.
7. Speakers
- The product color and shape may vary depending on the model.
Front Panel buttons
Touch the right side of each
button to operate.
Содержание LE23R87BD
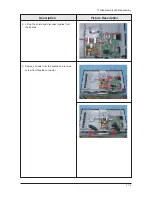
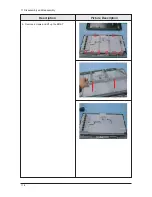
Страница 35: ...11 Disassembly and Reassembly 11 4 Description Picture Description 6 Remove screws and lift up the BRKT ...
Страница 37: ...11 Disassembly and Reassembly 11 6 Memo ...
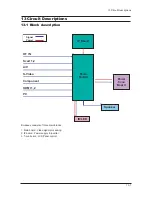
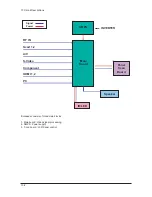
Страница 40: ...13 Circuit Descriptions 13 3 13 2 Main Block ...
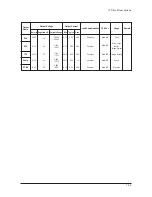
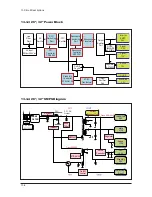
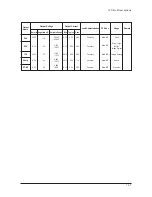
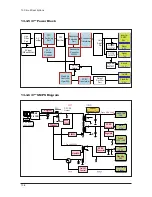
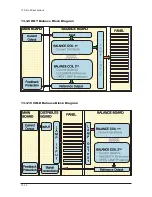
Страница 47: ...13 Circuit Descriptions 13 10 13 3 9 HOT Balance Block Diagram 13 3 10 COLD Balance Block Diagram ...
Страница 79: ...14 Reference Infomation 14 8 14 3 2 Supported Modes 1 ...
Страница 80: ...14 Reference Infomation 14 9 14 3 3 Supported Modes 2 ...
Страница 81: ...14 Reference Infomation 14 10 14 3 4 Supported Modes 3 ...
Страница 87: ...Memo 14 Reference Infomation 14 16 ...
Страница 88: ...7 Block Diagrams 7 1 7 Block Diagram This Document can not be used without Samsung s authorization ...
Страница 89: ...7 Block Diagrams 7 2 Memo ...
Страница 101: ...2 Product Specifications 2 12 Memo ...
Страница 104: ...5 Exploded View Parts List 5 3 5 3 LE26R86BD Exploded View T0003 T0175 M0215 T0447 M0115 M0014 M0107 M0013 M0013 ...
Страница 106: ...5 Exploded View Parts List 5 5 5 5 LE32R86BD Exploded View T0003 M0215 T0447 M0115 M0013 M0013 ...
Страница 108: ...5 Exploded View Parts List 5 7 5 7 LE37R87BD Exploded View T0003 M0215 M0013 M0013 T0447 M0115 M0146 M0146 M0107 M0014 ...
Страница 110: ...5 Exploded View Parts List 5 9 5 9 LE40R87BD Exploded View T0003 M0215 M0013 M0013 T0447 M0146 M0146 M0107 M0014 ...
Страница 112: ...12 PCB Diagram 12 1 12 PCB Diagram 12 1 Main PCB Diagram FOR READY ...
Страница 113: ...12 PCB Diagram 12 2 12 2 Main PCB Diagram FOR IDTV ...
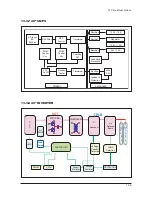
Страница 114: ...12 PCB Diagram 12 3 12 3 23 SMPS ...
Страница 115: ...12 PCB Diagram 12 4 12 4 26 32 SMPS ...
Страница 116: ...12 PCB Diagram 12 5 12 5 37 SMPS ...
Страница 117: ...12 PCB Diagram 12 6 12 6 40 IP Board ...

