4-51
4. Troubleshooting
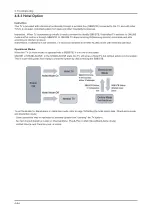
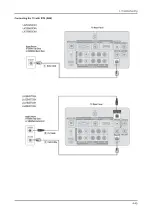
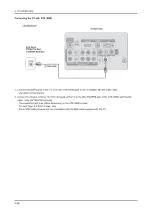
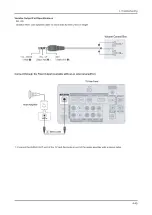
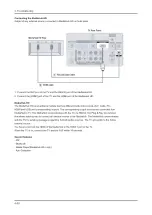
Connecting the RJP(Remote Jack Pack)
Output of any external source connected to RJP on user desk.
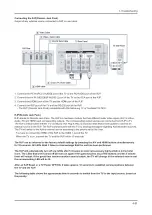
Connect the PC IN [PC] / [AUDIO] port of the TV to the PC/AUDIO port of the RJP.
Connect the AV IN [VIDEO]/[R-AUDIO-L] port of the TV to the RCA port of the RJP.
Connect the [HDMI] port of the TV and the HDMI port of the RJP.
Connect the RJP port of the TV and the RS/232 port of the RJP.
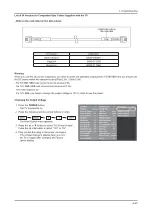
- The RJP (Remote Jack Pack) compatible with this Samsung TV is TeleAdapt TA-7610.
RJP(Remote Jack Pack)
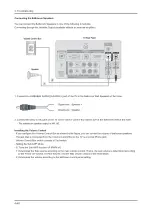
RJP stands for Remote Jack Pack. The RJP is a hardware module that has different Audio Video inputs (A/V, S-Video,
Audio, PC and HDMI) and corresponding outputs. The corresponding output sources are connected from RJP to TV.
The RJP communicates with the TV via RS232. Hot Plug & Play is a function that allows hotel guests to connect an
external source to the RJP. The RJP communicates with the TV by sending messages regarding Active/Inactive sources.
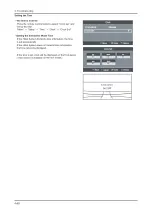
The TV will switch to the Active external source according to the priority set by the User.
- You have to connect the HDMI of the RJP to the HDMI 1 port of the TV.
- When the TV is on, connect the TV and the RJP within 10 seconds.
The RJP can be returned to the factory default settings by pressing the A/V and HDMI buttons simultaneously
for 10 seconds. All LEDs blink 5 times to Acknowledge that the rest has been performed.
The RJP will automatically turn off any LEDs after 5 minutes to avoid unnecessary light pollution in the hotel
room. The LEDs that were turned off will turn on again if the guest touches any of the buttons and the 5 minute
timer will restart. If the guest then touches another source button, the TV will change to the selected source and
the corresponding LED will be lit.
After an RJP Reset or a TV Power OFF/ON, it takes approx. 10 seconds to establish communications between
the TV and the RJP.
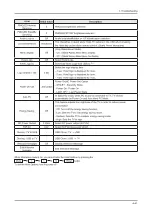
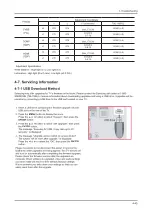
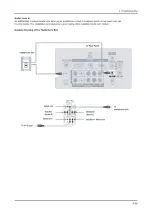
The following table shows the approximate time in seconds to switch from the TV to the input source, based on
the priority.
1.
2.
3.
4.
Содержание LA22B450C4H
Страница 185: ...1 4 1 Precautions Memo...
Страница 201: ...4 5 4 Troubleshooting LVDS PC_RGB HV_Sync MAINBOARD BOTTOM...
Страница 202: ...4 6 4 Troubleshooting WAVEFORMS 1 PC input V sink H sink R G B 2 LVDS output...
Страница 204: ...4 8 4 Troubleshooting HDMI 2 HDMI 1 MAINBOARD TOP...
Страница 205: ...4 9 4 Troubleshooting WAVEFORMS 3 HDMI input RX_Data RX_Clk 2 LVDS output...
Страница 207: ...4 11 4 Troubleshooting B3 3V_PW Tuner_CVBS B5V_VCCT_PW MAINBOARD TOP...
Страница 208: ...4 12 4 Troubleshooting WAVEFORMS 4 CVBS OUT Grey Bar 2 LVDS output...
Страница 210: ...4 14 4 Troubleshooting TS_DATA B1 2V_PW B3 3V_PW B5V_VCCT_PW MAINBOARD TOP...
Страница 211: ...4 15 4 Troubleshooting WAVEFORMS 2 LVDS output...
Страница 213: ...4 17 4 Troubleshooting MAINBOARD BOTTOM...
Страница 214: ...4 18 4 Troubleshooting WAVEFORMS 4 CVBS OUT Grey Bar 2 LVDS output...
Страница 216: ...4 20 4 Troubleshooting MAINBOARD BOTTOM...
Страница 217: ...4 21 4 Troubleshooting WAVEFORMS 5 Compnent_Y Gray scale Pb Pr Color bar 2 LVDS output...
Страница 220: ...4 24 4 Troubleshooting WAVEFORMS 6 I2C Data 7 Speaker out...
Страница 241: ...4 45 4 Troubleshooting Connecting the TV with STB SBB...
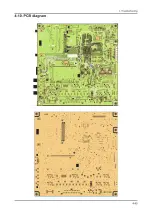
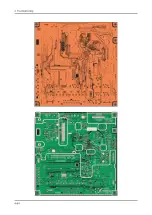
Страница 259: ...4 63 4 Troubleshooting 4 10 PCB diagram...
Страница 260: ...4 64 4 Troubleshooting...
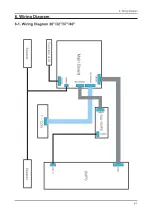
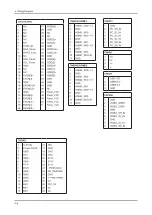
Страница 261: ...6 1 6 Wiring Diagram 6 Wiring Diagram 6 1 Wiring Diagram 26 32 37 40...

