background image

english - 1

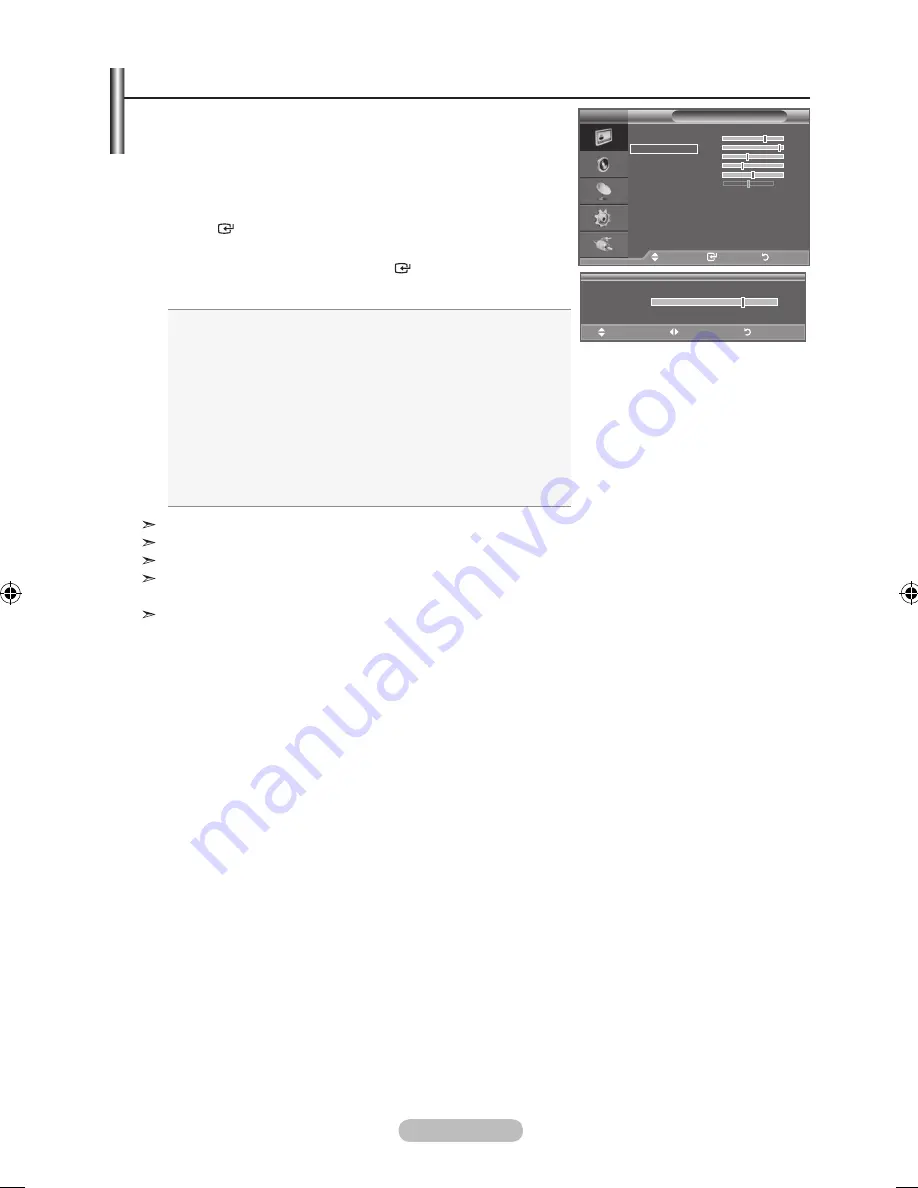
Your set has several settings which allow you to control 

picture quality.

1.

  To select the desired picture effect, follow the  


 "Changing the Picture Standard" instructions number 1 to 3. 

(On page 15)

.

   Press the 

 or 

 button to select a particular item. Press the 

enter  

button.

.

   Press the 

 or 

 button to decrease or increase the value of 

a particular item. Press the 

enter  

button.

.

  Press the 

eXIt

 button to exit.

♦ 

Backlight:

  Adjusts the screen brightness by adjusting the 

LCD backlight brightness. (0~10)

♦ 

Contrast:

  Adjusts the lightness and darkness between 

objects and the background.

♦ 

Brightness:

 Adjusts the brightness of the whole screen.

♦ 

Sharpness:

  Adjusts the outline of objects to either 

sharpen them or make them more dull.

♦ 

Colour:  

Adjusts the colours, making them lighter or 

darker. 

♦ 

tint:  

Adjusts the colour of objects, making them more red or 

green for a more natural look.

  The adjusted values are stored according to the selected Picture mode.

  In PC mode, you can only make changes to "Backlight", "Contrast" and "Brightness". 

   TV, AV modes of the PAL system, you cannot use the "Tint" Function.

  You can return to the factory defaults picture settings by selecting the "Reset".  


(Refer to "Resetting the Picture Settings to the Factory Defaults" on page 17)

   The energy consumed during use can be significantly reduced if the level of brightness of the picture 

is reduced, and that this will reduce the overall running cost.

adjusting the Custom Picture

Picture

mode 

:  Standard 


Backlight 


Contrast 


  9

Brightness 


Sharpness 


  0 

Colour 


  0

tint                      g  0    

r  0

Picture options 


reset 

: oK 


tV


move    

enter 

return

Backlight 


move  

adjust  


return

BN68-01911A-Eng-1231.indd   16

2009-01-07   �� 7:35:36

Содержание LA22A480

Страница 1: ...samsung com cn HONG KONG 3698 4698 www samsung com hk INDIA 3030 8282 1 800 3000 8282 1800 110011 www samsung com in INDONESIA 0800 112 8888 www samsung com id JAPAN 0120 327 527 www samsung com jp MALAYSIA 1800 88 9999 www samsung com my NEW ZEALAND 0800 SAMSUNG 0800 726 786 www samsung com nz PHILIPPINES 1800 10 SAMSUNG 726 7864 www samsung com ph SINGAPORE 1800 SAMSUNG 726 7864 www samsung com ...

Страница 2: ... the screen when displaying a still image Watching the LCD TV in 4 3 format for a long period of time may leave traces of borders displayed on the left right and center of the screen caused by the difference of light emission on the screen Playing a DVD or a game console may cause a similar effect to the screen Damages caused by the above effect are not covered by the Warranty Displaying still ima...

Страница 3: ...re Settings to the Factory Defaults 18 Viewing the Picture In Picture PIP 19 Setting the Sound Sound Features 20 Selecting the Sound Mode 21 Connecting Headphones Sold separately 21 Setting the Time Setting and Displaying the Current Time 22 Setting the Sleep Timer 22 Switching the Television On and Off Automatically 23 Function Description Choosing Your Language 23 Melody Energy Saving 24 Selecti...

Страница 4: ... card Safety Guide Registration Cards Warranty card Safety Guide Registration Cards Not available in all locations 1 Connect your LCD TV and the stand Two or more people should carry the TV Make sure to distinguish between the front and back of the stand when assembling them 2 Fasten three screws at bottom of the stand Stand the product up and fasten the screws If you fasten the screws with the LC...

Страница 5: ...he remote control 4 CH Press to change channels In the on screen menu use the CH buttons as you use the and buttons on the remote control Without the Remote Control you can turn on the TV by using the Channel buttons 5 Power Indicator Blinks and turns off when the power is on and lights up in stand by mode 6 Power Press to turn the TV on and off 7 Remote Control Sensor Aim the remote control towar...

Страница 6: ...k What is HDMI High Definition Multimedia interface allows the transmission of high definition digital video data and multiple channels of digital audio The HDMI DVI terminal supports DVI connection to an extended device with the appropriate cable not supplied The difference between HDMI and DVI is that the HDMI device is smaller in size has the HDCP High Bandwidth Digital Copy Protection coding f...

Страница 7: ...uilt in speakers will be disabled 9 COMPONENT IN 1 2 Connect component video cables optional to component connector PR PB Y on the rear of your set and the other ends to corresponding component video out connectors on the DVD If you wish to connect both the Set Top Box and DVD you should connect the Set Top Box to the DVD and connect the DVD to component connector PR PB Y on your set The PR PB and...

Страница 8: ...nnel P Previous channel Returns to the previous menu Use to select on screen menu items and change menu values Exit the on screen menu Picture size selection Displays the main on screen menu Selects the HDMI mode directly a Picture effect selection Teletext Functions 2 Exit from the teletext display 7 Teletext size selection 8 Teletext reveal 9 Fastext topic selection 0 Alternately select Teletext...

Страница 9: ... Remove the batteries and store them in a cool dry place if you won t be using the remote control for a long time If the remote control doesn t work check the following 1 Is the TV power on 2 Are the plus and minus ends of the batteries reversed 3 Are the batteries drained 4 Is there a power outage or is the power cord unplugged 5 Is there a special fluorescent light or neon sign nearby Installing...

Страница 10: ...IP see page 19 Auto Adjustment see page 28 FM Radio see page 26 TOOLS P SIZE 1 With the power on press the MENU button The main menu appears on the screen The menu s left side has icons Picture Sound Channel Setup Input 2 Press the or button to select one of the icons Then press the ENTER button to access the icon s sub menu 3 Press the EXIT button to exit The on screen menus disappear from the sc...

Страница 11: ... channel search will start and end automatically After all the available channels are stored the Clock Set menu appears Press the ENTER button at any time to interrupt the memorization process 7 Press the ENTER button Select the Month Day Year Hour Minute or am pm by pressing the or button Set the Month Day Year Hour Minute or am pm by pressing the or button You can also set the Month Day Year Hou...

Страница 12: ... ENTER button to select Area 3 Select the appropriate area by pressing the or button Press the ENTER button to confirm your choice 4 Press the or button to select Auto Store then press the ENTER button 5 Press the ENTER button The TV will begin memorizing all of the available channels Press the ENTER button at any time to interrupt the memorization process and return to the Channel menu 6 After al...

Страница 13: ...ed Press the or button to select C Air channel or S Cable channel Press the button then press the or button to select the required number You can also select the channel number directly by pressing the numeric buttons 0 9 If there is abnormal sound or no sound re select the sound standard required Search When you do not know the channel numbers Press the or button to start the search The tuner sca...

Страница 14: ... button to select Child Lock then press the ENTER button 6 Select On by pressing the or button then press the ENTER button 7 Press the or button to select Channel List then press the ENTER button 8 Move to the field by pressing the or button select a channel to be locked and press the ENTER button If you press the ENTER button again the symbol next to the channel disappears and the channel lock is...

Страница 15: ... to assign new names 1 Press the MENU button to display the menu Press the or button to select Channel then press the ENTER button 2 Press the or button to select Name then press the ENTER button 3 If necessary select the channel to be assigned to a new name by pressing the or button Press the ENTER button The selection bar is displayed around the name box 4 The following characters are available ...

Страница 16: ...ton 4 Press the or button to adjust the fine tuning Press the ENTER button 5 Press the EXIT button to exit Fine tuned channels that have been saved are marked with an asterisk on the right hand side of the channel number in the channel banner And the channel number turns red To reset the fine tuning select Reset by pressing the or button and then press the ENTER button Fine Tuning Channel Receptio...

Страница 17: ...h input source O You can also press the P MODE button on the remote control to select one of the picture settings Changing the Picture Standard Easy Setting 1 Press the TOOLS button on the remote control 2 Press the or button to select Picture Mode 3 Press the or button to select the required option 4 Press the EXIT or TOOLS button to exit Picture Mode Standard Backlight 7 Contrast 95 Brightness 4...

Страница 18: ... make them more dull Colour Adjusts the colours making them lighter or darker Tint Adjusts the colour of objects making them more red or green for a more natural look The adjusted values are stored according to the selected Picture mode In PC mode you can only make changes to Backlight Contrast and Brightness TV AV modes of the PAL system you cannot use the Tint Function You can return to the fact...

Страница 19: ...adcasting Just Scan Use the function to see the full image without any cutoff when HDMI 720p 1080i or Component 1080i signals are input In PC Mode only 16 9 and 4 3 mode can be adjusted Settings can be adjusted and stored for each external device you have connected to an input of the TV Temporary image retention may occur when viewing a static image on the set for more than two hours Wide Zoom Mov...

Страница 20: ...hen the external input connects to HDMI RGB signals Resetting the Picture Settings to the Factory Defaults You can return to the factory defaults picture settings 1 To select the desired picture effect follow the Changing the Picture Standard instructions number 1 to 3 on page 15 2 Press the or button to select Reset then press the ENTER button 3 Press the or button to select OK or Cancel Press th...

Страница 21: ...he TOOLS button on the remote control 2 Press the or button to select PIP then press the ENTER button 3 Press the or button to select a particular item 4 Press the or button to select the required option 5 Press the EXIT or TOOLS button to exit PIP On Off You can activate or deactivate the PIP function Main picture Sub picture Component 1 2 TV AV HDMI TV AV PC TV AV Source You can select a source ...

Страница 22: ...atented SRS technology that solves the problem of playing 5 1 multichannel content over two speakers TruSurround delivers a compelling virtual surround sound experience through any two speaker playback system including internal television speakers It is fully compatible with all multichannel formats Easy Setting 1 Press the TOOLS button on the remote control 2 Press the or button to select SRS TS ...

Страница 23: ...UAL 1 DUAL 2 DUAL 1 NICAM Stereo Mono MONO Automatic change Stereo MONO STEREO Dual MONO DUAL 1 DUAL 2 DUAL 1 If the stereo signal is weak and an automatic switching occurs then switch to the Mono This function is only activated in stereo sound signal It is deactivated in mono sound signal This function is only available in TV mode Selecting the Sound Mode Auto Volume Off On Each broadcasting stat...

Страница 24: ...NTER button 3 Press the ENTER button to select Clock Set 4 To Press the Move to Month Day Year Hour Minute or am pm or button Set the Month Day Year Hour Minute or am pm or button Confirm the setting ENTER button 5 Press the EXIT button to exit If you disconnect the power cord you have to set the clock again You can also set Month Day Year Hour and Minute by pressing the number buttons on the remo...

Страница 25: ...tting satisfied On Time Select hour minute am pm and On Off To activate timer with the setting satisfied set to On Off Time Select hour minute am pm and On Off To activate timer with the setting satisfied set to On Repeat Select Once Everyday Mon Fri Mon Sat or Sat Sun Volume Select the desired turn on volume level Programme When the On Timer is active you can turn on a specific channel You can se...

Страница 26: ...en the TV is turned off by Sleep Timer function Energy Saving Off Low Medium High This feature adjusts the screen brightness depending on the surrounding lighting conditions Off Turns off the energy saving function Low Sets the TV to low energy saving mode Medium Sets the TV to medium energy saving mode High Sets the TV to high energy saving mode Easy Setting 1 Press the TOOLS button on the remote...

Страница 27: ...DMI button on the remote control Selecting the Source TOOLS P SIZE TOOLS P SIZE TOOLS P SIZE TOOLS P SIZE TV Input Source List TV Edit Name FM Radio Move Enter Return TV Source List TV AV Component1 Component2 PC HDMI Move Enter Return Name the device connected to the input jacks to make your input source selection easier 1 Press the MENU button to display the menu Press the or button to select In...

Страница 28: ...Preset List press the ENTER button again Configuring it automatically You can automatically find and store available channels to the Preset List 1 Press the TOOLS button 2 Press the ENTER button to select Auto Preset Viewing the Preset List 1 Press the TOOLS button 2 Press the or button to select Preset List then press the ENTER button The Preset List screen appears 3 Press the or button to tune t...

Страница 29: ...the HDMI DVI IN jack The interlace mode is not supported The set might operate abnormally if a non standard video format is selected Separate and Composite modes are supported SOG is not supported Display Modes Both screen position and size will vary depending on the type of PC monitor and its resolution The resolutions in the table are recommended Mode Resolution Horizontal Frequency kHz Vertical...

Страница 30: ...rse and Fine tune again After the noise has been reduced re adjust the picture so that it is aligned on the center of screen Press the or button to select Coarse or Fine then press the ENTER button Press the or button to adjust the screen quality Press the ENTER button Position Adjust the PC s screen positioning if it does not fit the TV screen Press the or button to adjusting the Vertical Positio...

Страница 31: ...e required The page is displayed with other coloured information that can be selected in the same way To display the previous or next page press the corresponding coloured button 5 teletext on mix Press to activate teletext mode after selecting the channel providing the teletext service Press it twice to overlap the teletext with the current broadcasting screen 6 8 store Used to store the teletext...

Страница 32: ...play TOOLS P SIZE Using the Anti Theft Kensington Lock The Kensington Lock is a device used to physically fix the system when using it in a public place The appearance and locking method may differ from the illustration depending on the manufacturer Refer to the manual provided with the Kensington Lock for proper use The locking device has to be purchased separately 1 Insert the locking device int...

Страница 33: ...ce is often due to the use of an indoor aerial Remote control malfunctions Replace the remote control batteries Clean the upper edge of the remote control transmission window Check the battery terminals Check signal cable message is displayed Check that the signal cable is firmly connected to the PC or video sources Check that the PC or video sources are turned on On PC mode Not Supported Mode mes...

Страница 34: ...o the product Model Name LA22A480 Screen Size Diagonal 22 inch PC Resolution 1360 X 768 60Hz Sound Output 15W X 2 Dimensions WxDxH Body With stand 572 X 74 X 412 mm 572 X 179 X 433 mm Weight With stand 6 kg Environmental Considerations Operating Temperature Operating Humidity Storage Temperature Storage Humidity 10 C to 40 C 50 F to 104 F 10 to 80 non condensing 20 C to 45 C 4 F to 113 F 5 to 95 n...

Страница 35: ...This page is intentionally left blank ...

Отзывы: