background image

AH68-02624A-06

Correct Disposal of This Product (Waste Electrical & Electronic Equipment)

(Applicable in countries with separate collection systems)

This marking on the product, accessories or literature indicates that the product and its electronic accessories 
(e.g. charger, headset, USB cable) should not be disposed of with other household waste at the end of their 
working life. To prevent possible harm to the environment or human health from uncontrolled waste disposal, 
please separate these items from other types of waste and recycle them responsibly to promote the sustainable 
reuse of material resources.

Household users should contact either the retailer where they purchased this product, or their local government 
office, for details of where and how they can take these items for environmentally safe recycling. 

Business users should contact their supplier and check the terms and conditions of the purchase contract. 
This product and its electronic accessories should not be mixed with other commercial wastes for disposal.

Correct disposal of batteries in this product

(Applicable in countries with separate collection systems)

This marking on the battery, manual or packaging indicates that the batteries in this product should not be 
disposed of with other household waste at the end of their working life. Where marked, the chemical symbols 
Hg, Cd or Pb indicate that the battery contains mercury, cadmium or lead above the reference levels in EC 
Directive 2006/66. If batteries are not properly disposed of, these substances can cause harm to human health 
or the environment. 

To protect natural resources and to promote material reuse, please separate batteries from other types of waste 
and recycle them through your local, free battery return system.

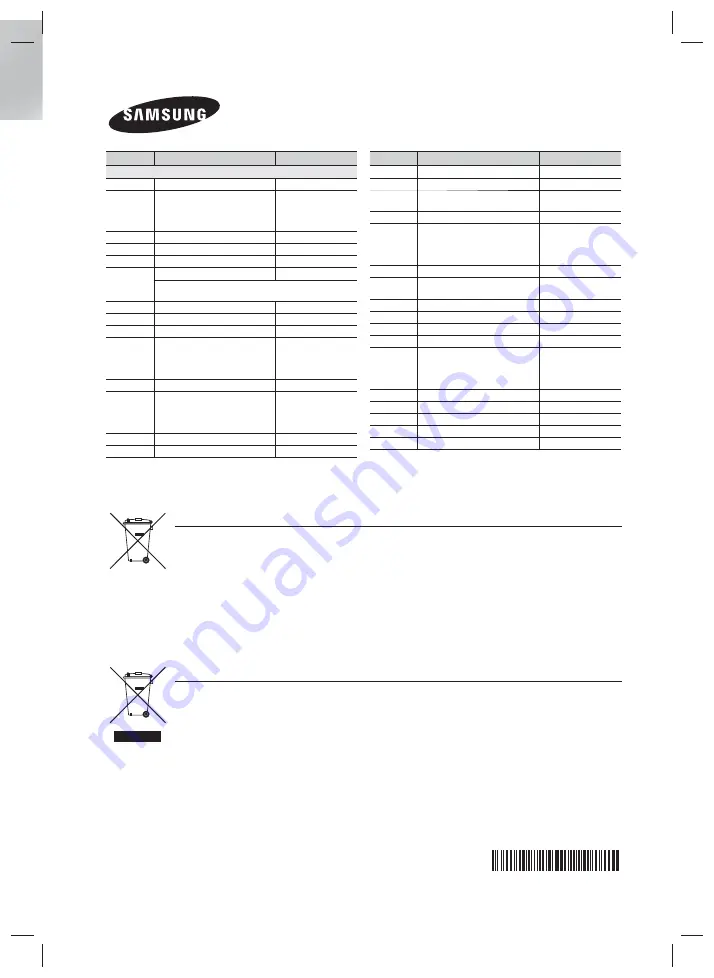
Contact SAMSUNG WORLD WIDE

If you have any questions or comments relating to Samsung products, please 
contact the SAMSUNG customer care centre.

Area

Contact Centre


Web Site

`

 Europe

AUSTRIA

0810 - SAMSUNG (7267864, € 0.07/min)

www.samsung.com

BELGIUM

02-201-24-18

www.samsung.com/be 
(Dutch)
www.samsung.com/be_fr 
(French)

BOSNIA

051 331 999

www.samsung.com

BULGARIA

07001 33 11 , share cost tariff

www.samsung.com/bg

CROATIA

062 SAMSUNG (062 726 786)

www.samsung.com/hr

CZECH

800 - SAMSUNG (800-726786)

www.samsung.com

Samsung Electronics Czech and Slovak, s.r.o. V Parku 2343/24, 148 00 - 
Praha 4

DENMARK

70 70 19 70

www.samsung.com

FINLAND

030-6227 515

www.samsung.com

FRANCE

01 48 63 00 00

www.samsung.com/fr

GERMANY

0180 6 SAMSUNG bzw. 
0180 6 7267864*
(*0,20 €/Anruf aus dem dt. Festnetz, aus 
dem Mobilfunk max. 0,60 €/Anruf)

www.samsung.com

CYPRUS

8009 4000 only from landline

www.samsung.com/gr

GREECE

80111-SAMSUNG (80111 726 7864) only 
from land line
(+30) 210 6897691 from mobile and land 
line

www.samsung.com/gr

HUNGARY

06-80-SAMSUNG (726-7864)

www.samsung.com/hu

ITALIA

800-SAMSUNG (726-7864)

www.samsung.com

Area

Contact Centre


Web Site

LUXEMBURG

261 03 710

www.samsung.com

MONTENEGRO

020 405 888

www.samsung.com

NETHERLANDS

0900-SAMSUNG (0900-7267864) (€ 0,10/
Min)

www.samsung.com

NORWAY

815 56480

www.samsung.com

POLAND

0 801-172-678* lub +48 22 607-93-33 **
*(całkowity koszt połączenia jak za 1 impuls 
według taryfy operatora)
** (koszt połączenia według taryfy operatora)

www.samsung.com/pl

PORTUGAL

808 20-SAMSUNG (808 20 7267)

www.samsung.com

ROMANIA

08008 SAMSUNG (08008 726 7864)
TOLL FREE No.

www.samsung.com/ro

SERBIA

011 321 6899

www.samsung.com/rs

SLOVAKIA

0800 - SAMSUNG (0800-726 786)

www.samsung.com

SPAIN

902172678

www.samsung.com

SWEDEN

0771 726 7864 (SAMSUNG)

www.samsung.com

SWITZERLAND

0848 - SAMSUNG (7267864,  CHF 0.08/
min)

www.samsung.com/ch 
(German)
www.samsung.com/ch_fr 
(French)

U.K

0330 SAMSUNG (7267864)

www.samsung.com

EIRE

0818 717100

www.samsung.com

LITHUANIA

8-800-77777

www.samsung.com/lt

LATVIA

8000-7267

www.samsung.com/lv

ESTONIA

800-7267

www.samsung.com/ee

HT-FS9200-XU_1024.indd   59

HT-FS9200-XU_1024.indd   59

2013-10-24     4:47:12

2013-10-24     4:47:12

Содержание HT-FS9200

Страница 1: ...sung product To receive more complete service please register your product at www samsung com register 2 1CH Blu ray Home Entertainment System user manual HT FS9200 HT FS9200 XU_0604 indd 1 HT FS9200 XU_0604 indd 1 2013 06 04 오전 10 32 38 2013 06 04 오전 10 32 38 ...

Страница 2: ...er Supply Plug UK Only IMPORTANT NOTICE The mains lead on this equipment is supplied with a moulded plug incorporating a fuse The value of the fuse is indicated on the pin face of the plug and if it requires replacing a fuse approved to BS1362 of the same rating must be used Never use the plug with the fuse cover removed If the cover is detachable and a replacement is required it must be of the sa...

Страница 3: ...try to play back again If the product makes an abnormal noise or produces a burning smell or smoke turn off the power switch immediately and disconnect the power plug from the wall outlet Then contact the nearest customer service centre for technical assistance Do not use the product Using the product as it is may cause a fire or an electric shock Licence Manufactured under licence from Dolby Labo...

Страница 4: ... information before using the 3D function Some viewers may experience discomfort while viewing 3D TV such as dizziness nausea and headaches If you experience any such symptom stop viewing 3D TV remove the 3D Active Glasses and rest Watching 3D images for an extended period of time may cause eye strain If you feel eye strain stop viewing 3D TV remove your 3D Active Glasses and rest A responsible ad...

Страница 5: ...Recorded Content 29 Using the AllShare Network Function 30 Controlling Video Playback 33 Controlling Music Playback 37 Playing Photo Contents 38 Listening to Radio 40 Using the Special Effects Remote Control Buttons NETWORK SERVICES 42 Logging In to Your Samsung Account 42 Before Using Movies TV Shows or Apps 43 Using Movies TV Shows 43 Using Apps 47 Screen Mirroring 47 Using the Web Browser 50 Li...

Страница 6: ...nd aspect ratio adjustment Information about the discs is written in detail on the disc box Please refer to this if necessary When you play a BD J title loading may take longer than a normal title or some functions may perform slowly Disc Types your Product cannot Play HD DVD DVD ROM PD MV Disc etc DVD RAM Super Audio CD except CD layer DVD RW VR mode CVD CD ROM CDV CD G CD I LD CD Gs play audio o...

Страница 7: ...hina NOTES If the Region number of a Blu ray Disc DVDs does not correspond to the Region number of this product the product cannot play the disc Logos of Discs the Product can Play Blu ray Disc 3D Blu ray Disc BD LIVE Dolby DivX PAL broadcast system in U K France Germany etc Java DTS Supported Formats Video File Support Limitations Even when a file is encoded by a supported codec listed above the ...

Страница 8: ...t GMC 2 or higher Supports SVAF Top Bottom Side by Side Only Supports BD MVC Spec Only Audio decoder Supports WMA 10 Pro Up to 5 1 Does not support WMA lossless audio Supported ADPCM IMA MS Does not support ADPCM A Law μ Low Does not support QCELP AMR NB WB Supports vorbis Up to 2ch Supports Dolby Digital Plus Up to 7 1ch Comments MPEG4 Supports up to GMC 1 Warping Point H 264 Supports up to BP MP...

Страница 9: ...orts USB Mass Storage Class MSC devices such as thumb drives and USB HDD HUB is not supported Certain USB HDD Devices multi card readers and thumb drives may not be compatible with this product If some USB devices require excessive power they may be limited by the circuit safety device If playback from a USB HDD is unstable provide additional power by plugging the HDD into a wall socket If the pro...

Страница 10: ...phones or mobile devices placed near the vacuum tube amp or electronic products placed on the top of the product can cause audio noise or distortion When the product is on do not let children touch the product s surface It will be hot To upgrade the product s software through the USB jack you must use a USB flash drive When the product displays the Blu ray Disc menu you cannot start the movie by p...

Страница 11: ...s product does not receive AM broadcasts Attaching the Toroidal Ferrite Core of the Main Unit For the Speaker Cable 1 Open the ferrite core by pulling up the tab 2 Make a loop twice in the Speaker Cables 3 Attach the ferrite core to the arranged cables and press to close it until you hear a click Insert the ferrite core as close to the main unit as possible For the Power Cord If you attach a Toroi...

Страница 12: ...al Blu ray Disc functions Press to search contents Press to select the home theater s mode HDMI1 AUX BD DVD etc or Press to select TV s video mode Press to stop play a disc Press to use Smart Hub Turns the remote control light on or off When on the buttons become illuminated for a moment when pressed Using the remote control with this button set to ON will reduce the battery usage time If you want...

Страница 13: ...5 Anam 01 02 03 04 05 06 07 08 09 10 11 12 13 14 AOC 01 18 40 48 Bell Howell M Wards 57 58 81 Brocsonic 59 60 Candle 18 Cetronic 03 Citizen 03 18 25 Cinema 97 Classic 03 Concerto 18 Contec 46 Coronado 15 Craig 03 05 61 82 83 84 Croslex 62 Crown 03 Curtis Mates 59 61 63 CXC 03 Daewoo 02 03 04 15 16 17 18 19 20 21 22 23 24 25 26 27 28 29 30 32 34 35 36 48 59 90 Daytron 40 Dynasty 03 Emerson 03 15 40...

Страница 14: ...rom the screen Front L Front R Product Subwoofer Front Speakers Place these speakers in front of your listening position facing inwards about 45 toward you Place the front speakers so that their tweeters will be at the same height as your ear Subwoofer The position of the subwoofer is not so critical Place it anywhere you like Speaker Components Front x 2 Stand Base x 2 Cover x 2 Subwoofer Front x...

Страница 15: ...stall the product on the wall fasten the screws or nails on the wall firmly and use the holes on the rear of speaker to install However when you install it accessories nails or screws and installation is not provided by the company Do not let children play with or near the speakers They could get hurt if a speaker falls When connecting the speaker wires to the speakers make sure that the polarity ...

Страница 16: ...back of the product to the HDMI OUT jack on your digital device Select the HDMI1 or HDMI2 mode Method 2 AUX IN Connecting an External Analogue Component Using a RCA audio cable not supplied connect the AUDIO In jack on the product to the AUDIO Out jack on the external analogue component Select the AUX mode Be sure to match the colours on the cable plugs to the colours on the input and output jacks...

Страница 17: ...d service Wireless IP sharer NOTES If your wireless IP router supports DHCP this product can use a DHCP or static IP address to connect to the wireless network Set your wireless IP router to Infrastructure mode Ad hoc mode is not supported The product supports only the following wireless security key protocols WEP OPEN SHARED WPA PSK TKIP AES WPA2 PSK TKIP AES Select a channel on the wireless IP r...

Страница 18: ... PC or mobile devices 4 Settings Set various functions to suit your personal preferences 5 Recommended Apps A list of useful and popular apps we recommend you download 6 Web Browser You can access the Internet using the Web Browser application 7 RED A Press the RED A button on your remote to create and or log in to your personal Samsung account BLUE D Set up the Screen Mirroring function between t...

Страница 19: ... or Smart Hub Home menu while in 3D mode the product will switch to 2D automatically Screen Size Enter the size of the TV attached to the product The product will automatically adjust the 3D output to the screen size of the TV TV Aspect Ratio Lets you adjust the output of the product to the screen size of your TV See page 51 BD Wise BD Wise is Samsung s latest inter connectivity feature When you c...

Страница 20: ...V digital optical input will not work If Audio Return Channel is set to auto and you are using an HDMI Cable to connect the product to the TV ARC or digital optical input is selected automatically Digital Output Lets you set the Digital Output to match the capabilities of the AV receiver you ve connected to the product For more details please refer to the digital output selection table See page 53...

Страница 21: ...our Apps Push Notification Settings Receive notifications from selected services Properties See basic info about Apps VOD Rating Lock You can lock access to Video on Demand VOD content based on its rating NOTES The default security PIN is 0000 Depending on your country this menu function may not be supported Terms Conditions Privacy Policy Lets you view the Smart Hub Terms and Conditions and Priva...

Страница 22: ...s or more All settings will revert to the factory default settings NOTES When the factory default settings are restored all the user stored BD data is deleted General You can specify the display brightness and time zone Front Display Lets you change the brightness of the front panel Time Zone You can specify the time zone that is applicable to your area Menu Transparency Adjust the transparency of...

Страница 23: ...cting to a wired network connect the product to your router using a LAN cable before you start the configuration procedure To begin configuring your network connection follow these steps 1 In the Home screen select Settings and then press the E button 2 Select Network and then press the E button 3 Select Network Settings and then press the E button 4 Go to the instructions for Wired networks start...

Страница 24: ... networks Network Settings Select your network type Network type Wireless Wireless network You can connect your Blu ray player to the internet Please select which wireless network to use si ap iptime iptime5G KIMING_VTOWER TIAS Refresh WPS PBC 2 Select the desired network and then press the E button 3 On the Security screen enter your network s security code or pass phrase Enter numbers directly u...

Страница 25: ...lecting a letter with the buttons and then pressing the E button 13 When finished select Done at the right of the screen and then press the E button The product verifies the network connection and then connects to the network 14 After the home cinema verifies the network select OK and then press the E button NOTES You can also begin the Manual Network setting by going to Settings Network Network S...

Страница 26: ...ct Using a PIN 1 Select the Wi Fi Direct device you want to connect to this product and then press the E button 2 The PIN pop up appears 3 Note the PIN code in the pop up and then enter it into the appropriate field in the Wi Fi Direct device you want to connect 4 The Connecting pop up appears followed by the Connected pop up When it closes you should see the device listed on the Wi Fi Direct scre...

Страница 27: ... is in Auto update mode with the power off If it downloads new upgrade software the product will ask you if you want to install it when you turn the product on NOTES To use the Auto update function your product must be connected to the Internet Update by USB 1 Visit www samsung com 2 Click SUPPORT on the top right of the page 3 Enter the product s model number into the search field As you enter th...

Страница 28: ...the product on 2 Connect the USB device to the USB port on the front panel of the product The New Device Connected pop up appears Movies TV Shows Apps Photos Videos Music V Apps Pho Vide Mus V Apps Pho e s Photos Videos Music All Content New device connected USB Flash Disk Add App Add App Add App Web Browser Settings NOTES If the pop up does not appear go to Method 2 3 Use the buttons to select Ph...

Страница 29: ...Photos Videos or Music and then press the E button NOTES Even though the product will display folders for all content types it will only display files of the Content Type you selected in Step 2 For example if you selected music you will only be able to see music files You can change this selection by returning to the Home screen and repeating Step 2 3 A screen appears listing the contents of the d...

Страница 30: ...V 0 5A Only available with Samsung phones supporting AllShare functionality 1 Connect the product your PC and your DLNA compatible cellular phone to the same wireless network 2 Follow the directions in the AllShare software Installation Instruction manual to set up devices and files for playing or viewing 3 On your computer using the AllShare software confirm your phone is connected 4 On the phone...

Страница 31: ...ed to 2D contents it may not be displayed properly Search Scene You can use the Search Scene function during playback to view or start a movie from the scene of your choice NOTES If the index information in the file is damaged or the file does not support indexing you will not be able to use the Search Scene function If you are using the DLNA function after connecting to a computer through your ne...

Страница 32: ...t the desired audio language Audio Sync In some cases when the product is connected to a digital TV the audio signal may not synchronize with the video signal If this occurs adjust the audio delay time to match the video signal Equaliser Mode Select to use the Equaliser Equaliser Settings Select to set the Equaliser NOTES It only appears when equaliser mode is on Subtitle Select to set the desired...

Страница 33: ...y differ All options may not be displayed The View and Options menus are usually available when you are viewing video files on a USB flash drive a PC a disc you recorded yourself or a mobile device They are usually not available if you are viewing a commercial Blu ray DVD or CD disc Controlling Music Playback You can control the playback of music content located on a DVD CD USB mobile device or PC...

Страница 34: ...e upper right and then press the E button Music View Track Displays all the music tracks on the media or storage device Album Displays all the music on the media or storage by album Artist Displays all the music files on the media or storage device by artist Genre Displays all music on the media or storage by genre Folder Displays all the folders on the media or storage device Options Play Selecte...

Страница 35: ...k and then press the E button A check appears to the left of the track 4 Repeat Step 3 to select and check additional tracks 5 To remove a track from the list move to the track and then press the E button again The check on the track is removed 6 When done press the buttons to select Play and then press the E button The Music Playback screen reappears listing only the tracks you checked The select...

Страница 36: ...cted tracks at once Using Bluetooth You can use a Bluetooth device to enjoy music with high quality stereo sound all without wires What is Bluetooth Bluetooth is a technology that enables Bluetooth compliant devices to interconnect with each other easily using a short wireless connection A Bluetooth device may hum or malfunction When a part of your body is in contact with the receiving transmittin...

Страница 37: ...evice from the Home Cinema For instructions refer to the Bluetooth device s manual When the Home Cinema is disconnected from the Bluetooth device the Home Cinema will display DISCONNECTED on the front display To disconnect the Home Cinema from the Bluetooth device Press the button on the front panel of the Home Cinema to switch from BT to another mode or turn off the Home Cinema Except when you di...

Страница 38: ...edia or storage device by Date Click a group to see the photos in that group Title Displays all the photo files on the media or storage device by title Folder Displays all the folders on the media or storage device Options Slide Show Starts the slide show Shows all the files in the current folder one after another If you want to create a slide show with a selected group of photos see Play Selected...

Страница 39: ... display Description on RDS function PTY Program Type Displays the type of program currently being broadcast PS NAME Program Service Name Indicates the name of broadcasting station and is composed of 8 characters RT Radio Text Decodes the text broadcast by a station if any and is composed of maximum 64 characters CT Clock Time Decodes the real time clock from the FM frequency Some stations may not...

Страница 40: ...ll on the display The centre unit searches 29 preset FM stations stops when it finds the one you have selected and tunes in that station Using the Special Effects Remote Control Buttons SOUND EFFECT Function SOUND EFFECT Lets you select a mode that optimizes the sound 1 Press the SOUND EFFECT button 2 Press the buttons to select the desired mode DSP or Sound Mode 3 Press the buttons to select the ...

Страница 41: ...en change to D IN TV SOUND ON Output to Home theatre speakers TV SOUND OFF Output to Anynet connected TV Speaker Use in this case 1 If you want to listen to the sound via home cinema speaker when you watch a TV 2 If you want to listen to the sound from the USB media that plugged to the TV via home cinema speaker TV SOUND ON OFF support specification Connected TV Anynet HDMI CEC Setting TV Sound ON...

Страница 42: ... have logged in the My Account pop up appears On the pop up you can select Logout Change Account Information Link Service Accounts Remove Accounts from the Device and Deactivate Account To rent movies and purchase for pay apps you must have a credit card registered in your account If you haven t registered a card select Change Account Information On the Change Account information page select Regis...

Страница 43: ...ow the directions on the screen to start the movie NOTES If you haven t logged into your Samsung account the Log in screen will appear after Step 3 and you will need to log in If you don t have a credit card associated with your Samsung account after you log in the Register Card screen will appear Follow the directions on the screen You must have a credit card registered to your account to rent mo...

Страница 44: ...gory Each time you move the highlight to another category a different set of applications appears on the right 6 Use the button to move to the applications and the buttons to move from app to app 7 To see more information about an app select it and then press the E button 8 To download the app follow the directions in Steps 2 and 3 Starting an Application 1 Select Apps on the Home screen and then ...

Страница 45: ...On the More Apps screen use the buttons to go to Options at the top of the screen and then press the E button 2 Select Edit My Apps and then press the E button The Edit My Apps screen appears 3 Select the app you want to delete from My Apps press the E button and then press the buttons in the direction of the The Remove from My Apps pop up appears 4 Select Yes and then press the E button 5 When yo...

Страница 46: ...or the folder When finished select Done on the right side and then press the E button The Rename popup reappears displaying the new name 6 Select OK and then press the E button The folder is renamed 7 Select Close on the right side of the screen and then press the E button Delete Delete lets you delete apps and folders from the My Apps screen If there are apps in a folder both the folder and the a...

Страница 47: ...ser You can access the Internet using the Web Browser application Select Web Browser on the Home screen and then press the E button NOTES When you run the Web Browser with the product connected by HDMI to a BD Wise compatible TV and BD Wise is on the browser is maximized to fill the screen and the TV s resolution is set to the optimal resolution automatically The Web Browser is not compatible with...

Страница 48: ...then press the E button the keyboard pop up appears E http www samsung com Caps 1 2 3 4 5 6 7 8 9 0 Clear q w e r t y u i o p 123 a s d f g h j k l Done z x c v b n m Cancel ENG www com 4 As you enter characters recommended text will be shown To use the keyboard pop up with your remote follow these steps 1 Use the buttons on your remote to move the highlight to a letter or number of your choice 2 ...

Страница 49: ...Pointer Browsing Reading Tools Provides an easy to read page by enlarging the main text Reading Tools is not available for all pages Approved Sites Lets you restrict your children s access to inappropriate web pages by allowing access only to the web sites you have registered Every time you access Approved Sites the PIN screen appears The first time you access Approved Sites enter the default PIN ...

Страница 50: ...gged in press the RED A button on your remote again 3 Select Link Service Accounts in the My Account pop up and then press the E button 4 On the Link Service Accounts screen select the service you want to link to the product and then press the E button 5 Select Register and then press the E button 6 In the ID and Password screen enter the ID you use to log in to the service you selected using the ...

Страница 51: ...Digital Output or you will hear no sound or just loud noise If the HDMI device AV receiver TV is not compatible with compressed formats Dolby Digital DTS the audio signal outputs as PCM Regular DVDs do not have BONUSVIEW audio and Navigation Sound Effects Some Blu ray Discs do not have BONUSVIEW audio and Navigation Sound Effects This Digital Output setup does not affect the analogue L R audio or ...

Страница 52: ...ges may not be available Some Blu ray Discs may allow you to select either the PCM or Dolby Digital audio soundtrack in English Selecting the Subtitle Language Depending on the Blu ray Disc DVD you may be able to change the subtitle language in the Disc Menu Press the DISC MENU button This function depends on the selection of subtitles that are encoded on the disc and may not be available on all B...

Страница 53: ...y Disc Any Decodes the main feature audio and BONUSVIEW audio stream together into PCM audio and adds Navigation Sound Effects Outputs only the main feature audio stream so that your AV receiver can decode the audio bitstream You will not hear BONUSVIEW audio or Navigation Sound Effects Decodes the main feature audio and BONUSVIEW audio stream together into PCM audio and adds Navigation Sound Effe...

Страница 54: ...If no pictures are shown after selecting Yes please wait for 15 seconds to return to the previous resolution Do you want to change the resolution appears If you select Yes the TV s screen will go to blank for 15 seconds and then the resolution will revert to the previous resolution automatically If the screen stays blank after you have changed the resolution remove all discs and then press and hol...

Страница 55: ...e the speakers connected properly Is the speaker setup correctly customized Is the disc severely damaged The remote control does not work Are you operating the remote within its operational range and within the proper angle relative to the sensor Are the batteries drained Have you selected the mode TV BD functions of the remote control TV or BD correctly The disc is rotating but no picture is prod...

Страница 56: ...ause 1 The Blu ray DVD disc s software restricts it 2 The Blu ray DVD disc s software doesn t support the feature e g angles 3 The feature is not available at the moment 4 You ve requested a title or chapter number or search time that is out of range If the HDMI output is set to a resolution your TV cannot support for example 1080p you may not see a picture on your TV Press and hold the 5 button o...

Страница 57: ...set to Allow All If all above fails contact the contents provider or update to the latest firmware When using the BD LIVE service an error occurs The memory device must have at least 1GB of free space to accommodate the BD LIVE service You can check the available size in BD Data Management See page 51 NOTES When the factory default settings are restored all stored user BD data will be deleted Here...

Страница 58: ...AUX 500mV Specifications Speaker 2 1ch speaker system Speaker system Impedance Frequency range Output sound pressure level Rated input Maximum input Dimensions W x H x D mm Weights kg Front 3 140Hz 20kHz 87dB W M 165W 330W 53 0 x 648 0 x 53 0 Stand base 149 0 x 149 0 1 55 Subwoofer 40Hz 160Hz 88dB W M 170W 340W 205 6 x 390 6 x 350 6 6 33 Network speeds equal to or below 10Mbps are not supported Sa...

Страница 59: ...ung products please contact the SAMSUNG customer care centre Area Contact Centre Web Site Europe AUSTRIA 0810 SAMSUNG 7267864 0 07 min www samsung com BELGIUM 02 201 24 18 www samsung com be Dutch www samsung com be_fr French BOSNIA 051 331 999 www samsung com BULGARIA 07001 33 11 share cost tariff www samsung com bg CROATIA 062 SAMSUNG 062 726 786 www samsung com hr CZECH 800 SAMSUNG 800 726786 w...

Отзывы: