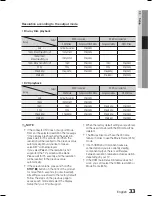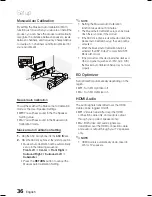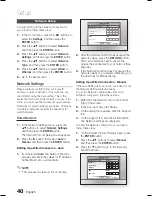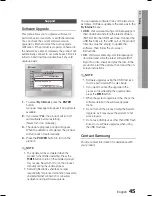
background image

English


47

04

Basic Functions

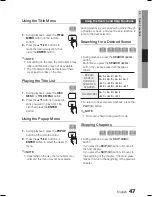
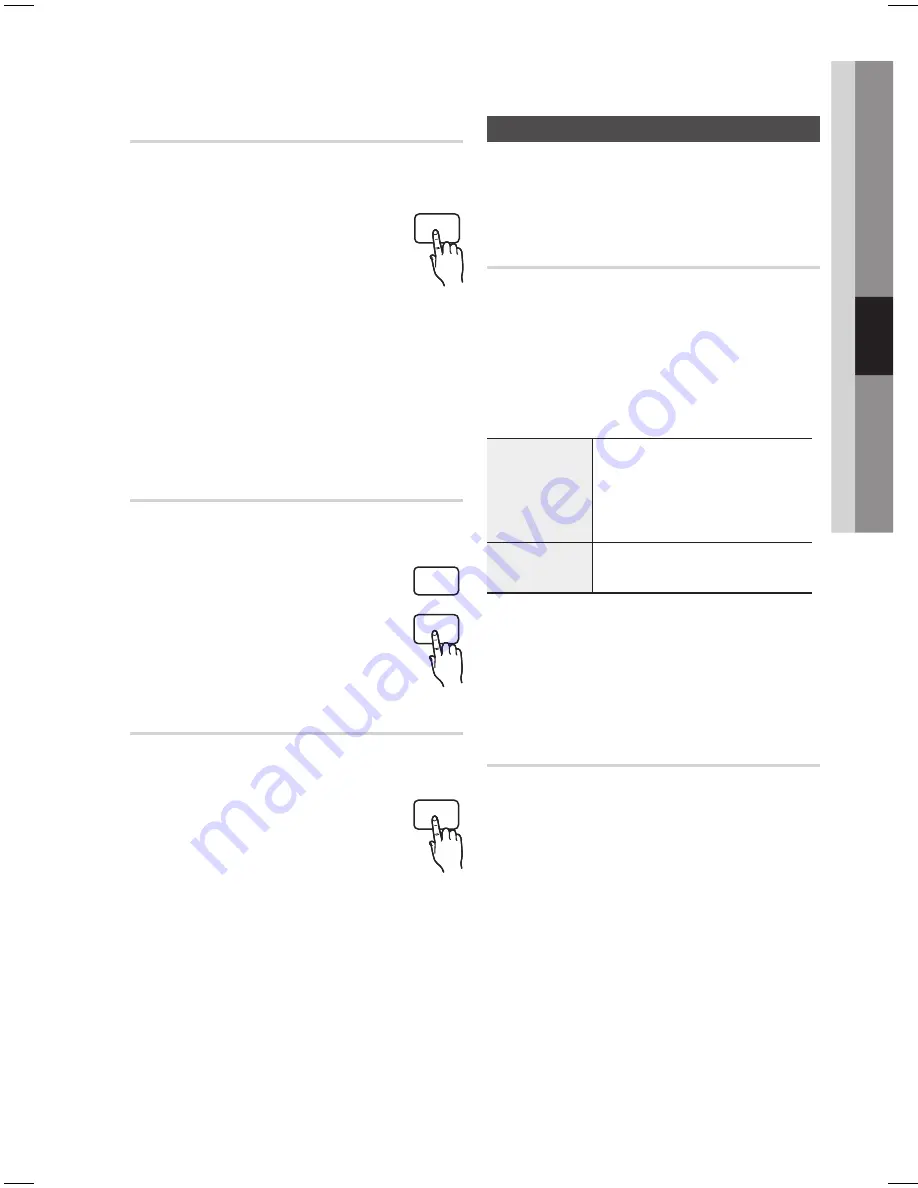
Using the Title Menu     

Z

During playback, press the 

TITLE 

MENU 

button on the remote 

control.

Press the 

▲▼◄ ►

 buttons to 

make the desired selection, then 
press the 

ENTER

 button.

NOTE

Depending on the disc, the menu items may 
differ and this menu may not be available.
The Title Menu will only be displayed if there 
are at least two titles on the disc.

Playing the Title List  


z

During playback, press the 

DISC 

MENU

 or 

TITLE MENU

 button.

Press the 

▲▼

 buttons to select an 

entry you want to play from Title 
List, then press the 

ENTER


button.

Using the Popup Menu


h

During playback, press the 

POPUP


button on the remote control.

Press the 

▲▼◄ ►

 buttons or 

ENTER

 button to select the desired 

menu.

NOTE

Depending on the disc, the menu items may 
differ and this menu may not be available.

1.

2.

1.

2.

1.

2.

Using the Search and Skip Functions

During playback, you can search quickly through 
a chapter or track, and use the skip function to 
jump to the next selection.

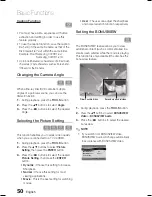
Searching for a Desired Scene

hzZyx

During playback, press the 

SEARCH

 (



button.
Each time you press the 

SEARCH

 (



button, the playback speed will change as 
follows.

BD-ROM, 

BD-RE/-R, 

DVD-RW/-R, 

DVD+RW/+R,

DVD-VIDEO

)

 1 

 )

 2 


)

 3 


)

 4 



)

 5 


)

 6 


)

 7

(

 1 

 (

 2 


(

 3 


(

 4 



(

 5 


(

 6 


(

 7

DivX, MKV, MP4

)

 1 

 )

 2 


)

 3

(

 1 

 (

 2 


(

 3

To return to normal speed playback, press the 

PLAY

 (

) button.

NOTE

No sound is heard during search mode.

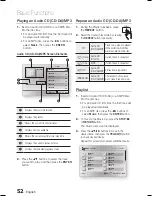
Skipping Chapters

hzZyx

During playback, press the 

SKIP

 (

#$

button.
If you press the 

SKIP

 (

$

) button, it moves to 

the next chapter.
If you press the 

SKIP

 (

#

) button, it moves to 

the beginning of the chapter. One more press 
makes it move to the beginning of the previous 
chapter.

TITLE MENU

POPUP

TITLE MENU

POPUP

DISC MENU

TITLE MENU

POPUP

HT-C5900_5950W_XSA_0504.indd   47

HT-C5900_5950W_XSA_0504.indd   47

2010-05-04     11:11:06

2010-05-04     11:11:06

Содержание HT-C5900

Страница 1: ...y Home Cinema System user manual imagine the possibilities Thank you for purchasing this Samsung product To receive more complete service please register your product at www samsung com register HT C5900 HT C5950W ...

Страница 2: ...o dripping or splashing and no objects filled with liquids such as vases shall be placed on the apparatus The Mains plug is used as a disconnect device and shall stay readily operable at any time This apparatus shall always be connected to a AC outlet with a protective grounding connection To disconnect the apparatus from the mains the plug must be pulled out from the mains socket therefore the mai...

Страница 3: ...tion may occur if your product or disc has been stored in cold temperatures If transporting the product during the winter wait approximately 2 hours until the product has reached room temperature before using The batteries used with this product contain chemicals that are harmful to the environment Do not dispose of batteries in the general household trash Viewing TV using the 3D function IMPORTAN...

Страница 4: ...copy protection technology that is protected by U S patents and other intellectual property rights of Rovi Corporation Reverse engineering and disassembly are prohibited ABOUT DIVX VIDEO DivX is a digital video format created by DivX Inc This is an official DivX Certified device that plays DivX video Visit www divx com for more information and software tools to convert your files into DivX video ABOU...

Страница 5: ...etwork 28 Attaching the Toroidal Ferrite Core to the Speaker Cables of the Main Unit SETUP 29 29 Before Starting Initial settings 30 Setting the Menu 31 Display 31 3D 32 TV Aspect 32 BD Wise 32 Resolution 34 HDMI Format 34 Movie Frame 24 Fs 34 Progressive Mode 34 Still Mode 34 HDMI Deep Color 35 Audio 35 Speaker Setting 36 Musical Auto Calibration 36 EQ Optimizer 36 HDMI Audio 37 Digital Output 38...

Страница 6: ... Play 48 Repeat Playback 49 Using the TOOLS button 51 Listening to Music 53 Sound Mode 54 Playing back a Picture 55 Playing back a USB Storage 56 Listening to Radio 57 Using an iPod NETWORK SERVICES 59 59 Using Internet TV 63 BD LIVE 63 Software Upgrade Notification 63 Using the AllShare Function OTHER INFORMATION 65 65 Troubleshooting 68 Specifications Figures and illustrations in this User Manual ...

Страница 7: ...lves a function available in a CD RW R DVD RW R disc or a USB storage media containing MP3 or WMA contents JPEG G This involves a function available in a CD RW R DVD RW R disc or a USB storage media containing JPEG contents DivX MKV MP4 DivX x This involves a function available in a CD RW R DVD RW R disc or a USB storage media containing DivX contents USB storage device F This involves a function ...

Страница 8: ...sits of cigarette smoke on the recording surface may make it impossible to use the disc for playback When a BD Java title is played loading may take longer than a normal title or some functions may perform slowly Discs that cannot be played HD DVD Disc DVD RAM 3 9 GB DVD R Disc for Authoring DVD RW VR mode Super Audio CD except CD layer DVD ROM PD MV Disc etc CVD CD ROM CDV CD G CD I LD CDGs play ...

Страница 9: ...he ideal format for making backups or recording personal video DVD VIDEO A digital versatile disc DVD can contain up to 135 minutes of images 8 audio languages and 32 subtitle languages It is equipped with MPEG 2 picture compression and Dolby Digital surround allowing you to enjoy vivid and clear quality images When switching from the first layer to the second layer of a dual layered DVD Video disc...

Страница 10: ...rding data on a DVD RW or DVD R disc The disc can be played by this product once it has been finalsed If a disc that has been recorded in Video Mode by a different maker s recorder but has not been finalsed it cannot be played by this product DivX Digital Video Express DivX is a video file format developed by Microsoft and is based on MPEG4 compression technology to provide audio and video data over ...

Страница 11: ...x1080 DivX 5 1 6 0 1920x1080 XviD 1920x1080 H 264 BP MP HP 1920x1080 wmv WMV wmv9 VC 1 AP WMA 1920x1080 VC 1 SM 1920x1080 mp4 MP4 MP4 mp4v AAC 1920x1080 H 264 BP MP HP 1920x1080 mpg mpeg PS MPEG1 MP1 2 AC3 DTS 1920x1080 MPEG2 1920x1080 H 264 BP MP HP 1920x1080 Music File Support File Extension Container Audio Codec Support Range mp3 MP3 MP3 wma WMA WMA Compliant with WMA version 10 Sampling rates ...

Страница 12: ...I Control Bulk Interrupt is not supported Digital Cameras that use PTP protocol or require additional program installation when connected to a PC are not supported A device using the NTFS file system is not supported Only the FAT 16 32 File Allocation Table 16 32 file system is supported Does not operate with Janus enabled MTP Media Transfer Protocol devices USB Devices that can be used with the pro...

Страница 13: ...nes down the FM frequency band 8 STOP BUTTON Stops disc playback 9 PLAY PAUSE BUTTON Plays a disc or pauses playback 10 TUNING UP SKIP BUTTON Goes to the next title chapter track Tunes up the FM frequency band 11 VOLUME CONTROL Volume adjustment 12 USB PORT A USB storage device can be connected here and used as storage when connected to BD LIVE It can also be used for software upgrades and MP3 JPE...

Страница 14: ...ously using an HDMI cable 8 HDMI OUT JACK Use an HDMI cable connect this HDMI output terminal to the HDMI input terminal on your TV for the best quality picture 9 WIRELESS LAN JACK Can be used for network based services see pages 59 64 BD LIVE and software upgrade with a wireless LAN adapter 10 LAN TERMINAL Can be used for network based services see pages 59 64 BD LIVE and software upgrade under t...

Страница 15: ... forwards Press to stop play a disc Press to pause a disc Adjust the volume Search for active FM stations and change channels Cut off the sound temporarily You can set the SFE Sound Field Effect mode best suited for the type of music you are listening to Press to view the disc menu Press this to move to the home menu Select on screen menu items and change menu value Return to the previous menu All...

Страница 16: ...ll Howell M Wards 57 58 81 Brocsonic 59 60 Candle 18 Cetronic 03 Citizen 03 18 25 Cinema 97 Classic 03 Concerto 18 Contec 46 Coronado 15 Craig 03 05 61 82 83 84 Croslex 62 Crown 03 Curtis Mates 59 61 63 CXC 03 Daewoo 02 03 04 15 16 17 18 19 20 21 22 23 24 25 26 27 28 29 30 32 34 35 36 48 59 90 Daytron 40 Dynasty 03 Emerson 03 15 40 46 59 61 64 82 83 84 85 Fisher 19 65 Funai 03 Futuretech 03 Genera...

Страница 17: ...t anywhere you like This section involves various methods of connecting the product to other external components Before moving or installing the product be sure to turn off the power and disconnect the power cord Connecting the Speakers Connections SW Position of the product Place it on a stand or cabinet shelf or under the TV stand Selecting the Listening Position The listening position should be...

Страница 18: ...s L R HT C5900 Speaker Components Assembled Speakers NOTE Refer to page 19 to install the Speakers on the Tallboy Stand FRONT L R STAND STAND BASE SPEAKER CABLE SURROUND L R HT C5950W HT C5950W FRONT SURROUND SPEAKER CENTRE SPEAKER SUBWOOFER CENTRE SUBWOOFER SCREW Large 4EA SCREW Small 16EA ...

Страница 19: ...nnect it to the Stand Insert four small screws clockwise into the four holes marked using a screwdriver as shown in the illustration Connect the upper Speaker to the assembled Stand Insert another large screw clockwise into the hole on the rear of the speaker using a screwdriver 1 2 3 4 2 3 Stand Speaker 4 Stand 1 Stand Base ...

Страница 20: ...s to the speaker jacks 1 2 3 Black Red FM ANT iPod SPEAKER IMPEDANCE 3 FM ANT iPod SPEAKER IMPEDANCE 3 SPEAKER IMPEDANCE 3 Front Speaker R Subwoofer Surround Speaker R Surround Speaker L Front Speaker L Centre Speaker NOTE HT C5950W do not have surround speaker connectors on the main unit The surround speakers are connected to the Wireless Receiver Module See pages 21 22 The surround speakers for ...

Страница 21: ...KER IMPEDANCE 3 Front Speaker R Subwoofer Centre Speaker Surround Speaker R Wireless Receiver Module Front Speaker L Surround Speaker L NOTE This product should be connected with the SWA 5000 only Wireless Receiver Module SWA 5000 Wireless Receiver Module TX Card Speaker Cable 2EA HT C5950W ...

Страница 22: ...ide down or in the reverse direction Insert the TX card when the product is turned off Inserting the card when it is turned on may cause a problem If the TX Card is inserted and wireless receiver module setting is complete sound is not output from the surround speaker connectors on the product The wireless receiving antenna is built into the wireless receiver module Keep it away from water and moi...

Страница 23: ...nding on your TV If an HDMI cable is connected or removed during playback of a CD DA MP3 or JPEG file the product will stop playing After making the video connection set the Video input source on your TV to match the corresponding Video output HDMI Component or Composite on your product See your TV owner s manual for more information on how to select the TV s Video Input source If you have set the ...

Страница 24: ...gital signal to the TV If your TV does not support HDCP random noise appears on the screen What is the HDCP HDCP High band width Digital Content Protection is a system for protecting BD DVD content outputted via HDMI from being copied It provides a secure digital link between a video source PC DVD etc and a display device TV projector etc Content is encrypted at the source device to prevent unauth...

Страница 25: ...th HDMI and Component jacks are connected and you select the Component 1080p 1080i 720p or 576p 480p mode the Display Setup menu will show the output resolution as 1080p 1080i 720p or 576p 480p in the menu The resolution is actually 576i 480i METHOD 2 Composite Video GOOD QUALITY Connect the supplied Video cable from the VIDEO OUT jack on the back of the product to the VIDEO IN jack on your TV NOT...

Страница 26: ...al components This system supports only DTS and Dolby Digital audio MPEG audio which is bitstream cannot be supported AUX Connecting an External Analogue Component Analogue signal components such as a VCR Connect AUX IN Audio on the product to the Audio Out of the external analogue component Be sure to match connector colours Press the FUNCTION button to select AUX input The mode switches as follo...

Страница 27: ... of the product to the LAN terminal of your modem Set the network options See page 40 NOTE Internet access to Samsung s software update server may not be allowed depending on the router you use or the ISP s policy For more information contact your ISP Internet Service Provider For DSL users please use a router to make a network connection For the AllShare function a PC must be connected in the net...

Страница 28: ...o Infrastructure mode Ad hoc mode is not supported When applying the security key for the AP wireless IP sharer only the following is supported Authentication Mode WEP WPAPSK WPA2PSK Encryption Type WEP AES For the AllShare function a PC must be connected in the network as shown in the figure Attaching the Toroidal Ferrite Core to the Speaker Cables of the Main Unit If you attach a Toroidal ferrite...

Страница 29: ...3 minutes 1 2 3 4 5 6 Press the buttons to the select the desired Network Settings Wired Wireless or PBC WPS then press the ENTER button See pages 40 43 The Network Test will start and Initial Settings will be completed a Previous d Skip Move Select Initial Settings I Network Network Setting is needed to use various Internet services Choose the primary method for connecting to network Wired Set th...

Страница 30: ...ome menu 2 RETURN Button Return to the previous menu 3 ENTER DIRECTION Button Press the arrow buttons to move the cursor and select an item Press the ENTER button to launch the selected item or confirm the setting 4 EXIT Button Press this to exit the menu Press the POWER button The Home Menu will appear Home Menu internet radio You Tube No Disc a Change Device d View Devices Enter Please activate I...

Страница 31: ...ld be seen on left or right or both sides TV Screen Size Lets you enter the actual screen size of your TV so that the product can adjust the image according to the screen size and display an optimal 3D image The maximum allowed screen size is 116 inches for this product CAUTION If you want to enjoy a 3D content connect a 3D device 3D compliant AV receiver or TV to the product and wear a 3D glass b...

Страница 32: ...s with BD Wise to each other via HDMI the optimum resolution will be set automatically Off The output resolution will be fixed according to the Resolution previously set regardless of the resolution of the disc On The original resolution of the BD DVD disc will be output to the TV NOTE If you want to change the resolution in BD Wise you must set BD Wise to Off in advance If you set off the BD Wise ...

Страница 33: ...s are shown after the selection please wait for 15 seconds And then the resolution will be reverted to the previous value automatically Would you like to make a selection will be displayed If you select Yes and the resolution is not supported the TV s screen will be blank Please wait for 15 seconds and the resolution will be reverted to the previous value automatically If the screen is blank press...

Страница 34: ...l 30 frame When the setting switches between Movie 24 frame and Video 30 frame the screen may blink for a few seconds If your TV does not support Movie Frame 24Fs function the pop up message will be displayed Progressive Mode Set to improve picture quality when viewing DVDs Auto Select this to have the product automatically set the best picture for the DVD you re watching Video Select this for the...

Страница 35: ... the speakers are set up correctly To stop the test tone press the buttons to select Off Display Audio System Network Language Security General Support Settings Speaker Setting Change rReturn Level Distance Test Tone All NOTE When HDMI Audio is ON audio is produced through TV speakers the Test Tone function is not available Audio Speaker Setting Level You can adjust the balance and level for each ...

Страница 36: ...tton to cancel the Musical Auto Calibration Setting 1 2 NOTE Setting the Musical Auto Calibration function takes about 3 minutes The Musical Auto Calibration setup can be made when there is no disc in the product If the ASC microphone is disconnected during the Musical Auto Calibration setup the setup will be cancelled When the Musical Auto Calibration function is activated the DSP Dolby Pro Logic...

Страница 37: ...ess of Digital Output Selections PCM or Bitstream Digital Output Selection Setup PCM Bitstream Re encode Bitstream Audiophile Connection HDMI Receiver Optical HDMI Receiver or Optical HDMI Receiver Optical Audio Stream on Blu ray Disc PCM Up to 7 1ch PCM 2ch DTS re encoded PCM PCM 2ch Dolby Digital Up to 5 1ch PCM 2ch DTS re encoded Dolby Digital Dolby Digital Dolby Digital Plus Up to 7 1ch PCM 2c...

Страница 38: ...c playback simply by pressing the PLAY button on the TV s remote control For more information please see the TV user manual Off Anynet function will not work On Anynet function will work NOTE This function is not available if the HDMI cable does not support CEC If your Samsung TV has an n logo then it supports the Anynet function Depending on your TV certain HDMI output resolutions may not work Pl...

Страница 39: ...ct rReturn Clock Mode You can select Auto or Manual If you select Manual the Clock Set menu will be activated while DST will be deactivated Clock Set You can specify the current time and date manually Time Zone You can specify the time zone that is applicable to your area DST You can set DST Daylight Saving Time 1 hour 2 hours and off DivX R Registration View DivX R VOD Registration Code to purcha...

Страница 40: ...and fills in the values for IP Address Subnet Mask etc automatically NOTE This process can take up to five minutes 1 2 3 4 5 6 1 2 1 Network Setting Internet Protocol Setup Auto IP Address 0 0 0 0 Subnet Mask 0 0 0 0 Gateway 0 0 0 0 DNS Auto DNS Server 0 0 0 0 Move Enter Return After the Network Function has acquired the network values press the RETURN button Then run a Network Test to ensure the pr...

Страница 41: ...After the network connection is set up press the RETURN button to exit the Network Setting screen Setting Up the Wireless Network Connection Auto Network Search Most wireless networks have an optional security system that requires devices that access the network to transmit an encrypted security code called an Access or Security Key The Security Key is based on a Pass Phrase typically a word or a ...

Страница 42: ...umber you entered press the GREEN B button 5 6 7 8 9 When done press the BLUE D button on your remote and then press the ENTER button Wait until the connection confirmation message is displayed and then press the ENTER button The Network Settings screen reappears To test the connection press the button to select Network Test and then press the ENTER button Setting Up the Wireless Network Connection...

Страница 43: ...atus Check whether a connection to the network and the Internet have been established 5 6 7 8 9 10 BD LIVE Internet Connection Set whether to allow internet connection when BD LIVE service is used Allow All The Internet connection will be allowed for all BD LIVE contents Allow Valid Only The Internet connection will be allowed only for BD LIVE contents containing a valid certificate Prohibit No Int...

Страница 44: ... password used to access security functions Display Audio System Network Language Security General Support Settings Change Password Enter Pin rReturn Enter the password If you forgot your password Remove the disc Press and hold the STOP button on the front panel for 5 seconds or more All settings will revert to the factory settings NOTE When the factory default settings are restored all the user d...

Страница 45: ... Never turn off or on the product manually during the update process Samsung Electronics shall take no legal responsibility for product malfunction caused an unstable internet connection or consumer negligence during software upgrade 1 2 3 4 You can update software in any of the two ways as follows Software update is the same as in the By Internet menu USB Visit www samsung com bluraysupport then ...

Страница 46: ...USE Pauses playback NOTE Not Available will appear when an invalid button is pressed 1 2 3 Disc Structure The contents of disc are usually divided as below Blu ray Disc DVD VIDEO title 1 title 2 chapter 1 chapter 2 chapter 1 chapter 2 chapter 3 Audio CD CD DA track 1 track 2 track 3 track 4 track 5 MP3 WMA DivX MKV and MP4 folder group 1 folder group 2 file 1 file 2 file 1 file 2 file 3 Using the Disc ...

Страница 47: ...the disc the menu items may differ and this menu may not be available 1 2 1 2 1 2 Using the Search and Skip Functions During playback you can search quickly through a chapter or track and use the skip function to jump to the next selection Searching for a Desired Scene hzZyx During playback press the SEARCH button Each time you press the SEARCH button the playback speed will change as follows BD R...

Страница 48: ...eat Playback Repeat the Title or Chapter hzZy Repeat the disc title or chapter During playback press the REPEAT button on the remote control Press the buttons to select Chapter or Title then press the ENTER button 1 2 Repeat Off To return to normal play press the REPEAT button again Press the buttons to select Off the press the ENTER button NOTE Depending on the disc the Repeat function may not be...

Страница 49: ... displayed if the Blu ray Disc has a BONUSVIEW section Use the button to switch between primary and secondary audio modes This function depends on what audio languages are encoded on the disc and may not be available A Blu ray Disc can contain up to 32 audio languages and a DVD up to 8 Some Blu ray Discs may allow you to select either the multi channel LPCM or Dolby digital audio soundtrack in Eng...

Страница 50: ...the TOOLS button Press the buttons to select Picture Setting then press the ENTER button Press the buttons to select the desired Picture Setting then press the ENTER button Dynamic Choose this setting to increase Sharpness Normal Choose this setting for most viewing applications Movie This is the best setting for watching movies 1 2 3 1 2 3 User The user can adjust the sharpness and noise reductio...

Страница 51: ...elect or deselect a track in the music list 7 ENTER button Plays and pauses the selected track 8 buttons Fast Play except for Audio CD CD DA 9 STOP button Stops a track 0 SKIP button During playback moves to the next page in the Music List or moves to the next track in the Playlist SKIP button During playback moves to the previous page in the Music List or moves to the previous track in the Playli...

Страница 52: ...ed play mode by pressing the REPEAT button repeatedly Off Audio CD CD DA MP3 Tracks on a disc are played in the order in which they were recorded on the disc Track Audio CD CD DA Current track is repeated One MP3 Current track is repeated All Audio CD CD DA MP3 All tracks are repeated Shuffle Audio CD CD DA MP3 The random option plays a disc s track in random order Playlist Insert an Audio CD CD D...

Страница 53: ...ss the DSP button SMART SOUND MP3 ENHANCER POWER BASS DSP MODE OFF SMART SOUND This will regulate and stabilize the volume level against a drastic volume change when changing channels or during a scene transition MP3 ENHANCER This also helps enhance your sound experience ex mp3 music You can upscale your MP3 level sound 24 kHz 8bit to CD level sound 44 1 kHz 16bit POWER BASS This function stresses...

Страница 54: ...size of the photo and the encoding method Dolby Pro Logic II Mode You can select the desired Dolby Pro Logic II audio mode Press the PL II button MUSIC When listening to music you can experience sound effects as if you are listening to the actual performance MOVIE Adds realism to the movie soundtrack PROLOG You will experience a realistic multi channel effect as if using six speakers while using j...

Страница 55: ... button USB d Home Enter Please activate Internet TV service to enjoy a variety of Internet Services USB 5 1 Press the buttons to select the USB then press the ENTER button 6 1 Press the buttons to select the desired Videos Music or Photos then press the ENTER button 7 For playing back Video Music or Photos files see pages 46 54 1 2 3 4 5 6 NOTE You must remove the USB storage device safely by perf...

Страница 56: ...h the band Manual Tuning Press the STOP button to select MANUAL and then press the button to tune in to a lower or higher frequency 1 2 1 2 Setting Mono Stereo Press the MO ST button Each time the button is pressed the sound switches between STEREO and MONO In a poor reception area select MONO for a clear interference free broadcast Presetting Stations Example Presetting FM 89 10 into memory Press...

Страница 57: ...olume to a moderate level before you connect your iPod and product When the product is powered on and you connect an iPod the product will charge your iPod s battery Make sure to connect the dock connector so that the label SAMSUNG faces upward Made for iPod means that an electronic accessory has been designed to connect specifically to the iPod and has been certified by the developer to meet Apple ...

Страница 58: ...functions such as the PLAY PAUSE STOP and buttons See page 15 iPod models that can be used with this product iPod nano 3rd generation video iPod 5th generation video iPod nano 4th generation video iPod touch 1st generation iPod touch 2nd generation iPhone 3G iPod classic iPhone NOTE You must have the VIDEO output Composite connected to your TV to view iPod video See page 25 If you want to iPod vid...

Страница 59: ...ernet TV service you will see the service agreement screen You must agree to the service terms and conditions before you can use the Internet TV service 1 2 3 After you have signed off on the service agreement the Internet TV service starts updating It takes several minutes When the update is complete you will see the Internet TV menu screen Internet TV at a Glance Contents 1 Contents 2 Contents 3...

Страница 60: ...from upper case to lower case Press buttons on the remote to input the rest of Challenger Rd Ridgefield Park NJ 1 2 3 4 5 6 7 8 9 10 11 12 Press the ENTER button The map and address appear on the screen NOTE Samsung Electronics shall take no legal responsibility for any interruption of the Internet TV service caused by the service provider for any reasons The Internet TV service is to download and ...

Страница 61: ...Lock password Reset Cancel 1 2 System Setup Reset Resets Internet TV settings to factory default settings NOTE If you forgot your password press the STOP button on the front panel of the product for more than 5 seconds with no disc inserted Internet TV ID Use this menu to create or delete an account and enter or delete account information You can control your account including contents site s acco...

Страница 62: ...ppS a Login b Thumbnail View d Sort By Return What s New Video Sports Lifestyle Games Infomation Other My Applications Help Video 1 1 Free Featured Most downloaded Most recent Name My Application Displays the application list Help If you questions about Internet TV check this section first If none of the tips apply please visit the help website Using the colour buttons with the Samsung Apps RED A L...

Страница 63: ...ctronics shall take no legal responsibility for product malfunction caused by unstable of internet connection or consumer negligence during software upgrade 1 2 3 1 2 3 4 5 Using the AllShare Function AllShare enables you to play music video and photo files in your PC using the product To use AllShare you must connect the product to your PC via the network See pages 27 28 and install the SAMSUNG PC...

Страница 64: ...fer depending on the sever function During video playback play time will not display To use AllShare function please locate both this product and PC in same subnet 8 Application Program at a Glance SAMSUNG PC Share Manager File Share Server Help Shared Folder Name Size Kind Folder 1 File Folder 2 File Folder 3 File Server PC Share Manager C Document and settings Admin My Computer Folder 1 C Docume...

Страница 65: ...s the disc severely damaged Sound can be heard only from a few speakers and not all 6 On certain BD DVD discs sound is output from the front speakers only Check if the speakers are connected properly Adjust the volume When listening to a CD radio or TV sound is output to the front speakers only Select PRO LOGIC II by pressing PL II Dolby Pro Logic II on the remote control to use all six speakers D...

Страница 66: ...nal FM antenna in an area with good reception While listening to TV audio through the Product no sound is heard If the OPEN CLOSE button is pressed while listening to TV audio using the D IN or AUX functions the BD DVD functions are turned on and the TV audio is muted Not Available appears on screen The features or action cannot be completed at this time because 1 The BD DVD s software restricts i...

Страница 67: ...omenon Check if you have a firewall enabled If so disable the firewall function BD LIVE I cannot connect to the BD LIVE server Check whether the network connection is successful or not by using Network Test menu See page 43 Check whether the USB memory device is connected with product or not The memory device must have at least 1GB of free space to accommodate the BD LIVE service You can check the a...

Страница 68: ...MPACT DISC Reading Speed 4 8 5 6 m sec Maximum Play Time 20 min Video Output Composite Video 1 channel 1 0 Vp p 75 Ω load Blu ray Disc 576i 480i DVD 576i 480i Component Video Y 1 0 Vp p 75 Ω load Pr 0 70 Vp p 75 Ω load Pb 0 70 Vp p 75 Ω load Blu ray Disc 1080i 720p 576p 480p 576i 480i DVD 576p 480p 576i 480i Video Audio HDMI 2D 1080p 1080i 720p 576p 480p 3D 1080p 720p PCM multichannel audio Bitstr...

Страница 69: ...0kHz 40Hz 160Hz Output sound pressure level 87dB W M 87dB W M 87dB W M 88dB W M Rated input 165W 165W 170W 170W Maximum input 330W 330W 340W 340W Dimensions W x H x D Front 90 x 1300 x 119 mm Stand base 250 x 250 mm Surround 90 x 1300 x 119 mm Stand base 250 x 250 mm Centre 360 x 74 5 x 68 5 mm Subwoofer 168 x 350 x 295 mm Weights Front 3 27 kg Surround 2 88 kg Centre 0 57 kg Subwoofer 3 80 kg Nom...

Страница 70: ...NG 902 172 678 www samsung com Sweden 0771 726 7864 SAMSUNG www samsung com U K 0845 SAMSUNG 7267864 www samsung com Eire 0818 717100 www samsung com Area Contact Centre Web Site Switzerland 0848 SAMSUNG 7267864 CHF 0 08 min www samsung com ch www samsung com ch_fr French Lithuania 8 800 77777 www samsung com Latvia 8000 7267 www samsung com Estonia 800 7267 www samsung com CIS Russia 8 800 555 55...

Страница 71: ...Code No AH68 02298N ...

Отзывы: