English-13
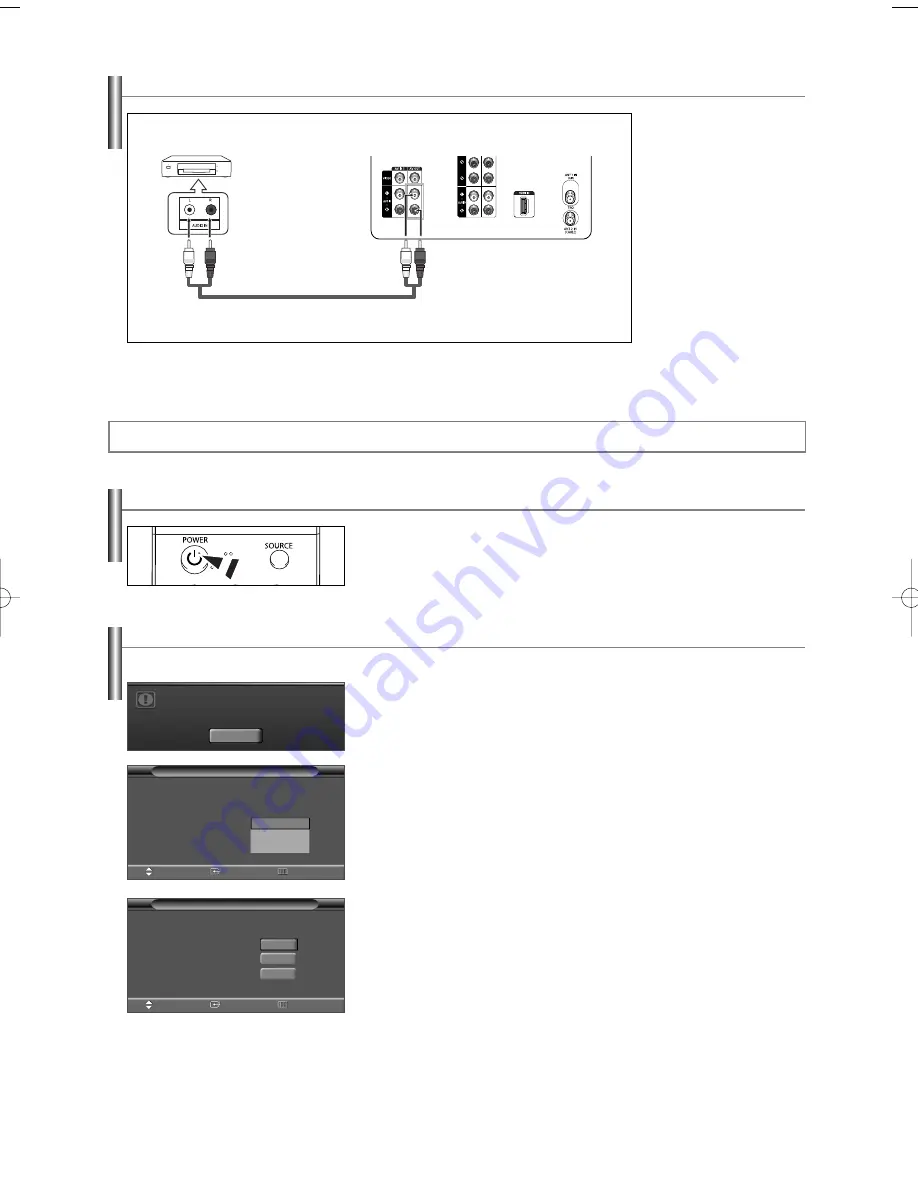
Connecting an Amplifier/DVD Home Theater
1.
Connect Audio Cables
between the AV OUT [L-
AUDIO-R] on the TV and
AUDIO IN on the
Amplifier/DVD Home
Theater.
When an audio amplifier
is connected to the
“AUDIO OUT [L-AUDIO-
R]” terminals: Decrease
the gain (volume) of the
TV, and adjust the
volume level with the
Amplifier’s volume
control.
Amplifier/DVD Home Theater
TV Rear Panel
Audio Cable (Not supplied)
➢
Each external input source device has a different back panel configuration.
➢
When connecting an external device, match the color of the connection terminal to the cable.
Operation
Turning the TV On and Off
Press the
POWER
button on the remote control.
You can also use the
POWER
button on the TV.
Plug & Play Feature
When the TV is initially powered on, basic customer settings proceed automatically and subsequently:
1.
Press the
POWER
button on the remote control.
The message “Menu language, Channels and Time will be set.” is displayed.
Press the
ENTER
button, then “Select the language of the OSD.” menu is
automatically displayed.
2.
Press the
ENTER
button to enter the language.
Press the
…
or
†
button to select language, then press the
ENTER
button.
“Select the antennas to memorize.” menu is automatically displayed.
3.
Press the
…
or
†
button to memorize the channels of the selected connection.
Press the
ENTER
button to select “Start”.
➢
If the antenna is connected to ANT 1(AIR), select “Air” and if it is connected to ANT 2
(CABLE), select “Cable”.
➢
If both ANT 1 (AIR) and ANT 2 (CABLE) are connected, select the “Air + Cable”.
➢
In Cable mode, you can select the correct signal source among “STD”, “HRC”, and
“IRC” by pressing the
œ
button, then press the
…
or
†
button.
Press the
√
button to select “Start”, then press the
ENTER
button.
Contact your local cable company to identify the type of cable system that exists in your
particular area.
Menu language, Channels
and Time will be set .
Start
Plug & Play
Move
Enter
Skip
Select the antennas to memorize.
Air
Cable
Air + Cable
S t a rt
S t a rt
S t a rt
Continued...
Select the language of the OSD.
Language
Plug & Play
English
Español
Français
Move
Enter
Skip
AA68-03782C-01Eng 4/21/06 8:48 AM Page 13


