background image

5. 

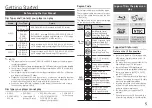
If you have connected a LAN 

cable to the Blu-ray player, Initial 

Setup defaults to Wired Network. 

Go to Wired Network on the 

right side of the page. If you 

have not connected a LAN cable, 

Initial Setup defaults to Wireless 

Network. Go to Wireless Network 

on the right side of the page.


NOTES


If you have no network, select Skip 
by pressing the 

BLUE (d)

 button, 

and then go to Step 6.

6. 

The Initial Settings Complete 

window appears and remains on 

the screen for a few moments. 

Then, the Home screen appears.

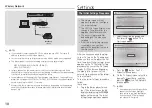
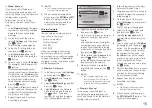
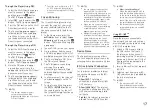
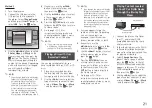
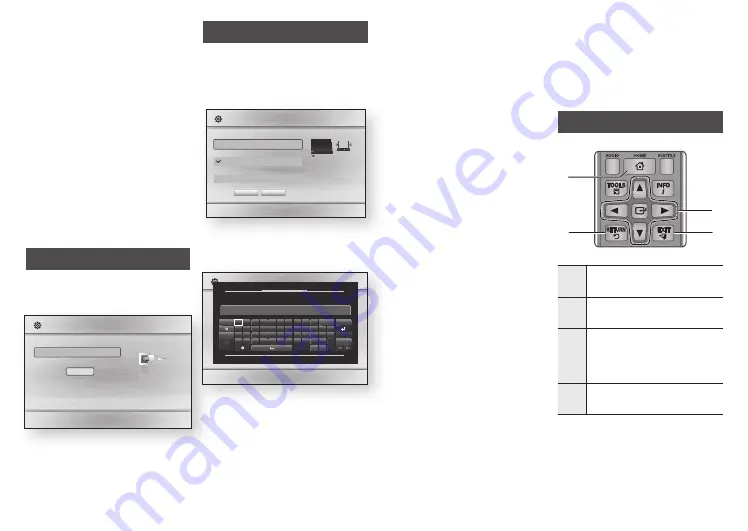
Wired Network

1. 

The Blu-ray player automatically 
verifies your wired network.


a

 previous 

d

 Skip 

m

 move 

"

 Select

Initial Settings I Network

Select your network type.

Network type                       Wired

Network cable connected.

Connect

2. 

After the player verifies the 

network, press the 

v

 button.

3. 

Go to Step 6 on the left side of 

the page.

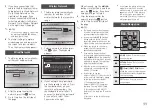
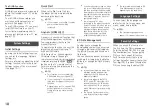
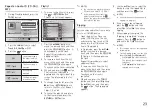
Wireless Network

1. 

The Blu-ray player automatically 
searches for and then lists all 
wireless networks that are within 
range.

                                                         a

 previous   

d

 Skip   

m

 move   

"

 Select

Initial Settings I Network

Select your network type.

Network type                      Wireless

Wireless network

Add Network

you can connect your Blu-ray 
player to the internet. please 
select which wireless network 
to use.

 WpS(pBC)         Search 

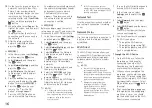
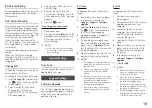
2. 

Select a network, and then press 

the 

v

 button. The keyboard 

appears.

                                                           a

 previous   

d

 Skip   

m

 move   

"

 Select

Initial Settings I Network

linksys3
solugen_edu#2
iptime23
solugen_edu#1

  WpS(pBC) 

Refresh

Enter security key. 

  0 / 64


Caps 

0


Clear


q  w    e 

p   ^  *


123#&  a 

s    d 

~  @ 

!


done


z


-


Cancel


ENG


.com


Select


'


Return

Security Key

3. 

If your network has a password, 

use the keyboard to enter it. Press 

the number buttons on your 

remote to enter numbers. Use 

the keyboard to enter letters. If 

you want to display the password 

as you enter it, select Show 

Password on the right. 


When finished, use the ▲▼◀▶ 

buttons to select Done, and then 

press the 

v

 button. If you have 

no password, go to Step 4.

4. 

After the player verifies the 

network, press the 

button.

5. 

Go to Step 6 on the left side of 

the page.


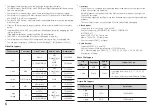
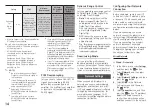
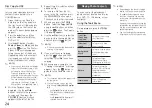
NOTES


The Home screen will not appear 
if you do not configure the initial 
settings except as noted below.


If you press the 

BLUE (d)

 button 

during network setup, you can 
access the Home screen even if the 
network setup is not completed yet.


When you return to the Home 
screen, the full screen mode is 
cancelled automatically.


If you want to display the Initial 
Setting screen again to make changes, 
press the ■ button on the front panel 

of the player for more than 5 seconds 
with no disc inserted. This resets the 
player to its default settings.


After the initial settings process 
is complete, you can operate the 
HDMI-CEC function.


If you want to use the 
(HDMI-CEC) function to aid 
in the initial set up process, please 
follow the instructions below.
1) Connect the player to an 
(HDMI-CEC) compliant 
Samsung TV using HDMI Cable.
2) Set the (HDMI-CEC) 
feature to On in both the TV and the 
player.
3) Set the TV to the Initial Settings 
Procedure.


If you leave the player in the stop 
mode for more than 5 minutes 
without using it, a screen saver will 
appear on your TV. If the player is 
left in the screen saver mode for 
more than 25 minutes, the power 
will automatically turn off

.

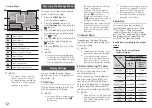
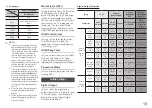
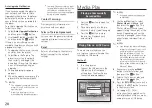
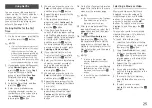
Menu Navigation

SCREEN

VIEW

A-B

FULL

BONUS REPEAT REPEAT

1

2

4

3

1

HOmE

 Button : Press to move to 

the Home menu.

2

RETURN

 Button : Return to the 

previous menu.

3

v

 (Enter) / dIRECTION

 Button : 

Move the cursor or select an item. 
Activate the currently selected item. 
Confirm a setting.

4

ExIT

 Button : Press to exit the 

current menu.

11

Содержание BD-HM59

Страница 1: ...the possibilities Thank you for purchasing this Samsung product To receive more complete service please register your product at www samsung com register Blu ray Disc Player user manual BD HM59 BD HM59C ENGLISH ...

Страница 2: ... the inside of this apparatus Only a qualified technician should open this apparatus Make sure to plug the power cord in until it is firmly seated When unplugging the power cord from a wall outlet always pull on the power cord s plug Never unplug by pulling on the power cord Do not touch the power cord with wet hands If this apparatus does not operate normally in particular if there are any unusua...

Страница 3: ...040 10 except for deviations pursuant to Laser Notice No 50 dated June 24 2007 DANGER VISIBLE AND INVISIBLE LASER RADIATION WHEN OPEN AVOID DIRECT EXPOSURE TO BEAM FDA 21 CFR CAUTION CLASS 3B VISIBLE AND INVISIBLE LASER RADIATION WHEN OPEN AVOID EXPOSURE TO THE BEAM IEC 60825 1 THIS PRODUCT UTILIZES A LASER USE OF CONTROLS OR ADJUSTMENTS OR PERFORMANCE OF PROCEDURES OTHER THAN THOSE SPECIFIED HERE...

Страница 4: ...to your preference Some functions such as BD Wise screen size adjustment and resolution adjustment may not operate properly in 3D play mode You must use a high speed HDMI cable for proper output of the 3D signal Stay at least three times the width of the screen from the TV when watching 3D images For example if you have a 46 inch screen stay 138 inches 11 5 feet from the screen Place the 3D video ...

Страница 5: ...CD G CD I LD CD Gs play audio only not graphics 3 9 GB DVD R for Authoring Region Code Both players and discs are coded by region These regional codes must match for a disc to play If the codes do not match the disc will not play The Region Code for this player is displayed on the rear panel of the player Disc Type Region Code Area Blu ray Disc a NorthAmerica Central America SouthAmerica Korea Jap...

Страница 6: ...DTS 1920x1080 H 264 BP MP HP 1920x1080 wmv WMV wmv9 VC 1 AP WMA 1920x1080 VC 1 SM 1920x1080 mp4 MP4 MP4 mp4v AAC 1920x1080 H 264 BP MP HP 1920x1080 mpg mpeg PS MPEG1 MP1 2 Dolby Digital DTS 1920x1080 MPEG2 1920x1080 H 264 BP MP HP 1920x1080 Limitations Even when a file is encoded by a supported codec listed above the file might not be played if its content has a problem Normal playback is not guar...

Страница 7: ... on the recording condition AVCHD format discs need to be finalized x v Color offers a wider color range than normal DVD camcorder discs Accessories The following accessories are included with your Blu ray player SCREEN VIEW A B FULL BONUS REPEAT REPEAT HDMI Cable BD HM59C Only BN39 01583A Batteries for Remote Control AAA Size 4301 000115 User Manual AK68 02473A Remote Control AK59 00149A Front Pa...

Страница 8: ...ere is any fluorescent lighting nearby CAUTION Dispose of batteries according to local environmental regulations Do not put them in the household trash Do not dispose of batteries in a fire Do not short circuit disassemble or overheat the batteries Danger of explosion if battery is incorrectly replaced Replace only with the same or equivalent type Connections Connecting to a TV Connect an HDMI cab...

Страница 9: ...Out jack on the product to the Digital Coaxial In jack of the receiver Good quality You will hear sound only through the front two speakers with Digital Output set to PCM Audio Audio Method 2 Method 1 Connecting to a Network Router You can connect your player to your network router using one of the methods illustrated below To use the DLNA network functionality you must connect your PC to your net...

Страница 10: ...fer depending on the menu you selected After the initial settings process is complete you can then operate the panel buttons and remote control After you have connected the player to your TV turn on the TV and player When you turn on the player the first time the player s Initial Settings screen appears on the TV The Initial Setting procedure lets you set the On Screen Display OSD and menu languag...

Страница 11: ... enter numbers Use the keyboard to enter letters If you want to display the password as you enter it select Show Password on the right When finished use the buttons to select Done and then press the v button If you have no password go to Step 4 4 After the player verifies the network press the v button 5 Go to Step 6 on the left side of the page NOTES The Home screen will not appear if you do not ...

Страница 12: ... content and the position of the picture on your TV screen you may see vertical black bars on the left side right side or both sides TV Aspect Ratio Depending on the type of television you have you may want to adjust the screen size setting NOTES Depending on the disc type some aspect ratios may not be available If you select an aspect ratio and option which is different than the aspect ratio of y...

Страница 13: ... DTS Re encoded Dolby Digital Dolby TrueHD PCM 2ch PCM 2ch Dolby TrueHD Dolby Digital Re encoded DTS Re encoded Dolby Digital DTS PCM 2ch PCM 2ch DTS DTS Re encoded DTS Re encoded Dolby Digital DTS HDHigh Resolution Audio PCM 2ch PCM 2ch DTS HDHigh Resolution Audio DTS Re encoded DTS Re encoded Dolby Digital DTS HD Master Audio PCM 2ch PCM 2ch DTS HD Master Audio DTS Re encoded DTS Re encoded Dolb...

Страница 14: ...PCM Downsampling Lets you choose to have 96KHz PCM signals downsampled to 48KHz before they are outputted to an amplifier Choose On if your amplifier or receiver is not compatible with a 96KHz signal Dynamic Range Control Lets you apply dynamic range control to Dolby Digital Dolby Digital Plus and Dolby True HD audio Auto Automatically controls the dynamic range of Dolby TrueHD audio based on info...

Страница 15: ...and then displays a list of the available networks m Move Select Return Network Settings Select your network type Network type Wireless Wireless network Add Network You can connect your Blu ray player to the internet Please select which wireless network to use WPS PBC Search 5 Select the desired network and then press the v button 6 On the Security screen enter your network s Security Code or Pass...

Страница 16: ...een NOTES Contact the manufacturer of the router for instructions explaining how to access the router s Set Up screens or refer to the router s user s manual For WPS connection set your wireless router s security encryption to AES WPS does not support WEP security encryption Network Test Use this menu item to check whether your network connection is working or not Network Status Use to check wheth...

Страница 17: ... EXIT or RETURN button on the remote control or shut off the Screen Mirroring function on your smart phone NOTES You can connect to a device that supports DLNA Cast Note that connecting to such a device may not be fully supported depending on the manufacturer For further information on mobile connection support refer to the manufacturer s web site When you are using the Screen Mirroring function v...

Страница 18: ... turn off the product disconnect and then reconnect the power cable the product turns on automatically to re establish the Anynet connection After about 15 seconds it turns off again automatically Some Samsung TVs when connected to this product using the Anynet function will when you turn them on display a warning popup message saying no connection has been found Never the less the Anynet connecti...

Страница 19: ...or additional services By Online To upgrade By Online follow these steps 1 Remove any discs from the player 2 In the player s menu go to Settings Support Software Upgrade 3 Select By Online and then press the v button The Connecting to Server message appears 4 A popup message will appear if an update is available 5 If a download is available select Yes The download and upgrade process starts Impor...

Страница 20: ...rded Disc 1 Press the 8 button to open the disc tray 2 Place a disc gently into the disc tray with the disc s label facing up 3 Press the 8 button to close the disc tray Playback starts automatically Playing Files on a USB Device There are two methods you can use to play or view multimedia files located on a USB device Method 1 1 Turn the player on 2 Connect the USB device to the USB port on the f...

Страница 21: ...label facing up and then close the tray 2 Use the buttons to select the type of content you want to view or play Videos Photos or Music and then press the v button NOTES Even though the player will display folders for all content types it will only display files of the Content Type you selected in Step 2 For example if you selected music you will only be able to see music files You can change this...

Страница 22: ... normal speed playback press the 6 button 6 button Starts playback 5 button Stops playback 7 button Pauses playback Fast Motion Play During playback press the 3 or 4 button Each time you press the 3 or 4 button the playback speed will change Slow Motion Play In pause mode press the 4 button Each time you press the 4 button the playback speed will change Step Motion Play In pause mode press the 7 b...

Страница 23: ...2 3 and 4 6 To cancel the play list and return to the Home screen press the RETURN or EXIT button NOTES You can create a playlist with up to 99 tracks on Audio CDs CD DA If you remove all the tracks from a play list and then press the v button the player lists and plays all the tracks on the disc Ripping Lets you copy audio files from a data disc to a USB HDD device 1 Open the disc tray Place the ...

Страница 24: ... select the device to store the copied files on and then press the v button NOTES Do not disconnect the device while copying is in progress 9 If you want to cancel copying press the v button and then select Yes Select No to continue copying 10 When copying is complete the Copying is completed message appears Press the v button to go back to the Playback screen NOTES This function may not be suppor...

Страница 25: ... button 11 When done move the cursor to Enter at the bottom of the screen and then press the v button 12 Repeat the same process for the all the fields displayed Last Name E mail etc 13 After you have entered your password confirmation select Continue at the bottom of the screen and then press the v button 14 On the Your Payment Information page fill in the fields in the same manner as the previou...

Страница 26: ...v button The Blu ray player launches Pandora Activation is complete Stop here 9 Visit www pandora com Samsung on your computer 10 Enter the activation code you recorded in Step 3 into the appropriate fields on the Pandora web page 11 Follow the instructions on the Pandora web pages to create a new account 12 When done return to the Activation Code screen select Continue and then press the v button...

Страница 27: ... List 4 Use the buttons to select a video and then press the v button The first video stops and the video you selected plays 5 If you do not find a video you want press the Return or button to return to previous screens Using Search 1 On the You Tube Home screen select Search and then press the v button 2 On the Search screen use the buttons to select a character and then press the v button The ch...

Страница 28: ...disc is not dirty or scratched Clean the disc PROBLEM SOLUTION No HDMI output Check the connection between the TV and the HDMI jack of the player CheckifyourTVsupports480p 720p 1080i or1080pHDMIinputresolutions Abnormal HDMI output screen If random noise appears on the screen it means that TV does not support HDCP High bandwidth Digital Content Protection If you experience other problems Go to the...

Страница 29: ... VIDEO DVD RW R DVD RW R and CD RW R logos and this player may not respond to all operating commands or operate all features of every disc These and other disc compatibility and player operation issues with new and existing format discs are possible because Blu ray is a new and evolving format and this player may not operate all features of Blu ray Discs because some features may be optional addit...

Страница 30: ... limiting the foregoing unless expressly authorized by the applicable content owner or service provider you may not modify copy republish upload post transmit translate sell create derivative works exploit or distribute in any manner or medium any content or services displayed through this device THIRD PARTY CONTENT AND SERVICES ARE PROVIDED AS IS SAMSUNG DOES NOT WARRANT CONTENT OR SERVICES SO PR...

Страница 31: ...oblems incorrect electrical line voltage fluctuations and surges customer adjustments and failure to follow operating instructions cleaning maintenance and environmental instructions that are covered and prescribed in the instruction book product removal or reinstallation reception problems and distortion related to noise echo interference or other signal transmission and delivery problems SAMSUNG...

Страница 32: ...hts reserved QUESTIONS OR COMMENTS COUNTRY CALL OR VISIT US ONLINE AT WRITE IN THE US 1 800 SAMSUNG 726 7864 www samsung com us support Samsung Electronics America Inc 85 Challenger Road Ridgefield Park NJ 07660 AK68 02473A 03 AK68 02473A 03 ...

Отзывы: