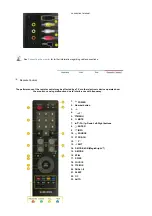
background image

1.

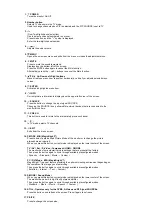
 POWER 

Turns the monitor On/Off. 
 

2. Number button 

Selects TV channels in the TV mode.  
Used to change channels when PIP is selected and the PIP SOURCE is set to TV.  
 

3. -/-- 

(One/Two-Digit channel selection) 
Use to select a channel numbered ten or over.  
Press this button, and the "--" symbol is displayed.  
Enter the two-digit channel number. 
 

4.


Adjusts the audio volume. 
 

5.

 MENU  

Opens the on-screen menu and exits from the menu or closes the adjustment menu. 
 

6.

 MUTE 

Press to mute the sound temporarily. 
Displayed on the bottom left of the screen.  
Press the MUTE button again to cancel the Mute function.  
Alternatively press the 

 buttons to cancel the Mute function.  


7.

 Up-Down Left-Right buttons 

Moves from one menu item to another horizontally, vertically or adjusts selected menu 
values.  
 

8.


ENTER  

Activates a highlighted menu item.  
 

9.


INFO  

Current picture information is displayed on the upper left corner of the screen. 
 

10.


SOURCE 

Press the button to change the input signal SOURCE.  
Changing the SOURCE is only allowed for external devices that are connected to the 
monitor at the time.  
 

11.


PRE-CH  

This button is used to return to the immediately previous channel.  
 

12.

 P    

In TV mode, selects TV channels.  
 

13.


EXIT 

Exits from the menu screen.  
 

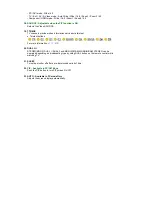
14. P.MODE, M/B (MagicBright™)  

Press to select a pre-defined Picture Mode of the monitor or to change the picture 
atmosphere as required. 
When you press this button, current mode is displayed on the lower center of the screen.  
 

TV / AV / Ext. / S-Video / Component / HDMI : P.MODE 


The monitor has four automatic picture settings that are preset at the factory.  
Then press the button again to circle through available preconfigured modes.  
( Dynamic 

 Standard 

 Movie 

 Custom )  


PC / DVI Mode : M/B ( MagicBright™ )


MagicBright™ is a new feature providing the optimum viewing environment depending on 
the contents of the image you are watching.  
Then press the button again to circle through available preconfigured modes.  
( Entertain

 Internet 

 Text 

 Custom )  


15. S.MODE ( Sound Mode ) 

When you press this button, current mode is displayed on the lower center of the screen.  
The monitor has a built-in high fidelity stereo amplifier.  
Then press the button again to circle through available preconfigured modes.  
( Standard 

 Music 

 Movie 

 Speech 

 Custom )  


16. STILL - Operates only for the CVBS, S-Video and RF Signal SOURCEs.


Press the button once to freeze the screen. Press it again to unfreeze.  
 

17. P.SIZE  

Press to change the screen size.  

Содержание 2032MG

Страница 1: ...ii LCD MONITOR quick start guide 932MW 2032MW 932MG 2032MG ...

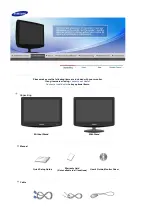
Страница 2: ...ed with your monitor If any items are missing contact your dealer Contact a local dealer to buy optional items Unpacking Without Stand With Stand Manual Quick Setup Guide Warranty Card Not available in all locations User s Guide Monitor Driver Cable ...

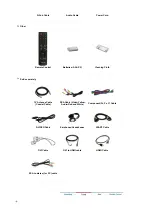
Страница 3: ...atteries AAA X 2 Cleaning Cloth Sold separately TV Antenna Cable Coaxial Cable RCA Cable Video Yellow Audio Red and White Component PR PB Y Cable S VIDEO Cable Earphones Headphones SCART Cable DVI Cable DVI to HDMI cable HDMI Cable RCA to stereo for PC cable ...

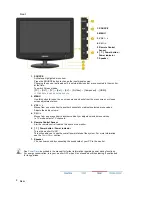
Страница 4: ... to another horizontally or adjusts selected menu values Adjusts the audio volume 4 CH Moves from one menu item to another vertically or adjusts selected menu values In TV mode selects TV channels 5 Remote Control Sensor Aim the remote control towards this spot on the monitor 6 Power button Power indicator Turns the monitor On Off This will enable you to see the overall power status of the system ...

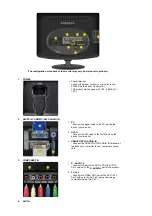
Страница 5: ... to the PC port on the back of your monitor 2 DVI D Connect the DVI cable to the DVI D port on the back of your monitor 3 HDMI PC DVI D AUDIO IN Connect the HDMI PC DVI D AUDIO IN terminal at the back of your monitor to your computer s sound card 3 COMPONENT IN 1 R AUDIO L Connect the port of the DVD VCR DVD DTV Set Top Box to the R AUDIO L port of the monitor 2 PR PB Y Connect the VIDEO OUT port ...

Страница 6: ...EXT RGB port of the monitor it makes TV or Video signal input and output 7 z The Kensington lock is a device used to physically fix the system when using it in a public place The locking device has to be purchased separately For using a locking device contact where you purchase it 8 S VIDEO VIDEO R AUDIO L 1 S VIDEO VIDEO Input devices such as DVD VCR or Camcorder are connected to the VIDEO or S V...

Страница 7: ...e affected by a TV or other electronic device operated near the monitor causing malfunction due to interference with frequency 1 POWER 2 Number button 3 4 5 MENU 6 MUTE 7 Up Down Left Right buttons 8 ENTER 9 INFO 10 SOURCE 11 PRE CH 12 P 13 EXIT 14 P MODE M B MagicBright 15 S MODE 16 STILL 17 P SIZE 18 SOURCE 19 TTX MIX 20 DUAL I II 21 SLEEP 22 PIP 23 AUTO ...

Страница 8: ...d to return to the immediately previous channel 12 P In TV mode selects TV channels 13 EXIT Exits from the menu screen 14 P MODE M B MagicBright Press to select a pre defined Picture Mode of the monitor or to change the picture atmosphere as required When you press this button current mode is displayed on the lower center of the screen TV AV Ext S Video Component HDMI P MODE The monitor has four a...

Страница 9: ...via teletext z Teletext buttons For more information TTX MIX 20 DUAL I II STEREO MONO DUAL l DUAL ll and MONO NICAM MONO NICAM STEREO can be operated depending on broadcasting type by using DUAL button on the remote control while watching TV 21 SLEEP Turns the monitor off after a pre determined period of time 22 PIP Available in PC DVI Mode Push the PIP button to turn PIP screen On Off 23 AUTO Ava...

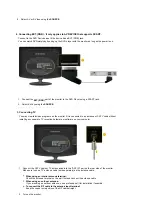
Страница 10: ...uter 2 1 Using the D sub Analog connector on the video card Connect the signal cable to the PC port on the back of your monitor PC 2 2 Using the DVI Digital connector on the video card Connect the DVI cable to the DVI D port on the back of your monitor DVI D 3 Connect the HDMI PC DVI D AUDIO IN port on the rear side of the monitor to the sound card of the PC 4 Turn on both your computer and the mo...

Страница 11: ... Connecting AV Devices Connecting Headphone The monitor has AV connection terminals to connect AV input devices like DVDs VCRs or Camcorders You may enjoy AV signals as long as the monitor is turned on You may connect your headphones to the monitor 1 Input devices such as DVD VCR or Camcorder are connected to the VIDEO or S VIDEO terminal of the monitor using the Video or S Video cable 2 Connect t...

Страница 12: ...t is connected to an antenna or CATV cable without installing any separate TV reception hardware or software on your computer 1 Connect the CATV cable or TV antenna cable to the ANT IN port on the rear side of the monitor Make sure to use a TV antenna cable sold separately as the antenna cable 2 Turn on the monitor When using an interior antenna terminal Check the antenna terminal on the wall firs...

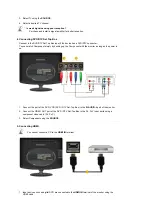
Страница 13: ...ly by hooking up the Component with the monitor as long as the power is on 1 Connect the port of the DVD VCR DVD DTV Set Top Box to the R AUDIO L port of the monitor 2 Connect the VIDEO OUT port of the DVD DTV Set Top Box to the PR PB Y input ports using a component video cable PR PB Y 3 Select Component using the SOURCE 5 Connecting HDMI You cannot connect a PC to the HDMI IN terminal 1 Input dev...

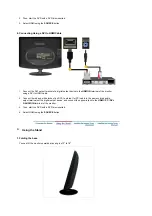
Страница 14: ... using a DVI to HDMI cable 2 Connect the red and white jacks of an RCA to stereo for PC cable to the same colored audio output terminals of the digital output device and connect the opposite jack to the HDMI PC DVI D AUDIO IN terminal of the monitor 3 Then start the DVD with a DVD disc inserted 4 Select HDMI using the SOURCE button Using the Stand 1 Folding the base You can tilt the monitor upward...

Страница 15: ...low Check Signal Cable appears on a black background when the monitor is in its normal working condition though it does not sense any video signal While in the Self Test mode the LED power indicator remains green and the figure moves around on the screen 4 Turn off your monitor and reconnect the video cable then turn on both your computer and the monitor If your monitor screen remains blank after ...

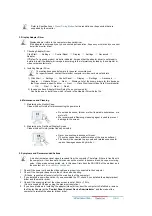
Страница 16: ...intaining the Flat Panel Display Screen Clean with a soft cloth cotton flannel smoothly z Do not use benzene thinner or other flammable substances or a wet cloth z We recommend a Samsung cleansing agent is used to prevent damage to the screen z Never use acetone benzene or thinner They may cause flaws or deformation of the screen surface z The user will be required to pay costs and related expense...

Страница 17: ...ed to the monitor screen and their solutions are listed Problems Solutions Screen is blank and power indicator is off z Ensure that the power cord is firmly connected and the LCD monitor is on Refer to the Connecting the Monitor Check Signal Cable message z Ensure that the signal cable is firmly connected to the PC or video SOURCEs Refer to the Connecting the Monitor z Ensure that the PC or video ...

Страница 18: ...Ensure that the audio cable is firmly connected to both the audio in port on your monitor and the audio out port on your sound card Refer to the Connecting the Monitor z Check the volume level Refer to the Volume The sound level is too low z Check the volume level Refer to the Volume z If the volume is still too low after turning the control to its maximum check the volume control on the computer ...

Страница 19: ...r Saving function z Windows XP Set the resolution in the Control Panel Appearance and Themes Display Screen Saver Set the function in the BIOS SETUP of the computer Refer to Windows Computer Manual z Windows ME 2000 Set the resolution in the Control Panel Display Screen Saver Set the function in the BIOS SETUP of the computer Refer to Windows Computer Manual How can I clean the outer case LCD Pane...

Страница 20: ...kground when the monitor is in its normal working condition though it does not sense any video signal While in the Self Test mode the LED power indicator remains green and the figure moves around on the screen 4 Turn off your monitor and reconnect the video cable then turn on both your computer and the monitor If your monitor screen remains blank after using the previous procedure check your video...

Страница 21: ...se benzene thinner or other flammable substances or a wet cloth z We recommend a Samsung cleansing agent is used to prevent damage to the screen z Never use acetone benzene or thinner They may cause flaws or deformation of the screen surface z The user will be required to pay costs and related expenses for repair of damages caused by him her 5 Symptoms and Recommended Actions A monitor recreates v...

Страница 22: ...t the power cord is firmly connected and the LCD monitor is on Refer to the Connecting the Monitor Check Signal Cable message z Ensure that the signal cable is firmly connected to the PC or video SOURCEs Refer to the Connecting the Monitor z Ensure that the PC or video SOURCEs are turned on Not Optimum Mode message z Check the maximum resolution and the frequency of the video adapter z Compare the...

Страница 23: ...k the volume level Refer to the Volume z If the volume is still too low after turning the control to its maximum check the volume control on the computer sound card or software program Sound is too high pitched or too low pitched z Adjust the Treble and Bass to appropriate level 4 Problems related to Remote Control Problems related to the remote control and their solutions are listed Problems Item...

Страница 24: ...r to Windows Computer Manual z Windows ME 2000 Set the resolution in the Control Panel Display Screen Saver Set the function in the BIOS SETUP of the computer Refer to Windows Computer Manual How can I clean the outer case LCD Panel Disconnect the power cord and then clean the monitor with a soft cloth using either a cleaning solution or plain water Do not leave any detergent or scratches on the c...

Отзывы: