background image

Series 6495
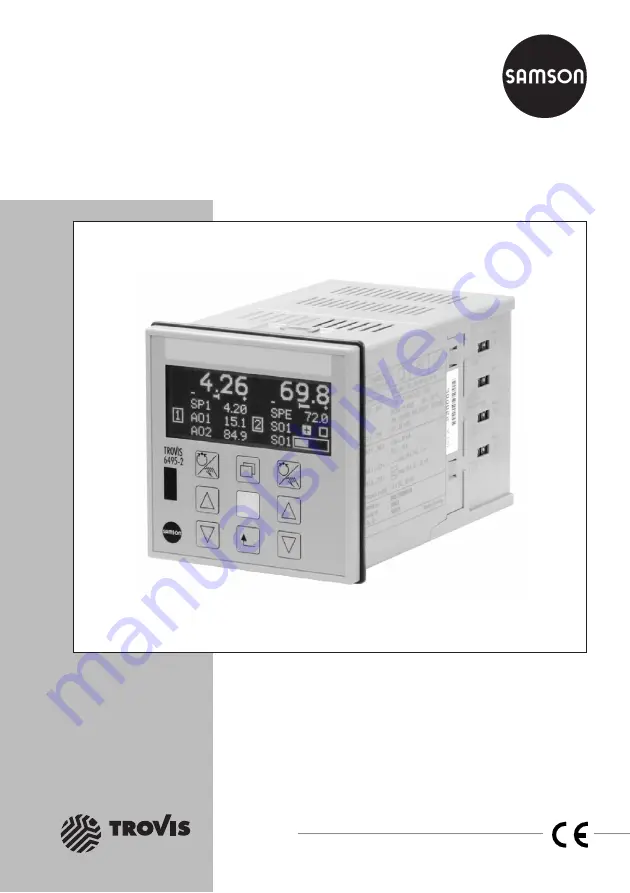
Industrial Controller TROVIS 6495-2

Mounting and
Operating Instructions

EB 6495-2 EN

Firmware version 1.11
Edition December 2009

®

Electronics from SAMSON 

Содержание TROVIS 6495 Series

Страница 1: ...Series 6495 Industrial Controller TROVIS 6495 2 Mounting and Operating Instructions EB 6495 2 EN Firmware version 1 11 Edition December 2009 Electronics from SAMSON...

Страница 2: ...azardous situation which if not avoided will result in death or serious injury NOTICE NOTICE indicates a property damage mes sage Note Supplementary explanations informa tion and tips Definitions of t...

Страница 3: ...3 Switching over internal external set point 25 8 4 Switching over between internal set points and changing them 25 9 Configuration menu 29 9 1 Entering the configuration level 29 9 2 Configuring the...

Страница 4: ...ftware 56 14 3 Starting TROVIS VIEW and performing settings 57 14 3 1 Configuring the controller 60 14 3 2 Reading information 62 14 4 Operational data graphs Trend Viewer 64 14 5 Data transmission 66...

Страница 5: ...ed personnel refers to individuals who are able to judge the work they are assigned to and recognize possi ble dangers due to their specialized training their knowledge and experience as well as their...

Страница 6: ...61 1033 Infrared adapter RS 232 8864 0900 Bracket for infrared adapter 1400 9769 USB 1 1 serial adapter 8812 2001 RS 232 USB interface board 1400 9917 RS 485 USB interface board 1400 9918 USB cable 2...

Страница 7: ...Push the industrial controller into the panel cut out from the front 3 Insert the two mounting clips in the notches on the top and bottom 4 Turn the threaded rods in the direction of the control panel...

Страница 8: ...equipped with suitable interference suppressors RC ele ments Control cabinet elements with high field strength e g transformers or frequency converters are to be shielded with sepa rators providing a...

Страница 9: ...s used for example for po sition feedback of an electrical actuator or for input of an external set point Generally we recommend performing a user calibration To perform a calibration use the configur...

Страница 10: ...AO1 31 24 V DC Digital input DI4 Supply output 21 V DC max 90 mA Digital input DI3 GND 37 36 Analog output AO2 35 86 87 89 90 85 99 98 Analog output AO3 97 Digital input DI2 Digital input DI1 GND 83 8...

Страница 11: ...V AC DC 20 to 30 V L L L1 N N Switch output SO1 Digital output DO2 Switch output SO2 Digital output DO3 Switch output SO2 Digital output DO4 43 42 53 52 46 45 56 55 L1 L1 N L1 Digital output limit val...

Страница 12: ...be changed These are located in two different menu items Configuration menu The controller is adapted to its control task by changing configuration items and pa rameters The configuration level is di...

Страница 13: ...o 8864 0900 connected to the computer DIP switches Before an analog input can be configured the DIP switches must be set correspond ingly These switches are used to initially se lect whether an input...

Страница 14: ...cade No function No function Edit individual items of parame ters Cursor keys Automatic mode Change set point Manual mode Change output value Browse through menu and information Browse through a menu...

Страница 15: ...with two control lers the default display has two sections Controller 1 on the left display section and Controller 2 on the right display section See overview below Note The default reading can be ad...

Страница 16: ...tion 6 3 6 1 Changing the set point Change the set point in automatic mode us ing the cursor keys Increase the set point Decrease the set point Note The last digit is changed by one value every time t...

Страница 17: ...osed by press ing the manual automatic key of the master controller 2 Note In the following example the master controller 2 is shown on the right display default As a result the manual automatic key o...

Страница 18: ...ts DO5 DO7 Last events Event 1 x Event x x Diagnosis Diagnosis 1 operating time Diagnosis 2 device temperature Diagnosis 3 cycle times Diagnosis 4 system internal events Diagnosis 5 system internal ev...

Страница 19: ...the keys on the left and right in the key panel can be used for the info menu Example A control mode with one control ler is configured An error message does not exist in the controller The objective...

Страница 20: ...digital outputs If the input output is assigned to both controllers both controller numbers 1 2 are indicated Additional readings apply to the digital inputs separate or combined with the controller...

Страница 21: ...ambient tempera ture 0 to 50 C is kept The device inside temperature is monitored to pro tect the controller If this temperature falls below 0 C or rises above 60 C a message is generated in Last eve...

Страница 22: ...2 TN reset time TV derivative action time Y0 operating point TV K derivative action gain TV K1 1 P PWM duty cycle SO1 P 1 P PWM duty cycle SO1 P 2 P PWM duty cycle SO2 P 2 P PWM duty cycle SO2 P Set p...

Страница 23: ...1 Entering the operating menu The controller is currently in the operating level Enter the operating menu of Controller 1 1x Switch to the main menu Operating menu contr 1 is highlighted 1x Enter Ope...

Страница 24: ...the comparator PV0 the set point at the com parator SP0 and the manipu lated variable Y are indicated on the left For ratio control Actual ratio PVR ratio set point SPR and manipulated variable Y The...

Страница 25: ...high lighted SPE 1x Select internal set point SPI 1x Confirm the setting SPI is now the active set point Note Determining and changing the inter nal set point is described in Section 8 4 Cascade cont...

Страница 26: ...et point 1x Activate the menu item Set point The actual value at the comparator PV0 the set point at the com parator SP0 and the manipu lated variable Y are indicated on the left For ratio control Act...

Страница 27: ...elect the set point SP2 1x Activate the set point setting SP2 The current set point is highlighted 90 0 Keep pressed and change the set point to 100 0 1x Confirm the set point The set point is adopted...

Страница 28: ...functions restart condition controller display and key locking See section 15 2 for details 2C Controller 2 O Output This menu contains the configura tion of analog outputs AO1 to AO3 and digital inpu...

Страница 29: ...ht of the key panel can be used in the configura tion level If the controller is to be newly configured we recommend keeping the following con figuration sequence 1 Set the control mode e g M 1 1 2 Se...

Страница 30: ...ration item C 1 1 1 Input vari able PV Note Some configuration items as well as the parameters can only be set if certain set tings have already been made in the con troller configuration The required...

Страница 31: ...l stepwise 9 2 2 Configuration example Based on a default setting 1x Fixed set point follow up control M 1 1 the analog input AI1 is to be set to Pt 1000 The mea suring range is to be 0 to 200 C The c...

Страница 32: ...Activate the configuration item I 1 1 Input signal The input signal setting is high lighted Pt 100 1x Change setting to I 1 1 7 Pt 1000 1x Confirm new setting Set the measuring range 1x Select AI1 MI...

Страница 33: ...additionally be determined for the rows 4 and 5 The following table shows the settings neces sary for adapting the display see section 15 2 for details Select signal Select type of representation Row...

Страница 34: ...urrently active setting is dis played 1C 5 6 0 Off 1x Activate configuration item 1C 5 6 The currently active setting is highlighted Off 2x Change setting to 1C 5 6 2 Output AO1 1x Confirm setting Con...

Страница 35: ...le to display the additional displays of both controllers To implement the additional display in the display it must be activated in the submenu A 2 Operation display The following table indicates the...

Страница 36: ...1 As sign source is displayed together with the currently active setting O 2 1 0 Off 1x Activate configuration item O 2 1 The currently active setting is high lighted Off 1x Change setting to O 2 1 1...

Страница 37: ...ange setting to C 6 7 3 Output AO2 1x Confirm setting 1x Select configuration item 1C 6 8 Row 4 representation The currently active setting is dis played 1C 6 8 1 Numerical 1x Activate configuration i...

Страница 38: ...reading in the dis play the Output AO2 is displayed numerically inverted 9 3 3 Switching Controller 1 and Controller 2 displays The left display is assigned to Controller 1 and the right display to Co...

Страница 39: ...ctivate left display 6x Select menu A General settings 1x Enter A General settings The submenu A 1 Language Sprache is highlighted 1x Select submenu A 2 Operation display 1x Enter submenu A 2 Operatio...

Страница 40: ...setting Configure left display 1x Select configuration item A 2 1 Left display 1x Activate configuration item A 2 1 Left display The currently active setting is high lighted Off 2x Change setting to A...

Страница 41: ...ck set point keys On Example The set point adjustment of Con troller 1 is to be locked The controller is currently in the operating level 4 Enter the configuration level see sec tion 9 1 Activate lock...

Страница 42: ...2 The controller is currently in the operating level 4 Enter the configuration level see sec tion 9 1 Activate locking 6x Select menu A General settings 1x Activate menu A General set tings 2x Select...

Страница 43: ...umber operation as well Key number operation is activated in the configuration level in the configuration item A 4 1 The controller is currently in the operating level 4 Enter the configuration level...

Страница 44: ...vel can only be performed af ter the key number has been entered using the cursor key and con firmed by pressing the enter key Deactivate key number operation Key number operation is deactivated by se...

Страница 45: ...log input AI1 and Pt 100 see section 15 2 4 Set the signal source to the end value If the input value is within the range that can be calibrated the selection bar is displayed 4 Press the enter key to...

Страница 46: ...an be configured so that they are activated when a sensor signal error or communication error occurs See configuration item O 10 1 and O 11 1 in section 15 2 46 EB 6495 2 EN Fault alarms Error message...

Страница 47: ...ck location of installation Internal temperature Temperature too high 60 C Internal temperature Temperature too low 5 C Internal temperature Temperature too high 65 C Communication error AI1 2 3 4 Tim...

Страница 48: ...6 4 10 5 Fig 4 Data transmission 1 RJ12 jack RS 232 USB interface board 2 Infrared interface 3 USB interface RS 232 USB and RS 485 USB interface boards 4 USB cable mini B 5 pin USB type A 5 Infrared a...

Страница 49: ...terface integrated in the controller A bracket ensures that the adapter is properly aligned Note To ensure data transmission functions properly place the infrared adapter so that the distance to the i...

Страница 50: ...the interface board with cover into the open ing making sure that the interface board rests on the guide intended for it and that the cover locks in place 13 2 1 RS 232 USB interface board Upgrading t...

Страница 51: ...or can be downloaded from the Internet at www samson de Services Support Downloads USB driver 13 2 2 RS 485 USB interface board To integrate the controller into a communications network the controller...

Страница 52: ...dbus protocol A maximum of 246 devices can be addressed First of all a converter must connected to the computer to convert the RS 232 signal issued by the computer into a RS 485 signal A repeater must...

Страница 53: ...y pen into the RJ12 jack at the RS 232 USB board of the controller The following appears on the display when the controller recognizes the memory pen In the top row of the display the device type whos...

Страница 54: ...The following display appears when data transmission is completed The memory pen can be removed 54 EB 6495 2 EN Interfaces...

Страница 55: ...g instructions include a description on the key functions of the TROVIS VIEW software in conjunction with the TROVIS 6495 2 Industrial Controller Refer to the online help in the menu for a detailed de...

Страница 56: ...re can be activated automatically or man ually Internet access on the computer on which TROVIS VIEW is installed is required for automatic activation Automatic activation A request code containing the...

Страница 57: ...settings appear on the operator inter face or alternatively a stored TROVIS VIEW file tro can be loaded and overwritten by selecting Open in the File menu 1 Start TROVIS VIEW The operator interface a...

Страница 58: ...an be pre viewed before saving it e g VIEW3_ 6495_2009 June 23 tro 5 If required add a new or additional TROVIS VIEW module by selecting Add module in Options menu Enter the CD key written on the inst...

Страница 59: ...Data point can be executed Data point is user defined Mark to indicate error Value has fallen below minimum limit Value has exceeded maximum limit Source of data Value has been modified manually Value...

Страница 60: ...d the configuration items and parameters in TROVIS VIEW 1 Click on the menu folder in which the configuration item parameter that you want to change is located 2 Click on the submenu folder in which t...

Страница 61: ...om the controller Write Upload a setting of configuration item parameter to the controller Default Reset configuration item parameter to displayed factory default value in gray to indicate that the co...

Страница 62: ...formation on the TROVIS 6495 2 Industrial Controller Operation display folder The Operation display folder shows the inputs and outputs of the controller The values for the analog inputs and set point...

Страница 63: ...value at comparator PV0 Error signal e and Output Y of the controller can be read in this folder Signals folder The values of individual signals can be monitored in the Signals folder EB 6495 2 EN 63...

Страница 64: ...t at comparator SP0 4 Actual value at comparator PV0 and 4 Output Y In addition to the just displaying the data logged data can also be saved to a file 1 The Trend Viewer is only displayed when the Tr...

Страница 65: ...i ables to change their color in the graph Check or uncheck data points to acti vate or deactivate them in the graph 4 Start communication See section 13 The activated data points are displayed in the...

Страница 66: ...controller Or Connect the serial port of the computer using the SAMSON connecting cable to the interface board of the controller 2 Select Communications in Options menu to open the server settings win...

Страница 67: ...ffline mode there is no constant data communication between the computer and control ler Communication must first be established to upload data from the controller and down load data to the controller...

Страница 68: ...en found at COM Confirm interface setting by clicking OK button Downloading data from TROVIS VIEW to the memory pen 4 Select Download to Memory pen in Memory pen menu 5 Click OK button to start data t...

Страница 69: ...58 to 572 F can be limited Connection Three wire circuit resistance per lead 15 two wire circuit Resolution 0 03 based on nominal signal range 0 1 C Potentiometer Nominal values 100 200 500 1000 Conn...

Страница 70: ...r zero and span based on 20 C Resolution 0 03 based on nominal signal range Static destruction limit 30 V 7 digital outputs Relay outputs 4 relays with floating NO contact can be inverted Permissible...

Страница 71: ...bit 1 start bit Modbus 300 to 115200 bit s 8 bit parity bit adjust able 1 2 stop bits Type of transmission RS 485 Asynchronous half duplex 4 wire or 2 wire Number of connected devices RS 485 32 can b...

Страница 72: ...5 mm 0 5 to 1 5 mm wire cross section Display Dot matrix display with 132 x 49 pixels Display range 999 to 9999 start value end value and decimal separator can be selected Total delay time 100 ms Con...

Страница 73: ...de 1x fixed set point follow up control Ratio control Cascade control Override control 2x fixed set point follow up control Ratio control Controller M 1 1 1 I Input Default setting Setting I 1 Analog...

Страница 74: ...rate both DIP switches on right mA V kg h Mass flow both DIP switches on right mA V t h Mass flow both DIP switches on right mA V lb h Mass flow both DIP switches on right mA V both DIP switches on ri...

Страница 75: ...lue at AO1 O 1 1 2 Constant output value at AO2 O 2 1 2 Constant output value at AO3 O 3 1 2 Constant output value at SO1 O 4 1 2 Constant output value at SO2 O 5 1 2 With last output value O 1 1 2 O...

Страница 76: ...16 17 18 19 20 Physical unit Off both DIP switches on right mA V C Temperature F Temperature K Temperature both DIP switches on right mA V bar Pressure both DIP switches on right mA V mbar Pressure bo...

Страница 77: ...Constant output value at AO2 I 2 6 2 10 0 110 0 0 0 AO3 K1 Constant output value at AO3 I 2 6 3 10 0 110 0 0 0 SO1 K1 Constant output value at SO1 I 2 6 4 10 0 110 0 0 0 SO2 K1 Constant output value...

Страница 78: ...XXX 3 decimal places I 3 2 1 I 3 3 0 1 2 3 4 5 6 7 8 9 10 11 12 13 14 15 16 17 Physical unit Off both DIP switches on right mA V C Temperature F Temperature K Temperature both DIP switches on right mA...

Страница 79: ...t value at AO3 O 3 1 1 Constant output value at SO1 O 4 1 1 Constant output value at SO2 O 5 1 1 With last output value O 1 1 1 O 2 1 1 O 3 1 1 O 4 1 1 O 5 1 1 I 3 6 0 AO1 K1 Constant output value at...

Страница 80: ...1 6 7 I 4 3 2 999 0 9999 0 50 0 300 0 C 58 0 572 0 F 0 0 AI4 MAX Upper measuring range I 4 1 6 7 I 4 3 1 I 4 1 6 7 I 4 3 2 999 0 9999 0 50 0 300 0 C 58 0 572 0 F 100 0 AI4 K1 Initial value I 4 1 5 De...

Страница 81: ...4 5 0 AI4 K1 Default value I 4 5 2 Initial value I 4 1 5 999 0 9999 0 0 0 AI4 TOUT Timeout interface I 4 1 5 I 4 5 0 1 99999 s 60 s I 4 6 0 1 2 3 4 5 6 Manual mode Controller 1 at signal error I 4 5 0...

Страница 82: ...4 7 1 10 0 110 0 0 0 AO2 K1 Constant output value at AO2 I 4 7 2 10 0 110 0 0 0 AO3 K1 Constant output value at AO3 I 4 7 3 10 0 110 0 0 0 SO1 K1 Constant output value at SO1 I 4 7 4 10 0 110 0 0 0 S...

Страница 83: ...2 2 C 1 1 4 0 1 Function generation C 1 1 1 0 Off On C 1 1 4 0 1 2 PV MIN Lower range value output function generation C 1 1 4 1 999 0 9999 0 0 0 1 2 PV MAX Upper range value output function generatio...

Страница 84: ...5 6 7 8 9 10 11 12 13 14 15 16 17 18 19 20 Physical unit after function generation C 1 1 4 1 Off C Temperature F Temperature K Temperature bar Pressure mbar Pressure psi Pressure kPa Pressure m3 h Fl...

Страница 85: ...O2 Output value 2 C 1 2 4 1 999 0 9999 0 0 0 1 2 SPE I3 Input value 3 C 1 2 4 1 999 0 9999 0 0 0 1 2 SPE O3 Output value 3 C 1 2 4 1 999 0 9999 0 0 0 1 2 SPE I4 Input value 4 C 1 2 4 1 999 0 9999 0 0...

Страница 86: ...humidity kg m3 Density pH pH value C 1 3 Input variable DV Input variable DV 1 1 1 1 1 2 2 2 2 2 C 1 3 1 0 1 2 3 4 Assign source Off Analog input AI1 Analog input AI2 Analog input AI3 Analog input AI...

Страница 87: ...t value 5 C 1 3 4 1 999 0 9999 0 0 0 1 2 DV I6 Input value 6 C 1 3 4 1 999 0 9999 0 0 0 1 2 DV O6 Output value 6 C 1 3 4 1 999 0 9999 0 0 0 1 2 DV I7 Input value 7 C 1 3 4 1 999 0 9999 0 100 0 1 2 DV...

Страница 88: ...e value output function generation C 1 4 4 1 999 0 9999 0 0 0 1 2 TR MAX Upper range value output function generation C 1 4 4 1 999 0 9999 0 100 0 1 2 TR I1 Input value 1 C 1 4 4 1 999 0 9999 0 0 0 1...

Страница 89: ...F Temperature K Temperature bar Pressure mbar Pressure psi Pressure kPa Pressure m3 h Flow rate l h Flow rate ft3 h Flow rate kg h Mass flow t h Mass flow lb h Mass flow mFS Filling level mmFS Fillin...

Страница 90: ...2 1 1 1 1 M 1 2 6 999 0 9999 0 0 0 9999 0 0 0 1 2 SP2 MAX Set point upper limit C 2 1 1 1 1 M 1 2 6 999 0 9999 0 0 0 9999 0 100 0 1 2 SP3 Set point C 2 1 1 3 4 1 M 1 2 6 999 0 9999 0 0 0 9999 0 0 0 1...

Страница 91: ...for TR C 2 1 3 4 999 0 9999 0 1 00 1 K22 Factor for PV C 2 1 3 4 999 0 9999 0 1 00 1 K23 Factor for DV C 2 1 3 4 999 0 9999 0 0 00 1 K24 Factor for TR C 2 1 3 4 999 0 9999 0 0 00 1 1 1 1 2 2 2 2 C 2...

Страница 92: ...output value at AO1 O 1 1 1 38 39 Constant output value at AO2 O 2 1 1 38 39 Constant output value at AO3 O 3 1 1 38 39 Constant output value at SO1 O 4 1 1 38 39 Constant output value at SO2 O 5 1 1...

Страница 93: ...DI3 C 2 1 1 2 SP1 SP2 with DI4 C 2 1 1 2 SP1 SP4 with DI1 DI2 C 2 1 1 4 SP1 SP4 with DI3 DI4 C 2 1 1 4 SP1 SP3 with DI2 DI3 C 2 1 1 3 SP1 SP4 with DI2 3 4 C 2 1 1 4 1 1 1 1 1 2 2 2 2 2 C 2 2 2 0 1 2 3...

Страница 94: ...ental value C 2 2 6 0 999 0 9999 0 0 0 C 2 3 Set point ramp function Set point ramp function 1 1 1 1 1 1 1 1 1 1 2 2 2 2 2 2 2 2 2 2 C 2 3 1 0 1 2 3 4 5 6 7 8 9 Set point ramp Off Start with DI1 SP PV...

Страница 95: ...rnal internal set point C 2 1 2 0 Off Min selection SPI SPE Max selection SPI SPE SPI SPE SPI SPE SPE SPI C 2 4 2 0 1 1 C 2 4 3 0 1 Function generation set point SPM at slave controller M 1 3 Off On C...

Страница 96: ...ent 0 01 100 0 1 00 1 2 TN Reset time C 3 1 1 1 4 5 1 9999 s 120 s 1 2 TV Derivative action time C 3 1 1 3 4 1 9999 s 10 s 1 2 Y0 Operating point C 3 1 1 2 3 10 0 110 0 0 0 1 2 TV K Derivative action...

Страница 97: ...behavior C 3 1 5 5 999 0 999 0 10 0 1 2 KP S Prop action coefficient for P D behavior C 3 1 5 0 0 01 100 0 1 00 1 1 1 1 1 1 1 1 1 2 2 2 2 2 2 2 2 2 C 3 1 6 0 1 2 3 4 5 6 7 8 Function generation KP Off...

Страница 98: ...alue 1 C 3 1 7 0 999 0 9999 0 0 00 1 2 FTN O1 Output value 1 C 3 1 7 0 0 01 100 0 1 00 1 2 FTN I2 Input value 2 C 3 1 7 0 999 0 9999 0 0 00 1 2 FTN O2 Output value 2 C 3 1 7 0 0 01 100 0 1 00 1 2 FTN...

Страница 99: ...C 3 1 6 1 10 0 110 0 0 0 1 2 OP I7 Input value 7 C 3 1 6 1 999 0 9999 0 0 0 1 2 OP O7 Output value 7 C 3 1 6 1 10 0 110 0 0 0 1 1 1 1 1 2 2 2 2 2 C 3 1 9 0 1 2 3 4 Operating point 1 with DI Off With...

Страница 100: ...mula SPE K3 K4 9999 0 9999 0 0 0 1 1 1 1 1 2 2 2 2 C 3 2 3 0 1 2 3 4 Link input variables DV TR M 1 2 6 Controller 1 Link input variable TR Off To input variable PV To set point SP To output YPID To i...

Страница 101: ...stant formula DV TR K5 K6 K7 K8 M 1 2 6 Controller 1 without DV 9999 0 9999 0 0 0 1 1 1 1 1 2 2 2 2 2 C 3 2 5 1 2 3 4 5 Transfer function for disturbance variables C 3 2 3 0 P behavior D behavior1 D b...

Страница 102: ...3 2 1 1 C 3 2 3 1 PV A C 1 1 1 1 2 3 4 C 3 2 1 1 C 3 2 3 1 PV A 2 C 1 1 1 1 2 3 4 C 3 2 1 1 C 3 2 3 1 Min PV A C 1 1 1 1 2 3 4 C 3 2 1 1 C 3 2 3 1 Max PV A C 1 1 1 1 2 3 4 C 3 2 1 1 C 3 2 3 1 PV SPE C...

Страница 103: ...1 2 3 4 Max PV SPE DV TR C 1 1 1 1 2 3 4 C 1 2 1 1 2 3 4 C 1 3 1 1 2 3 4 C 1 4 1 1 2 3 4 1 1 1 1 1 C 3 2 7 0 1 2 3 4 Arithmetic operation input variable DV M 1 2 6 C 3 2 3 4 Off DV B DV B DV B DV B C...

Страница 104: ...acking C 1 4 1 1 2 3 4 M 1 3 4 Controller 1 only Off With input TR DI1 With input TR DI2 With input TR DI3 With input TR DI4 C 3 3 3 0 1 1 1 1 1 2 2 2 2 2 C 3 3 6 0 1 2 3 4 Increase decrease actual va...

Страница 105: ...38 39 Auto start SO2 SO2 K1 O 5 1 1 2 38 39 Manual start AO1 AO1 K1 O 1 1 1 2 38 39 Manual start AO2 AO2 K1 O 2 1 1 2 38 39 Manual start AO3 AO3 K1 O 3 1 1 2 38 39 Manual start SO1 SO1 K1 O 4 1 1 2 3...

Страница 106: ...24 25 26 Row 4 Off Output according to priority Output AO1 O 1 1 0 Output AO2 O 2 1 0 Output AO3 O 3 1 0 Output SO1 O 4 1 0 Output SO2 O 5 1 0 Controller 1 output Y Controller 2 output Y Output master...

Страница 107: ...representation Numerical Numerical inverted Bar graph Bar graph inverted Switch signal Digital signal C 5 5 1 C 5 5 5 if C 5 4 5 6 is set C 5 5 6 if C 5 4 37 38 39 is set 1 1 1 1 1 1 1 1 1 1 1 1 1 2 2...

Страница 108: ...2 3 4 Set point SP2 C 2 1 1 2 3 4 Set point SP3 C 2 1 1 3 4 Set point SP4 C 2 1 1 4 Set point SPI Set point SPM M 1 3 Set point SPC C 2 1 2 2 Set point SP Set point SP0 at comparator Ratio set point S...

Страница 109: ...SPE before filter C 1 2 1 0 Input SPE after function generation C 1 2 1 0 Input DV before filter C 1 3 1 0 Input DV after function generation C 1 3 1 0 Input TR before filter C 1 4 1 0 Input TR after...

Страница 110: ...output Y Controller 2 output Y Output master controller YM M 1 3 Input PV before filter C 1 1 1 0 Input PV after function generation C 1 1 1 0 Actual value PV0 at comparator C 1 1 1 0 Actual ratio PVR...

Страница 111: ...6 5 0 1 2 3 4 5 6 7 8 10 11 12 13 14 15 16 17 18 19 20 22 23 Row 3 Off Output according to priority Output AO1 O 1 1 0 Output AO2 O 2 1 0 Output AO3 O 3 1 0 Output SO1 O 4 1 0 Output SO2 O 5 1 0 Cont...

Страница 112: ...uts DO5 7 Digital inputs DI1 4 Effective KP Effective TN 1 1 1 1 1 1 2 2 2 2 2 2 C 6 6 1 2 3 4 5 6 Row 3 representation C 6 5 0 Numerical Numerical inverted Bar graph Bar graph inverted Switch signal...

Страница 113: ...1 5 1 0 Input FB after filter C 1 5 1 0 Signal A C 3 2 1 0 C 3 2 3 0 Signal B C 3 2 3 0 Set point SP1 C 2 1 1 1 2 3 4 Set point SP2 C 2 1 1 2 3 4 Set point SP3 C 2 1 1 3 4 Set point SP4 C 2 1 1 4 Set...

Страница 114: ...1 1 0 Actual ratio PVR M 1 2 6 Input SPE before filter C 1 2 1 0 Input SPE after function generation C 1 2 1 0 Input DV before filter C 1 3 1 0 Input DV after function generation C 1 3 1 0 Input TR be...

Страница 115: ...graph Bar graph inverted Switch signal Digital signal C 6 10 1 C 6 10 5 if C 6 9 5 6 is set C 6 10 6 if C 6 9 37 38 39 is set C 7 Operator keys Operator keys 1 1 2 2 C 7 1 0 1 Invert manual output va...

Страница 116: ...ut FB before filter 1C 1 5 1 0 1 Signal A 1C 3 2 1 0 1C 3 2 3 0 1 Signal B 1C 3 2 3 0 1 Set point SP0 1 Error signal e 1 Error signal e 1 Ratio set point SPR M 1 2 6 1 Actual ratio PVR M 1 2 6 2 Input...

Страница 117: ...AO1 P1 Y value for AO1 AO1 MIN O 1 3 1 Y value for AO1 AO1 MAX O 1 3 2 10 0 110 0 0 0 The default value of AO1 P1 is the same as AO1 MIN If AO1 MIN is changed AO1 P1 is set to AO1 MIN AO1 P2 Y value...

Страница 118: ...0 s min h s O 1 6 0 1 2 3 4 Constant output value 1 with DI auto mode O 1 1 0 Off With digital input DI1 With digital input DI2 With digital input DI3 With digital input DI4 O 1 6 0 AO1 K1 Constant ou...

Страница 119: ...tput value 7 O 1 9 1 10 0 110 0 100 0 O 2 Analog output AO2 Analog output AO2 O 2 1 0 1 2 4 5 6 7 8 9 10 11 12 13 14 15 16 17 18 19 20 Assign source Off Controller 1 output Y Controller 2 output Y M 1...

Страница 120: ...0 2 Signal A M 1 3 4 5 6 2C 3 2 1 0 2C 3 2 3 0 2 Signal B M 1 3 4 5 6 2C 3 2 3 0 2 Set point SP0 M 1 3 4 5 6 2 Error signal e M 1 3 4 5 6 2 Error signal e M 1 3 4 5 6 Output master controller YM M 1...

Страница 121: ...ecreasing continuously active Increasing and decreasing Increasing start with DI1 Increasing start with DI2 Increasing start with DI3 Increasing start with DI4 Decreasing start with DI1 Decreasing sta...

Страница 122: ...0 0 0 AO2 I2 Input value 2 O 2 9 1 9999 0 9999 0 0 0 AO2 O2 Output value 2 O 2 9 1 10 0 110 0 0 0 AO2 I3 Input value 3 O 2 9 1 9999 0 9999 0 0 0 AO2 O3 Output value 3 O 2 9 1 10 0 110 0 0 0 AO2 I4 In...

Страница 123: ...o set point SPR M 1 2 6 1 Actual ratio PVR M 1 2 6 2 Input PV before filter M 1 3 4 5 6 2C 1 1 1 0 2 Input PV after function generation M 1 3 4 5 6 2C 1 1 1 0 2 Actual value PV0 M 1 3 4 5 6 2C 1 1 1 0...

Страница 124: ...2 10 0 110 0 0 0 The default value of AO3 P1 is the same as AO3 MIN If AO3 MIN is changed AO3 P1 is set to AO3 MIN AO3 P2 Y value for AO3 AO3 MAX O 3 3 1 Y value for AO3 AO3 MIN O 3 3 2 10 0 110 0 10...

Страница 125: ...adient for decreasing output signal only with O 3 5 2 3 8 9 10 11 0 1 100 0 1 0 AO3 TB2 Time base O 3 5 0 s min h s O 3 6 0 1 2 3 4 Constant output value 1 with DI auto mode O 3 1 0 Off With digital i...

Страница 126: ...tput value 5 O 3 9 1 10 0 110 0 0 0 AO3 I6 Input value 6 O 3 9 1 9999 0 9999 0 0 0 AO3 O6 Output value 6 O 3 9 1 10 0 110 0 0 0 AO3 I7 Input value 7 O 3 9 1 9999 0 9999 0 100 0 AO3 O7 Output value 7 O...

Страница 127: ...output value O 4 2 0 0 0 100 0 100 0 O 4 3 1 2 Operating direction O 4 1 0 Increasing Decreasing O 4 3 1 SO1 P1 Y value for SO1 SO1 MIN O 4 3 1 Y value for SO1 SO1 MAX O 4 3 2 0 0 100 0 0 0 The defau...

Страница 128: ...nction generation O 4 1 0 Off Free adjustment Equal percentage Equal percentage inverse O 4 9 0 SO1 I1 Input value 1 O 4 9 1 10 0 110 0 0 0 SO1 O1 Output value 1 O 4 9 1 10 0 110 0 0 0 SO1 I2 Input va...

Страница 129: ...1 100 0 2 0 SO2 SW Increment O 5 2 1 2 1 4 1 SO2 P Duty cycle signal O 5 2 3 4 5 6 1 0 1000 0 s 10 0 s SO2 P Duty cycle signal O 5 2 5 6 1 0 1000 0 s 10 0 s SO2 TMIN Minimum on time signal O 5 2 3 4...

Страница 130: ...al input DI1 With digital input DI2 With digital input DI3 With digital input DI4 O 5 6 0 SO2 K1 Constant output value 1 O 5 6 0 10 0 110 0 0 0 O 5 7 0 1 2 3 4 Constant output value 2 with DI man auto...

Страница 131: ...SO2 I6 Input value 6 O 5 9 1 10 0 110 0 0 0 SO2 O6 Output value 6 O 5 9 1 10 0 110 0 0 0 SO2 I7 Input value 7 O 5 9 1 10 0 110 0 100 0 SO2 O7 Output value 7 O 5 9 1 10 0 110 0 100 0 O 6 Digital outpu...

Страница 132: ...AO3 O 3 1 0 Output SO1 O 4 1 0 Output SO2 O 5 1 0 Actual ratio PVR M 1 2 6 Controller 1 O 6 1 1 Difference PV 1 PV 2 M 1 3 4 5 6 C 1 1 1 0 O 6 1 1 2 O 6 2 0 O 6 3 0 1 2 Switch function O 6 2 0 Off Si...

Страница 133: ...ut DI2 With digital input DI3 With digital input DI4 With digital output DO5 O 10 1 0 With digital output DO6 O 11 1 0 O 7 1 0 O 7 2 0 1 2 3 4 5 6 7 8 9 10 Assign signal O 7 1 0 Off Input variable PV...

Страница 134: ...Off Signal under limit Signal over limit O 7 4 0 DO2 LIM Limit O 7 3 0 O 7 2 1 2 3 4 5 6 17 O 7 2 7 8 9 18 O 7 2 10 O 7 2 11 O 7 2 12 13 14 15 16 999 00 9999 00 9999 00 9999 00 110 00 110 00 0 00 110...

Страница 135: ...16 17 18 Assign signal O 8 1 0 Off Input variable PV C 1 1 1 0 Input SPE C 1 2 1 0 Input DV C 1 3 1 0 Input TR C 1 4 1 0 Input FB C 1 5 1 0 Actual value PV0 C 1 1 1 0 Difference PV SPE C 1 1 1 0 C 1 2...

Страница 136: ...10 00 0 50 O 8 4 0 1 Inverting O 8 1 0 Off On O 8 4 0 O 8 5 0 1 Storage O 8 1 0 Off Reset with DI1 O 8 5 0 O 8 5 2 3 4 Storage Reset with DI2 Reset with DI3 Reset with DI4 O 9 Digital output DO4 O 5 2...

Страница 137: ...AO2 O 2 1 0 Output AO3 O 3 1 0 Output SO1 O 4 1 0 Output SO2 O 5 1 0 Actual ratio PVR M 1 2 6 Controller 1 O 9 1 1 Difference PV 1 PV 2 M 1 3 4 5 6 C 1 1 1 0 O 9 1 1 2 O 9 2 0 O 9 3 0 1 2 Switch func...

Страница 138: ...I 2 2 0 I 3 2 0 I 4 2 0 Communication error D 1 1 1 Cascade opened M 1 3 1 Automatic mode 1 Manual mode 1 External set point active 1C 2 1 2 0 1 External output value active 1C 3 3 3 0 2 Automatic mo...

Страница 139: ...1 3 1 Automatic mode 1 Manual mode 1 External set point active 1C 2 1 2 0 1 External output value active 1C 3 3 3 0 2 Automatic mode M 1 3 4 5 6 2 Manual mode M 1 3 4 5 6 2 External set point active M...

Страница 140: ...umber D 2 1 3 1 255 1 BITRATE Modbus Baud rate D 2 1 3 300 600 1200 2400 4800 9600 19200 38400 57600 115200 bit s 9600 bit s PARITY Parity D 2 1 3 0 1 0 STOPBIT Stop bit D 2 1 3 1 2 1 RSP TOUT Respons...

Страница 141: ...additional reading M 1 3 4 5 6 A 2 1 1 A 2 2 0 1 2 3 4 Right display Off A 2 1 0 Controller 1 Controller 1 additional reading Controller 2 M 1 3 4 5 6 Controller 2 additional reading M 1 3 4 5 6 A 2 2...

Страница 142: ...t end 20 mA I 1 1 2 A 20 1 5 Voltage zero 0 V I 1 1 3 A 20 1 6 Voltage end 10 V I 1 1 3 A 20 1 7 Voltage zero 2 V I 1 1 4 A 20 1 8 Voltage end 10 V I 1 1 4 A 20 1 9 Pt 100 zero 0 C I 1 1 6 A 20 1 10 P...

Страница 143: ...rrent end 20 mA I 3 1 1 A 20 3 3 Current zero 0 mA I 3 1 2 A 20 3 4 Current end 20 mA I 3 1 2 A 20 3 5 Voltage zero 0 V I 3 1 3 A 20 3 6 Voltage end 10 V I 3 1 3 A 20 3 7 Voltage zero 2 V I 3 1 4 A 20...

Страница 144: ...2 3 2 V O 1 2 4 A 20 5 4 Voltage end 10 V O 1 2 3 4 A 20 6 Analog output AO2 A 20 6 1 Current zero 0 mA O 2 2 2 4 mA O 2 2 1 A 20 6 2 Current end 20 mA O 2 2 1 2 A 20 6 3 Voltage zero 0 V O 2 2 3 2 V...

Страница 145: ...PV Process value PV0 Actual value at comparator PVR Actual ratio PWM Pulse width modulation SO Switch output SP Set point SP1 4 Set point 1 4 SPI Internal set point SP0 Set point at comparator SPC Set...

Страница 146: ...n off O O 3 3 3 3 O O 3 2 3 2 O O 4 3 4 3 O O 4 2 4 2 O O 5 3 5 3 O O 5 2 5 2 31 31 32 32 33 33 O O 1 3 1 3 O O 1 2 1 2 mA V mA V mA V mA V O O 2 3 2 3 O O 2 2 2 2 35 35 36 36 37 37 97 97 98 98 99 99...

Страница 147: ...R atio atio Ext set point Ext set point via interface via interface K11 K11 I 1 1 I 1 1 11 11 12 12 13 13 AI1 AI1 I 2 1 I 2 1 15 15 16 16 17 17 AI2 AI2 I 3 1 I 3 1 19 19 20 20 21 21 AI3 AI3 I 4 1 I 4...

Страница 148: ...42 43 43 52 52 53 53 45 45 46 46 55 55 56 56 O O 1 1 1 1 O O 2 1 2 1 O O 3 1 3 1 O O 5 1 5 1 O O 4 1 4 1 PID PID SPE SPE SPC SPC PV PV C 2 2 2 C 2 2 2 C 2 1 2 C 2 1 2 C 3 1 1 C 3 1 1 PV0 PV0 SP0 SP0 e...

Страница 149: ...1 3 PID PID C 3 1 1 C 3 1 1 C 3 1 3 C 3 1 3 Y Y 2 2 Y Y 1 1 C 2 1 1 C 2 1 1 SP1 2 3 4 SP1 2 3 4 C 2 1 1 C 2 1 1 SP1 2 3 4 SP1 2 3 4 Controlled v Controlled variable ariable External External set poin...

Страница 150: ...5 1 5 1 O O 4 1 4 1 M 1 5 M 1 5 2x fix 2x fixed set point control or follow ed set point control or follow up control up control PID PID SPE SPE SPC SPC PV PV C 2 2 2 C 2 2 2 C 2 1 2 C 2 1 2 C 3 1 1...

Страница 151: ...ernal External r r atio set point atio set point Internal Internal r r atio set point atio set point R R atio formula C 2 1 3 1 atio formula C 2 1 3 1 PV PV DV DV K11 K11 R R atio atio K11 K11 I 1 1 I...

Страница 152: ...perating level 15 Control parameters changing 23 Control schematics 145 Controller configuring 30 Controller locking key number operation 43 keys 42 operating level 41 Cursor keys 13 14 D Data transmi...

Страница 153: ...g 16 P Panel cut out 7 Parameters 29 adjusting example 31 Potentiometer 13 electrical connection 9 R Resistance thermometer electrical connection 8 S Safety instructions 5 Set point changing 16 25 int...

Страница 154: ...154 EB 6495 2 EN...

Страница 155: ...EB 6495 2 EN 155...

Страница 156: ...SAMSON AG MESS UND REGELTECHNIK Weism llerstra e 3 60314 Frankfurt am Main Germany Phone 49 69 4009 0 Fax 49 69 4009 1507 Internet http www samson de EB 6495 2 EN 2010 02...

Отзывы: