background image

3.1.1 Pressure gauges

To control the supply air (Supply) and signal
pressure (Output), pressure gauges as well
as a gauge mounting block are required.
Replace the included connecting plate with
the gauge mounting block.

Accessories

Order no.

Gauge mounting block:

G ¼

¼ NPT

1400-7611
1400-7612

Pressure gauge (st. steel/brass):

1x supply, 1x output for single-acting

1x supply, 2x output for double-acting

1400-6950
1400-7613

3.2 Electrical connections

Electropneumatic positioner

Connect the wires for the reference variable
to ter11 and –12 using the hous-
ing's cable glands.
For versions with limit switch, additionally
connect the limit switch wires to
terminals 41, 42 and 43.

For electrical installation, you are
required to observe the relevant
electrotechnical regulations and the
accident prevention regulations that
apply in the country of use. In Ger-
many, these are the VDE regula-
tions and the accident prevention
regulations of the employers’ liabil-
ity insurance.
The following regulations apply to
installation in hazardous areas:
EN 60079-14:2003; VDE 0165
Part 1:1998.
The data specified in the certificate
of conformity and the EC type ex-
amination certificate apply to the
connection of intrinsically safe cir-
cuits.

Warning!

Switching the assignment of the
electrical terminals for the control
signal and the limit switch may
cause the explosion protection to
become ineffective!
Do not loosen enameled screws in
or on the housing.

14

EB 8386 EN

Connections

Содержание 3761

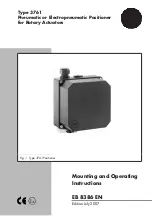
Страница 1: ...Type 3761 Pneumatic or Electropneumatic Positioner for Rotary Actuators Mounting and Operating Instructions EB 8386 EN Edition July 2007 Fig 1 Type 3761 Positioner...

Страница 2: ...tion 9 2 2 Selecting and aligning the cam disc 10 3 Connections 13 3 1 Pneumatic connections 13 3 1 1 Pressure gauges 14 3 2 Electrical connections 14 4 Operation Adjustment 16 4 1 Starting point and...

Страница 3: ...as 4 Any hazards that could be caused in the control valve by the process medium the operating pressure or by moving parts are to be prevented by means of the appropriate measures If inadmissible moti...

Страница 4: ...essure signal pe creates a force on the measuring diaphragm 6 which is bal anced by the force of the tension spring 4 The movement of the measuring diaphragm is passed on to the double plug 7 of the a...

Страница 5: ...Fig 2 Functional diagram Fitting position marked Position 2 Output 238 Position 1 Output 138 Output 238 Output 138 1 Pick up lever 2 Cam disc 3 Zero point adjuster 4 Tension spring 5 Diaphragm lever...

Страница 6: ...n Reversible Principle of operation Single acting or double acting Hysteresis 1 Variable position 7 Tight closing function can be deactivated Type 3761 x21x Type 3761 x22x Deactivated when reference v...

Страница 7: ...2 1 2 Push follower plate 5 onto the slotted actuator shaft or the spacer 7 3 Push coupling wheel 4 with its flat side facing towards the actuator onto the fol lower plate 5 Make sure to position the...

Страница 8: ...7 1 8 Fix scale plate 4 1 to the coupling wheel so that the arrow tip indicates closed po sition and can easily be identified when the valve is installed see Fig 4 9 Leave the coupling lever which is...

Страница 9: ...plate onto the unoccupied position so that the associated supply air bore is sealed Note When relocating the amplifiers make abso lutely sure that both O rings remain in the base of the housing Doubl...

Страница 10: ...he rotary actuator is mounted on the valve and how the two sig nal pressure outputs 138 and 238 are as signed to the connections y1 and y2 of the rotary actuator Depending on the rotary actuator s dir...

Страница 11: ...put 138 Reverse operating direction Connection Output 238 Ref variable Signal pressure Valve Cam Ref variable Signal pressure Valve Cam Increases Increases Opens A Decreases Increases Opens B Fail saf...

Страница 12: ...ure to y2 Direct operating direction Reverse operating direction Ref variable Signal pressure Valve Cam Ref variable Signal pressure Valve Cam Increases Output 138 to y1 Output 238 to y2 Opens A Decre...

Страница 13: ...ver and remount it The default setup is shown in the top left of Figs 5 and 6 valve closed in fail safe posi tion opens counterclockwise and closes clockwise 3 Connections 3 1 Pneumatic connections De...

Страница 14: ...switch wires to terminals 41 42 and 43 For electrical installation you are required to observe the relevant electrotechnical regulations and the accident prevention regulations that apply in the coun...

Страница 15: ...wire end ferrules When two separate cables are used for con nection an additional cable gland can be installed Cable entries left unused must be sealed with plugs Accessories Order no M20x1 5 cable g...

Страница 16: ...bar instead of 4 mA 0 2 bar The exact starting point is adjusted using the zero adjuster 3 Fig 2 The upper range value is automatically de termined by the cam disc s angle of rotation If it should be...

Страница 17: ...ed to 4 to 20 mA For electropneumatic positioners with tight closing function the starting point and upper range value can be set to 4 or 20 mA The activation deactivation function ensures that the va...

Страница 18: ...from its initial position 3 Increase the input signal and slowly re duce it again Check whether the closure member starts to move at 20 mA 1 bar 4 Correct any deviations by turning the zero adjuster 3...

Страница 19: ...bar The upper range value valve OPEN will then be 4 mA 0 2 bar Important After adjusting the positioner close it by re mounting the cover Make sure that the vent plug in the housing points down when...

Страница 20: ...the starting point and upper range value before adjusting the limit switch 1 Adjust the reference variable so that the valve moves to the desired end position where the switching function is to be ac...

Страница 21: ...ed a certificate stating this or given the device a mark of conformity Inspection by an expert is not required if the manufacturer performs a routine test on the device prior to putting it back into o...

Страница 22: ...ions in mm 22 EB 8386 EN Dimensions in mm 88 15 M20x1 5 28 28 28 129 88 15 M20x1 5 129 40 Supply Input Output 2 Output 1 G or NPT pneumatic connections Connecting dimensions according to VDI VDE 3845...

Страница 23: ...EB 8386 EN 23...

Страница 24: ...24 EB 8386 EN...

Страница 25: ...EB 8386 EN 25...

Страница 26: ...26 EB 8386 EN...

Страница 27: ...EB 8386 EN 27...

Страница 28: ...SAMSON AG MESS UND REGELTECHNIK Weism llerstra e 3 60314 Frankfurt am Main Germany Phone 49 69 4009 0 Fax 49 69 4009 1507 Internet http www samson de EB 8386 EN S Z 2008 07...

Отзывы: