


30
11.3.1.
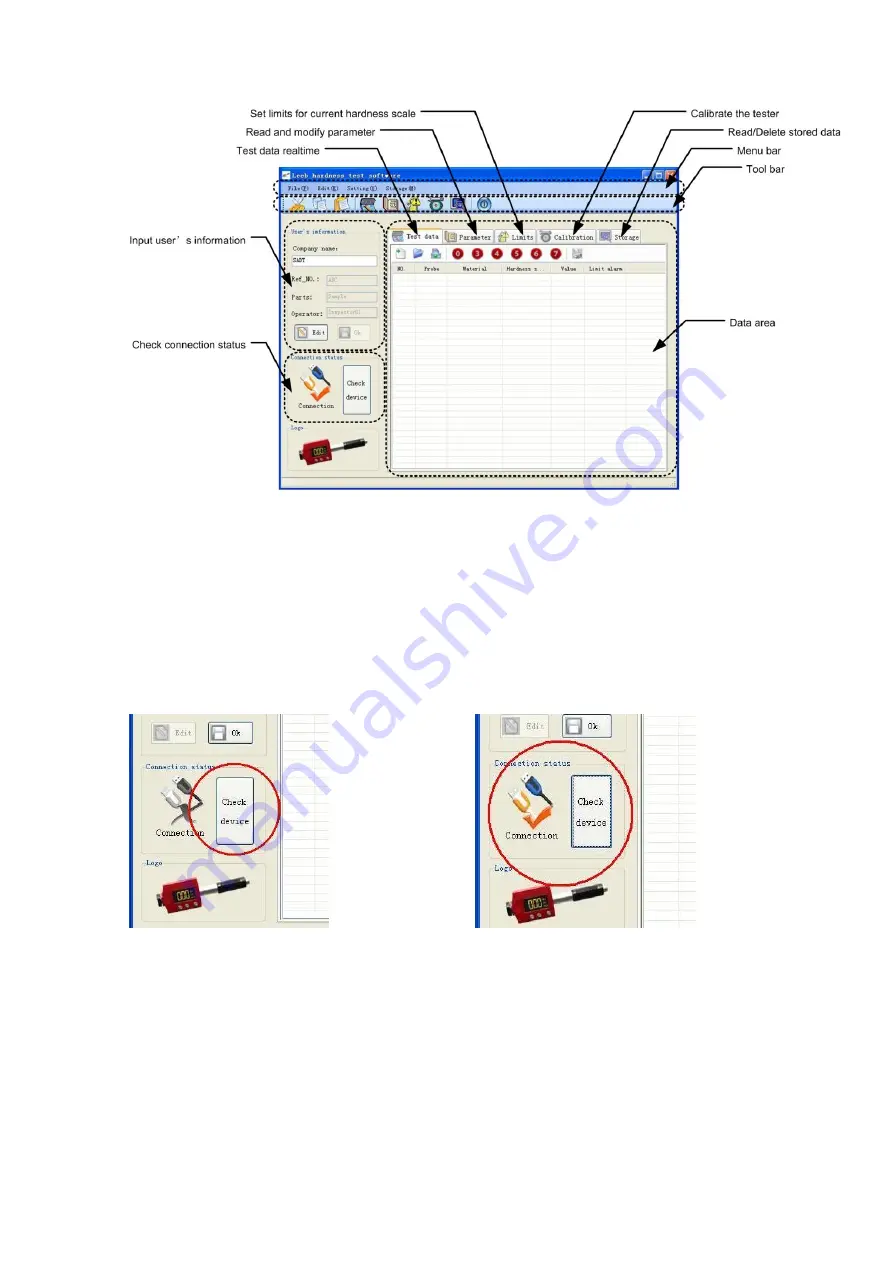
Introduction of the main interface
11.3.2.
Create commnunication between the tester and PC
Before the transmission starts between hardness tester and PC, a RS232 communication
should be created between them.
1)
Connect the tester and PC with the USB cable supplied with the tester.
2)
Power on the tester.
3)
Select DATA TRANSFER --> SELECT PORT --> USB/RS232 ON from the tester's menu.
4)
Select COMMUNICATE in data transfer menu, "Transferring press any key back" will
display in the LCD screen.
5)
Click “Check Device” which is in the down-left corner of the software window. After
checking, an orange check displays, that means the connection is created successfully.
Before Checking Device
After Checking Device, connected successfully
6)
Since the data transfer is one way transmission, most of operations in PC software
should be done under this mode, except for TEST DATA and CALIBRATION. You can
press “Check Device” to connect with the tester manually if the connection fails.
Note: Before pressing “Check Device”, please make sure to select right port from
“Data transfer” first and then select “Communicate” from “Data transfer”.
11.3.3.
Input user’s information
The user may record the
Ref No.
,
Parts
and
Operator
for current job. Press the
Содержание HardyTest HARTIP 1800
Страница 1: ...HARDNESS TESTER HardyTest HARTIP 1800 OPERATION MANUAL...
Страница 2: ......
Страница 11: ...9 6 2 Diagram of Operation Figure 6 2 Diagram of Operation...
Страница 38: ...36 11 4 Quit the program After finish all the job you can click from the tool bar to quit the program...
Страница 39: ......


